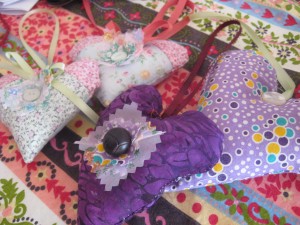
Yesterday was a bit of a rough day (flat tire, grouchy kids, nothing major), and I’m recovering from yet another round of mastitis (feeling better, but trying to take it easy), so we’re trying to have a low-key morning. It seems like the perfect time to finish a few Christmas gift projects while we listen to the remainder of our current book on CD.

Ruth and Bea collected the English lavender from our bushes this past summer, dried it, and stored it in jars specifically for making sachets over the winter.  Ruth (nearly 9) requested that we make more heart-shaped sachets today, although yesterday I made a few birds as well, using this fabric bird as inspiration. Bea (age 7) sticks with rectangles, which are easier for her to tackle on the sewing machine (see end of this post).
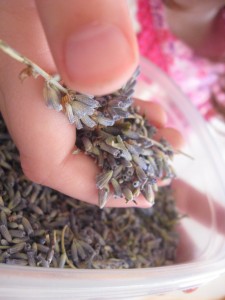
So far, Hal simply enjoys sifting, sorting, scooping the dried lavender while we work. His contribution to the project is snipping up the scraps of fabric into teensy itty bits, and he is sure that is somehow tremendously helpful. :) Ah, well, it’s good practice with scissors and hand-eye coordination for him.
The girls were allowed to pick out a 1/4 yd of remnant fabric from the fabric store for this project, and I’ve been using thrifted odds and ends. Buttons are from our button jar of scrounged/thrifted/found buttons, and the ribbons and lace are also from the thrift store.   Not only are the sachets a frugal homemade craft, but also make handsome, practical gifts the girls can put together themselves now that they are more confident in their sewing skills.
Here’s how we make them:
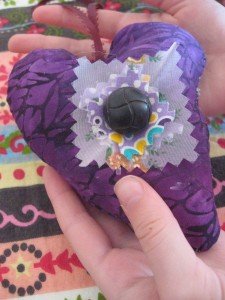
Ruth’s Lavender Hearts
Materials (per sachet):
– scraps of fabric approximately 4-5inches tall and wide, depending on desired shape/style of heart
– 3 Tbsp dried lavender flowers (you can also use cloves + diced dried orange peel, or dried rosemary)
– large handful of wool for stuffing (I use the un-spinnable bits of white/natural roving from the seconds/mill-end bags I purchase for dyeing and spinning. Un-dyed is best, especially if using light-colored fabric, so it does not show through.)
– bits of lace/buttons, embroidery floss, beads, etc for embellishment
– 1 piece of 8-10 inch-long narrow ribbon if you desire to hang the sachet from a door-knob or hook.
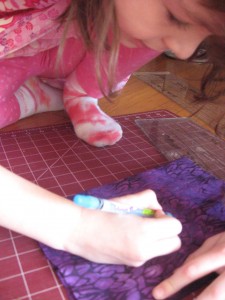
1. Place two pieces of equal-sized fabric facing each other, and pin in the middle (You can use two whole-pieces, or, for a more folksy look, or to use up those teeny bits of a lovely print, create patchwork blocks instead.)Â With tailor’s chalk or a pencil, free-hand a heart shape onto one of the blocks.
2. Stitch hearts together, leaving a small hole along one side (not at the point!). Trim away excess fabric, leaving a 1/4-inch seam allowance (I find it’s easier for Ruth to sew firs,t and cut after and that way she is more likely to produce a heart she is happy with.)
3. Flip fabric right-side out, using the tip of a chop-stick or pencil to press the heart’s point crisply.
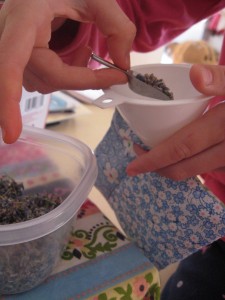
4. Using a funnel, fill each lobe of the heart with 1 Tbsp of dried flowers. With the help of the chopstick, press wool stuffing into the rest of the heart (more stuffing = nicer-looking finished product. Don’t skimp!) When heart is halfway filled, pour in last tablespoon of lavender flowers in the body of the heart.
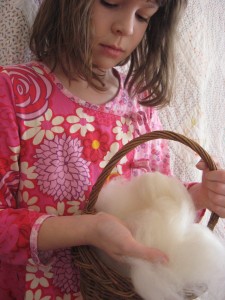
5.  Finish filling with more wool until sachet is desired fluffiness. Using an invisible stitch (such as that used on quilt binding), fold in the seam allowance and close the hole.
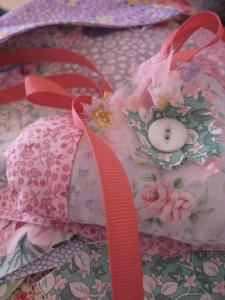
Attach embellishments to your heart, and finish with a loop of ribbon tacked firmly to the top for hanging up your heart.
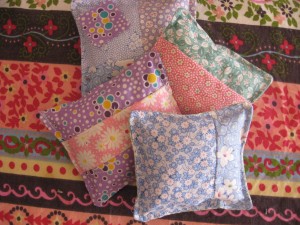
If your child is younger, s/he may enjoy this project more by making simple pillow-shaped drawer sachets like the ones below that Bea and I made together:
(Since I was sick over the weekend, I did not get to finish the second post on tactile play for preschoolers. I will do my best to get it up later this week.)
Happy Christmas crafting!