Farming/Gardening

Pear-Quince Butter Recipe

dsc_0662

Yesterday I spend the morning making Pear-Quince Butter.  It’s a twist on the traditional apple butter because I’m using the ingredients I have on hand.  I have an abundance of quince trees in the garden, and the fruit is now beginning to ripen up.  I also have basket full of pears right now – some from our Seckel pear tree, but most the girls picked up in Hood River this past weekend.

I make membrillo out of quince every year, and also Caramel-Spice Pear Butter (sorry, the recipe is top-secret!), but with the quantity of both in my kitchen right now, I thought I’d try mixing them together.  I’m quite happy with the result.   Here’s my recipe:

Spiced Quince-Pear Butter

5 large quince

10 pears (I used a mixture of Comice, Seckel, Barlett, and Red Anjou)

1/4 C water

6 C sugar

1 tsp ground cinnamon

3/4 tsp ground ginger

1/2 tsp allspice

1/2 tsp ground cloves

1 tsp kosher salt

Juice of two lemons

4 Tbsp brandy (optional)

Directions

  1.  Wash the fruit, peel and core it.  Cut the quince into 16ths and the Pear into 8ths (quince are harder and take longer to cook, cutting them into smaller pieces insures they will cook at the same rate).
  2. To a large heavy-bottomed pot or Dutch Oven, add the chopped fruit and water.  Cover, and cook on medium until all of the fruit is tender (about 30 min).
  3. After fruit is tender, remove lid and reduce head.  Here you have two options:  for a super smooth butter, process fruit in a food mill.  For a more rustic butter, mash thoroughly with a potato masher.   Measure pulp.  You should have 8 cups.

    dsc_0671
    Clockwise from far left: salt, cinnamon, allspice, cloves, ginger.
  4. Return the pulp to the pot.  Add spices, salt, and sugar.  Cook, uncovered, stirring frequently, until the butter cooks down to a desired thickness (depending on the heat and frequency of stirring, about 45 min to 2 hours)
    dsc_0681
    Butter halfway cooked down


  5. Halfway through cooking down the butter, Heat up the hot-water bath canner.  Place clean jars in the canner and bring them up to a boil.  Place lids and rings in a small saucepan and warm them (do NOT boil, it damages the rubber seal).
    dsc_0680

    I use a lid-rack I found at a thrift store ages ago to keep the lids from being in direct contact with the bottom of the pan.  It also makes them easy to grab when filling jars.
    dsc_0692

  6. When butter is ready, stir in lemon juice (and brandy, if desired).  Cook 2-3 minutes.
  7. Fill half-pint jars, clean top of the jar, place lids and rings on snuggly. Process 5 minutes in a hot-waterbath canner.  Remove from heat and let cool for several hours.  Makes 9-10 half pint jars.
    dsc_0698


Chanterelle and Gruyere Tart Recipe

dsc_0541

I’ve made this Chanterelle and Gruyere Tart a few times in the past few weeks.  It’s quick and easy, and uses ingredients I’ve had readily on hand in the pantry, and in the garden.    It only takes a few minutes to put together, and is packed with autumnal flavor.  If Chanterelles aren’t in season, you can substitute with any fresh, meaty mushroom, thinly sliced.

Chanterelle and Gruyere Tart

1 piece storebought puff pastry, thawed in the fridge

4 oz chevre, crumbled

6 oz gruyere, shredded

One heaping cup chanterelles, thinly sliced

Four pieces of curly kale, stems removed, and torn into one inch pieces

Balsamic vinegar

Extra virgin olive oil

Pink Himalayan salt

Cracked black pepper

1 egg whisked with 1 Tbsp heavy cream


Directions:

1)Preheat the oven to 375 F.  Roll out the pastry.  Line a jelly roll pan with parchment paper and lay the pastry on top.  Brush the edges of the pastry with egg wash mixture and fold over 1/2 inch.  Press with a fork to seal and crimp the edges.  Add more egg wash to the outside crimped edge.  Return to the fridge to chill for 10-15 minutes if the pastry has warmed too much during this time.

dsc_0543

2) Carefully spread the chevre across the bottom of the pastry.  Sprinkle with half the shredded gruyere, the mushrooms, and the kale.  Top with remaining gruyere.  Drizzle with balsamic vinegar and olive oil, then sprinkle lightly with pink salt and liberally with cracked black pepper.

3) Bake at 375 for 15-18 minutes or until crust is browning.  Place under the broiler for 2-3 minutes or until cheese is bubbling and turning golden.  Remove from oven and immediately place on a wire cooling rack.

dsc_0551

Cut into 16 pieces.  Serve warm or at room temperature.  Enjoy!

.

End of Summer Salad

dsc_0597

A friend from derby is recovering from a broken leg and I’m taking her tomato bisque and homemade bread for dinner and needed a salad for the side dish. The garden is bursting with tomatoes and peppers, the mint has spread everywhere, and the fall curly kale is ready to start harvesting.  I have a big block of feta in my fridge and a lot of Israeli couscous in my pantry.  And thus, this salad came together.

(Note: The recipe serves four, but some of the quantities look large in the photos because I made a quadruple batch to share with my parents and so our family could have some for dinner, too.)

End of Summer Israeli Couscous Salad

Serves four

2 cups Israeli couscous (sometimes sold as “pearl couscous”)

2 1/2 C water

2 tsp salt (I prefer pink Himalayan)

1 1/2 Tbsp extra virgin olive oil

2 C chopped tomatoes (I used a mix of cherry and beefsteak tomatoes)

1/2 C finely chopped sweet peppers (I used pimiento and part of a yellow bell pepper)

1/4 sweet onion, very finely chopped

2 large pieces curly Scotch kale, washed, ribs removed, and chopped

2 tsp fresh mint, cut in a fine chiffonade

2 tsp red wine vinegar

1/8 tsp cracked black pepper

6 ounces feta, crumbled

Directions:

  1.  In a medium saucepan, bring the water and salt to a boil.  Add the couscous, cover and cook for 8-10 minutes or until couscous is tender and cooked through.  Remove from heat, remove lid, toss gently with the olive oil, and allow to cool to room temperature.

dsc_0592

2.  In a large bowl, combine all chopped veggies, mint, pepper, vinegar, and feta and gently toss.

3.  Gently fold the cooled couscous into the bowl of veggies. Add salt and additional pepper to taste.  Garnish with sprigs of mint, and serve at room temperature or chilled – your choice. Enjoy!

dsc_0602


Returning

DSC_0297

I’ve always been a sporadic blogger.   Honestly, the last several months, it’s been easier to Instagram.   After a long, unintended blog break full of

SkatesPurpleLaces

officiating roller derby,

tomatoes

working in the garden,

BulgurBowlTropical

and writing for Azure Standard,

collectorsitem

the change of the seasons always draws me back here.  I have recipes and knitting patterns in the works, and hope to be back to blogging on a semi-regular basis…for a while at least…until derby and work and unschool life with four kids gets overwhelming again.

Blessings on this tail end of summer.  Back tomorrow with a recipe to share.

January Garden Slumber

IMG_3263

This is what gardening looks like in Western Oregon in January.

IMG_3287

I’m trying to finish shoveling a giant pile of mulch off my driveway.  I’m down the last couple of yards, and even though it was 38 degrees and raining out, today was the day when I had room in my schedule to work on it.  So, I got to work.

IMG_3282IMG_3281

Most of the garden is asleep in January, but I still make the rounds of all my perennials every week to check on them.  Each one gets a visual inspection for weather/rodent damage, disease, state of dormancy, etc.

The Goumi berry (Eleagnus multiflora) (left) and Sea Buckthorn (Hippophae rhamnoides) (right) plants may lose their leaves in winter, but they still provide visual interest with upright shape and scores of thorns.  The Goumi’s thorns are only on younger growth, but their downward hook means it is easy to snag a hole in your pants as you walk by.  Sea Buckthorns are notorious for their spines, but I grow Siberian varieties, which are less thorny than their German cousins.  Both species are nitrogen fixers and produce their own nutritious tasty fruits, but their spikey nature means I have planted them on the perimeter of the garden – near enough to the pome fruits to provide nitrogen-fixing benefits, and where their own berries can be easily reached but not where kids will fall into them, or clothes become easily snagged on the spines.

IMG_3273

Walking around today, I noticed that one of the rhubarbs in a particularly warm and sheltered spot has emerged early from dormancy.  The new leaves are always a vibrant blend of fuschia and chartreuse, with salmon and tangerine overtones.  Simply beautiful.

IMG_3276

The rhubarb divisions potted up for our upcoming spring plant sale are all still dormant, but I can spy one in the upper right trying to wake up.

IMG_3270

The backyard isn’t much to behold this time of year.  One can hardly tell there is an orchard along the U-shaped perimeter of the yard – it all blends in to the fencing with the leaves and fruit absent.  The rain garden in the foreground doesn’t impress much at the moment, either.  But soon sleeping herbaceous perennials and spring bulbs will start to stir from their slumber.

For the time being, the ducks have the run of the place -the rain keeps the chickens hiding much of the time, and the ducks follow me around as I take care of morning chores, although here they’re happily preening in the rain garden, in the midst of a downpour.  Always in their element in wet weather, the ducks.

IMG_3317

Working outside every day in winter weather has taken a toll on my hands.  Every time I come in, my knuckles seem to be cracked and bleeding.  Potting up dormant berry bushes for the spring plant sale, in particular, has been really rough on them.

Because being out in wet, windy, cold weather so much was damaging my hands – and because my dad, a hobby woodworker, was experiencing similarly cracked and banged-up hands – I made up a special batch of lanolin-rich hand salve.

IMG_3312

Lanolin is the waxy oil from sheep’s wool – because it is washed from the wool after shearing, and no sheep are harmed in production, it is a vegetarian (not vegan) product.  But because it is also an animal fat, made to keep skin & wool healthy out in the elements, lanolin is the perfect choice to use on hands that spend many hours outdoors or in rough working conditions.

Combined together with beeswax, lanolin makes a water-resistant coating against rain and wind.  And because lanolin is readily absorbed into the skin, it helps to heal and moisturize severely dry skin as it protects.

I’ll be back later in the week with more from the garden – evergreen plants that provide winter interest now – and nutritious fruit come summer!

If you’d like to order some of this batch of salve, you can find it here.

The Garden Keeps Giving


IMG_2668

It’s nearly November, and yet we’re still finding fresh food in the garden every day.

George helped me pick some green tomatoes so I could make a batch of lacto-fermented pickles with them.

IMG_2697

I picked the last of the quince for the year and have membrillo simmering on the stove right now.  Can’t wait until it is ready to pour into a pan and set up and finally EAT.  Nothing goes better with a cup of tea on a rainy afternoon than membrillo with cheese and smoked-paprika-spiced crackers.

IMG_2666

Bea helped me dig a few sunchoke tubers for dinner later in the week.  Sunchokes are an easy-to-grow perennial food-crop that are ready late in the year.  They contain about 110 calories/cup and one serving contains 28% of your daily amount of iron.  They are also a good source of vitamin C and potassium.  Sunchokes also contain a lot of inulin, and while they are tasty sliced fried in ghee or bacon grease, they can cause gas in some people unless cooked for long periods of time.  The best way to prepare them that helps break down the inulin is to simmer them in the crockpot in chicken or veggie broth and then make a mash with other root veggies.

IMG_2664

Bea found an exceptionally large sunchoke while we were digging.  She was awfully proud of it.

IMG_2688

While I was cutting back some rhubarb plants – whose leaves are beginning to die back due to the cold night temperatures, I noticed one of the ground cherries nearby still going strong.  One quick shake and full cup of ripe fruit fell onto the ground.  We ate most, but I kept a few back in order to save the seeds.

IMG_2677

On Monday I picked over 50 lbs of pumpkins for Birch Community Services, but today I picked just a few for our family.  These are (my absolute favorite) Burgess Buttercup on the left, and on the right a kabocha-type variety whose seeds were gifted to me, which I want to say is Confection, but that might not be correct.  I look forward to trying the one on the right and seeing how it compares to the excellent texture and flavor of Burgess Buttercup.

I’m very grateful for this late-in-the-year gifts from the garden, and look forward to a few more weeks of nourishing foods and healing herbs from the garden before it is put to bed for the winter.


Rooting Up

IMG_2690

No rain this afternoon, so it was time to take cuttings and root up a few perennials I hadn’t gotten to in the past few weeks.  Today I was rooting goumi (Eleagnus multiflora) and silverberry (Eleagnus commutata), both of which are excellent nitrogen-fixing semi-evergreen shrubs that also produce edible fruit.  Goumis produce copious amounts of tasty red fruit the size of a blueberry or larger, and I have three becaue the children enjoy the fruit so much.  Silverberries produce smaller fruit which are gold with silver speckles.  I don’t find the diminutive fruit worth harvesting for us to eat, but the chickens and ducks love them, so I grow silverberries in the orchard where the birds can get the fruit, and the apple trees can get the benefit of the nitrogen the shrubs fix.

IMG_2691

Some plants will root easily on their own from cuttings (Ribes, grapes, for example), but some need a little rooting hormone to encourage the formation of roots.

IMG_2693

After stripping all of the leaves off, and pruning off any side branches, the cut ends are dipped onto the rooting hormone and then planted.  Over the winter and early spring, they will form roots and you have a new plant!

IMG_2704

Since I had a few extra minutes, I rooted some additional herbs, and a dozen blackcaps.

IMG_2681

George, age four, insisted on making all of the labels for the raspberries.  He asked me to tell him what to write, so I said, “Munger Blackcap Raspberry” and then he wrote out his tags.  He may not be the easiest four yr-old, but having him for a garden helper is always a real delight.

More tomorrow with some of the foods the garden is still producing this last week of October.

Parkrose Market

IMG_2511

I have had much time to blog the last several days, I’m working on stocking our Etsy store (Parkrose Market) with salves and balms and knitted things.  Trying to juggle all of my obligations at the moment is proving challenging, and I’m dropping a few balls here and there.  But, I’m still making progress and being anything less than busy doesn’t come naturally to me.

I grow all of the herbs here (with the exception of myrrh), dry them in our solar dehydrator, and then infuse them into organic unrefined coconut oil and organic olive oil.  We use only local beeswax from natural beekeepers (learn more about natural beekeeping here).  Right now, I’m making four kinds:

IMG_2519

Soothe Salve has calendula and plantain, which have been used for ages as first-aid for skin conditions, rashes, bug bites.

IMG_2541

Besides being great for medicinal purposes, calendula is a long-blooming, repeat-blooming bee-loving plant.  Even now, in late October, it is a steady source of food for our honeybees.  It also self-sows readily.

IMG_2526

We’re a roller derby family, and in the derby world, arnica is the favorite herb for the endless succession of bruises that come with the sport.  Vervain (also called Juno’s Tears) is purported to help with inflammation.  Together, the two herbs make for good care for bumps and bruises.

(Note, if you decide to grow Arnica montana in your garden – it is toxic and absolutely should not be ingested.  And while it is a great bee-plant with lovely yellow flowers, it has a habit of spreading, so don’t put it in unless you can keep it controlled.)

IMG_2518

Comfrey’s other name is Knit-Bone.  It is an age-old treatment for broken bones, sprains, etc – typically used as a poultice, but also in salves.  There is some dispute as to whether drinking quantities of comfrey tea can cause liver problems, so I only use it topically.  I do use comfrey salve twice a day, every day, since I broke my ankle last summer.

Comfrey is one of the best herbaceous perennial plants for the permaculture garden, orchard, or farm.  I’ve written a lot about it, and we stock sterile Russian Bocking comfrey plants for sale here.  Shoot us an email if you’re interested in growing comfrey in your garden.

IMG_2538

At the request of several folks, I’m also making a general all-purpose balm as we head into winter, specifically geared for supporting and protecting skin.  As a farmer who doesn’t wear gloves as much as she should, this has been a big help to my dry hands.

I’ll be back later in the week with more, and will let y’all know when our Parkrose Market Etsy store is ready to open up.

Fall Fruit, Fall Projects

IMG_2295

Enjoying some of the last of the fall fruit coming from the garden this week:

IMG_2275

George helped me pick quince, which we turned into membrillo.

IMG_2226

Ground cherries (Physalis spp.) that didn’t get eaten straight off the plants went into a tart with plums.  The tartness of the ground cherries melded very well with sweetness of prune plums.

IMG_2291

George picking an apple for an afternoon snack.

IMG_2218

Our newest apple tree, a little Liberty, produced exactly one apple this year.  Next year there will be lots of Liberty apples, and even more for many, many years thereafter, but this year that one fruit felt very special, and perhaps that’s why it tasted extra delicious.

The next few weeks are intensely busy around here.  The girls’ home team season for roller derby starts this weekend, and I’m going back to weekly sports rehab for my ankle to try and overcome some mobility issues that make certain movements in skating difficult or impossible.  This weekend we also have a garlic cultivation workshop that’s been in the works for quite some time. I’m finishing up an order of custom herbal salves (made with herbs we grow and dry) and making all sorts of good things to stock up in preparation for opening an Etsy store.  I’m taking on more gardening clients, doing fall clean-up and garden consulting and whatever they need done. And last but not least, I’ve been working on a book for quite a while, and have been spending every spare minute editing chapters, test-knitting patterns, test-baking recipes, and writing a book proposal.  Just when it feels like life in the garden is winding down, the rest of it ramps up.  I’m excited about all of the projects, but attempting to not feel overwhelmed by them all at the same time.

More tomorrow from my kitchen!

Buttercups and Quince

IMG_2195

Harvesting by myself in the garden this morning.  Picked 65 lbs of produce – the bulk of which was winter squash and quince.  The quince are just starting to ripen, so I didn’t pick very many, but a few were definitely ready.  Quince (Cydonia oblonga) may not be the most lovely fruit in the world – looking like a misshapen pear covered in shedding fuzz – but the aroma from this crate of fruit was nothing short of heavenly.  The scent is likened to guava and honey with overtones of vanilla and rose.

These ancient pomes are a fruit worth keeping in cultivation and in the kitchen.  In fact when people ask me what fruit tree they should pick if they only have room for one, I always say, “quince!”  Naturally dwarf, with a lovely shape, handsome bark, stunning fragrant pink flowers, quince are an excellent landscaping tree.  Most varieties are self-fertile, so you only need one.  A quince will also bear twice as much fruit as an apple tree the same size, and the fruit are pestered by far fewer insects than apples.  I love them so much, I have five varieties in my garden, although three are too young to be producing yet.

IMG_0156[1]

My favorite way to enjoy quince is to turn it into membrillo – a Spanish quince paste made from cooking the high-pectin fruit for hours and hours until it becomes a beautiful orangey-red.  It is then poured into a dish to cool, where it sets into a dense, slightly grainy jelly that is amazing on toast or with Manchego cheese.

Quince are very hard and most varieties cannot be eaten raw, but roasted they turn pink and sweet and fill the kitchen with a delicious fragrance.  Any apple pie or applesauce is augmented significantly by the addition of quince to the recipe.  Any roasted pork or poultry dish would also pair beautifully with roasted quince.


IMG_2198

IMG_2197

As I was ripping up dead winter squash vines and spent tomatoes, I ended up with the first few witner squash of the season.  Most of the vines are still going strong, and there are dozens more squash that will be picked over the next few weeks.

Most of the squash I plant are Buttercup varieties.  Buttercups are a type of Cucurbita maxima, and have the benefit of being a meal-sized squash, not a hulking behemoth the modern family has trouble making use of.

The one above is “Burgess Buttercup” and has consistently been rated the best-tasting winter squash variety.  It is slightly dry with dense bright orange flesh.  It is fantastic for roasting, and holds its shape in soups and stews.  I have steamed and mashed it and made pumpkin rolls that were everyone’s favorite at the holidays.


IMG_2201

Honestly, I’m looking forward to the end of the garden year.  Volunteers have ended their shifts for 2015, and the next few weeks I will be harvesting by myself – more quince, oodles of winter squash, ground cherries, Inca Berries, lingonberries, and the like.  Then, we’ll be down to cleaning up the garden, planting garlic, and growing only what our family eats off of for the winter (kale, leeks, etc).  As much as I love running the garden project, winter is a nice sabbatical, and a chance to focus on indoor activities and hobbies.

Eve of Autumn

Eve of Autumn

Today we said goodbye to summer and anticipate the impending arrival of autumn.  It has been warm and sunny during the day, but the crispness of fall has definitely made itself felt in the air.

We’ve been pulling out pants (only to discover George has outgrown every pair that fit this spring) and mittens and vests and rain jackets.  The kitchen has been really chilly in the mornings, and it gives me an excuse to bake:  I’ve made bread two days in a row, and have plans to get up before the children to bake banana bread for breakfast tomorrow.

IMG_1974

Speaking of mornings, The Hudson’s Golden Gem apples are ready right in time to welcome in fall.  I’ve been eating one off the tree every morning with my coffee, and Ruth and George have been enjoying them with dinner.

IMG_1971

The young tree sits right outside our front door, planted in a polyculture with rhubarb, comfrey, clove currant, Egyptian walking onions, blood sorrel, rosemary, English lavender, bearded iris, calendula, and Oregon iris.  Around the perimeter – in an area amended with pine needles – are highbush blueberry and lowbush blueberry and red currant.  This weekend I also added a Haku Botan pomegranate – prized for being very dwarf, cold hardy, and producing double-ruffled white flowers which set into white fruit.

IMG_2126

If you need another apple to add to the family garden, the Hudson’s Golden Gem is an excellent choice.  The fruit is yellow and heavily russeted – nothing much to look at.  But the flesh is creamy white, and very crisp, but with an exceptionally buttery quality – not grainy or gritty or mealy at all.  The flavor is a good balance of sweet and acid with undertones of butter and hazelnuts.  It’s an apple that children and adults can both enjoy very much.

IMG_2106

IMG_2109

To mark the shift of seasons, we had mint tea this afternoon and burnt a little myrrh in the hour or so before dinner.  In studying ancient Egypt, the children had become interested in what myrrh actually smelled like (we’d burned frankincense at Christmas before).  I had to order a few things from Mountain Rose Herbs, and included myrrh (Commiphora myrrha) and sweet myrrh (Commiphora opoponax), which have markedly different scents.  They arrived in plenty of time to test them out today.

IMG_2104

You can’t simply light myrrh unless you want it to smell, well, burnt.  (It’s like the difference between a great cup of coffee and a scorched cup that’s sat in the pot with the burner on – they’re both coffee, but one is the right way to appreciate it, and the other is a waste of coffee.)  Instead (a video tutorial is here), light a disc of charcoal, place it in salt or sand, sprinkle it with more salt (to form a buffer layer between the charcoal and the myrrh), and then place a very small piece of resin on top.  It will slowly melt and darken, trailing up a wisp of intensely fragrant smoke as it does so.  Two tiny half-pea sized pieces were enough to fill the whole house with the soothing aroma.

IMG_2110

While the kids drank their tea and made dragons before dinner, I finished a few pairs of children’s’ mitts.  I’m working on stocking up handmade goods to open a little Etsy store before Thanksgiving.  Something about the chill in the air, the winding down of the garden, the early-setting-sun that makes fiber-folk want to knit and spin in earnest.  So the turn of the season seems like a good time to get things finished up and get that Etsy store open.

IMG_2097

Hope to be back later in the week with some of our unschooly activities and setting the fall Nature Table.

Blessings on your family as you settle into the rhythms of the new season.


Plant Sale


plant sale

Every year, I give away dozen and dozens of plants to the volunteers who harvest here and to the folks who take our free garden workshops through Birch Community Services.  As our permaculture food forest becomes more mature and more productive, I have recently been able to expand our nursery stock and offer some plants for sale to the general public.

(A Note:  Everything we grow here is produced using all organic methods – no fungicides, herbicides, pesticides, synthetic fertilizers of any kind.    One of the ethics of permaculture is “share the surplus”, and in keeping with that ethic- and my desire to encourage other folks to grow their own food by keeping their startup costs low – the plants we have for sale are at a small fraction of the cost of local nurseries’ prices for non-organic stock.  I charge just enough to help recoup a little bit of the cost of the water and soil ammendments and such, and prices don’t reflect my labor and such.)

The Fall Gold raspberries had spread beyond their rows, and were shading out a young Sea Buckthorn, so they had to go.  I ended up with about 25 good looking crowns, trimmed them up, and found homes for them all in about 15 minutes.  Fall Gold is by far my favorite variety of raspberry, and because 1/2 pints of them in the store can run $6!!! (and are often picked underripe), they are a high-value crop and worth growing in the home garden.  They also produce a crop in early summer and another from August all the way through into October.

plant sale

This time of year, if you order herbaceous plants from Parkrose Permaculture, they will be heading toward dormancy (the perfect time to plant them).  I trim the leaves off to reduce transplant stress, but herbaceous plants, by definition, will die all the way to the ground.  When planting in your garden, be sure to mark the spot with a stake so you don’t lose track of where it was planted.

We still have horseradish crowns available for $2 each, by the way.  Horseradish is extremely easy to grow and thrives on neglect.  And homemade horseradish is soooo much better than store-bought. It takes only about ten minutes to make, including digging up the roots.

IMG_2048

plant sale

Another example of what plants look like right now.  The top photo is costmary in my garden (a lush, low-growing herb that is extremely fragrant, smelling like balsam and mint blended together, with subtle undertones of bergamot and sage).  Very shortly, it will be dying back to the ground, as nights continue to drop in temperature.  If you order costmary right now, it will be trimmed for transplanting, and while it won’t produce new vegetative growth over the winter, it will be developing a strong root system underground, and come up strong in the spring.

Plant sale

11147861_1010054389037929_5409863485510528160_n

Comfrey is an invaluable herb in the garden.  It is traditionally called “Knitbone” and is used in poultices and salves to treat broken bones and the like.  But comfrey is also a versatile, extremely useful plant in the context of permaculture.  Its lovely purple flowers are superb bee food, and the leaves make excellent duck and hoofstock fodder.  I plant comfrey at the base of all my fruit trees, where its deep taproot will help break up the dense clay soil and its leaves will make nutrient-rich mulch.  I also use it to make a very stinky, but very potent tea fertilizer for everything in the garden.

Right now, I have comfrey crown cuttings available, and in the spring will have full plants.  If there is one non-fruit or veggie plant to have in your garden, this is the plant.  And all of our comfrey is sterile Russian Bocking Comfrey, so it will not set seed or get out of control.

Plant sale

If you place an order with us right now, your plants might look much like this – bareroot shrubs and vines, and potted plants losing leaves in preparation for winter.  But autumn is a really good time to transplant perennials.  As I mentioned above, while not much is going on above ground, during the mild PNW winter, fall-planted specimens are establishing healthy, vigorous root systems, which will result in strong new growth first thing in the spring.

Negronne Figs

IMG_2061

A quick final note –  all of our orders come with freebies – be it extra herbs starts, or a few packets of flower seeds, or a little box of fruit from our orchard.  Some of our orders this week were delivered with fresh Negronne figs (see above box of plants).  I wanted to include a picture of them, because I’ve been eating them every day with lunch, and they are fantastic – like strawberry and honey with a hint of caramel.  If you have room for one fig tree, let it be this variety (which is naturally quite dwarf, topping out at 8 ft).

Our next plant sale will be in the spring, when we will have red currants, rhubarb, herbs of all kinds, elderberries, figs, and more.  If you’re searching for perennial plants of any type in the meantime, especially those used in permaculture, I probably have them. Send me an email at ParkrosePermaculture@gmail.com with any inquiries, and I can try to fill your order.

Our weekend is full of roller derby and more roller derby, so I’ll be back early next week with a new post.  Blessings on your weekend!


Mid-September

IMG_1842

A few quick pictures from around our permaculture garden today:

IMG_1940

IMG_1956

The lovage has gone to seed, so it was time to cut it back and sow the seeds around the garden.  They will germinate in the spring and add to our stock of perennial vegetables.  Their blossoms will be a strong attractant to parasatoid wasps, lacewings, and other beneficial insects.

IMG_1978

The Aromatnaya quince are nearly ripe.  A few more weeks, and they will be fragrant and ready to pick and put into sauces and pies.

IMG_2028

In May, we put in 2 female and 1 male sea buckthorn (Hippophae rhamnoides). Sea buckthorn is a very important permaculture plant, as it fixes nitrogen, is extremely hardy, and produces a nutritious fruit crop.  We chose Siberian varieties known for their smaller growing habit and less suckering than the German and other Russian varieties.   In 4 months they have grown from tiny twigs to nearly the height of my 10 yr-old.  Very excited for them to start producing their Vitamin C-rich fruit in the next year or two.  

IMG_2021

It’s late in the year, and the bees (all kinds, not just our honeybees) are frantically collecting up nectar and pollen in preparation for winter.  We’ve been making a conscious choice to let certain plants bolt (radish, argula, mint, etc) and making second plantings and cutting back hard to encourage repeat blooms of various plants (calendula, lavender, salvia, rosemary, borage) to provide sufficient food for the bees.

While this has resulted in some parts of our permaculture garden looking a bit scraggly and even more wild than normal, it has also meant ample forage for our girls and all the native bees besides.  The children have really enjoyed identifying all the species of sweat bees, bumblebees, and syrphid flies that visit the flowers.  We’re also hoping it will make for some seriously delicious honey when we harvest in the spring.

More soon!


Putting Up Plums

IMG_2003

September is the month when the various kinds of prune plums ripen in succession.  I have so many, I scarcely know what to do with all of them.  When the Shropshire Damson starts producing next year, I will be absolutely flooded with plums at the end of summer.


IMG_1977

We had a brief run of rain, followed by hot weather, and now more rain, and the late plums are all splitting faster than I can pick them.

IMG_2007

When jams, sauces, plum brandy are all made and still there are buckets of very ripe plums left, the solution is to dehydrate them.  Afterall, prune plums – with their intense sweetness and freestone habit – are perfect for drying.

The kids built a blanket fort in the living room this afternoon, and I got around to washing and halving bowls and bowls of plums to fill the dehydrator trays. (It’s cloudy and rainy, today, so I couldn’t use the solar dehydrator, but that’s okay, because it’s chilly in the house tonight, and the heat from the electric dehydrator is filling the kitchen with the delicious honey aroma of the drying fruit.)

We go through a lot of dried fruit outside the summer months.  Aside from eating them whole, prunes go into much of my winter cooking.  One of my favorite dishes is a tagine with beef or lamb and prunes, pumpkin and chickpeas with a side of couscous.  If you don’t think you like prunes, try them in a tagine and you’ll discover how great they can be.

If you have a favorite plum recipe, I’d love to hear it, because I have more plums waiting to be picked!


Ripening Tomatoes

IMG_1936

After a serious drought most of the year, the rain has finally returned.  (It actually feels like Oregon again here.  So glad for the grey and the rain!)

Despite the fact that we had what felt like an eternal summer, the reality is that it is now September, and the cooling temperatures and rapidly-shrinking day-lengths mean the bumper tomato harvest can only last a few more weeks.

I frequently hear from folks who are frustrated to find most of their tomato fruit still hanging green and rock hard on the vines by the time temps dip into the 40’s at night and the vines begin to die.  So much effort is put into a crop that never matures before the season ends.  And there are only so many batches of green tomato pickles and chutney one can put up in the fall!

So, I thought I’d give you some of my tips for encouraging your tomatoes to ripen before the end of the season:

IMG_1920

First of all, obviously not all tomatoes are red when ripe, so color is not a good indicator that your crop is ready to pick.  This variety, Indigo Rose, rapidly turns a dark purple, but isn’t ripe until the green color under the purple turns brownish-orange.  Despite being a cherry tomato, it is one of the longest-ripening tomatoes in my garden, fooling many volunteers into picking it underripe because of the early purple blush.

Knowing the characteristics of the varieties you are growing will help you determine ripeness.  Knowing the firmness/feel of a ripe tomato when you gently squeeze it is `important thing to know.  As well as knowing that most (but not all) varieties of tomato slip easily from the vine when ripe.  If you have to tug and tug to pick the fruit, it probably isn’t ripe (although I have a few heirloom beefsteaks that will hang on for dear life until they are very overripe).

IMG_1928

Here’s another very soft, very ripe tomato, although it doesn’t look particularly ripe.  Some of my favorites have green stripes when ripe, or are completely green (Evergreen and Green Zebra come to mind).  Again, here softness and ability to slip easily off the plant are the best indictators of ripeness.

Volunteers here frequently skip over pink beefsteak varieties, thinking they are not yet ripe because they aren’t deep red.  But they will never turn deep red, and if left hanging on the vine, they will attract creatures who know  they are ripe and tasty in their pinkish hue: birds, mice, slugs, will damage them and crops will be lost.  The same goes for lemon-yellow varieties, which folks tend to overlook, waiting for an orangey indictator of ripeness which will never come.

So, now that we know how to tell if a tomato is ripe, how do we get those green tomatoes to hurry up and get in that state?

Ripening tomatoes

Tip 1:  As soon as early September hits, I snip off all of the the flower blossoms and buds from the vines.  These flowers don’t have time to turn into harvestable crops before the end of the month, and they are robbing energy from the vine that it could be putting into maturing fruit.

Removing the flower buds also signals to the plant that flowering time is over, and fall is approaching, and it should focus on ripening already-set fruit.

Ripening tomatoes

Tip 2: Remove all very small, immature fruit.  These little guys are never going to ripen into 1 lb Brandywines in two to three weeks.  Again, removing them keeps the plant from wasting energy attempting to mature them, and allows more resources to go to larger fruit that have a chance of ripening before the end of the month.

Tip 3:  Stop watering.  A shortage of water stresses the plant and encourages it to hurry up and ripen its set fruit before dying.  Now, in Oregon, that may not be an option because sometimes the rain returns in September.  But many years, September is very dry until late in the month, and the combination of lack of water and dipping night temperatures will help those beefsteaks mature.

Ceasing to water also helps prevent fungal diseases on ripening fruit (and believe me, while late blight is rare here, it will devastate your entire crop in 48 hours.  Ripening tomatoes and their vines will turn into black mush before you know what has hit you, and there is no cure.)   I lost 300 lbs of tomatoes one year to late blight (which is spread on the wind, and brought into our state by big-box store’s tomato starts cultivated in the South, where the disease is common), and I hope to never experience that again.

Tip 4: Grow more cherry tomatoes!  Some years, Oregon has cool summers, and beefsteaks are never going to be able to set and ripen many fruits in the season.  I always grow a few beefsteaks and large slicers, even knowing that many won’t produce a large crop for me if the summer is mild.  Brandywine and Mortgage Lifter are particularly prone to setting fruit late and having buckets of green tomatoes for me at the end of the season (they do make very tasty lactofermented dill pickles, though).  Small slicers such as Green Zebra and cherry tomatoes like Sungold and Chocolate Cherry are sure winners no matter the weather.

IMG_1916

Hope that helps you, and I hope you get lots of tomatoes in the next few weeks and enjoy the tail end of summer.

I know I am beginning to anticipate fall crops like the late September glut of tomatillo and ground cherry fruit, winter squash, quince, lingonberries…

More soon, and happy gardening!


Rewards

IMG_1912

A long day of jury duty called for a little after-dinner plum-picking therapy…

IMG_1898

And a handful of Fall Gold raspberries for dessert.

Back in a few days when I’m out of the courtroom and once again in overalls playing in the dirt.

Tuesday Evening

IMG_1871

The garden always starts to look a little more wild and unkempt than normal this time of year.  Some plants are past their prime and looking scraggly.  Some have spilled over their boundaries to scramble over paths and up tomato cages.  Some (like the mile-high lettuce in the center-background) are allowed to bolt so I can save the seeds or are permitted to self-sow about the garden.

IMG_1860

After dinner, George helped me pick some tomatoes and plums and summer squash for a delivery in the morning.  He got a thrill out of being hoisted up to help reach the first wave of ripe Stanley plums.

IMG_1870He

He thought this Pink Brandywine tomato was really cool and deserved a close-up.


IMG_1874

As the sun was getting close to setting, Ruth brought out her favorite chicken, Cookie, to peck around in the Rain Garden before she and Casey locked up the poultry for the night.

IMG_1877


It’s a good thing Cookie is the world’s snuggliest chicken, because Ruth absolutely adores her.  She’s a total puppy dog and wants to be picked up and held at every opportunity.


IMG_1861

All in all, not-too-shabby for less than an hour’s picking with small children “helping”, especially considering I also picked another dehydrator-load of calendula and comfrey, and some golden raspberries for the kids’ dessert, and weeded as I went along.  Definitely, not-too-shabby.

Solar Dehydrator

IMG_1806

A friend recently gave me her well-loved solar dehydrator.  I have been chomping at the bit to try it out, and yesterday picked a bunch of herbs (that will eventually go into salves) and set to drying them.

IMG_1799

I spent some time in the evening gathering calendula blossoms and comfrey (shown here), broad-leaf plantain, raspberry leaves, rosemary, lavender, and costmary.  The calendula blossoms come in an array of peaches, yellows, oranges since I let them freely self-sow around the garden and express their natural genetic diversity.

IMG_1816

I have two electric dehydrators and make a lot of dried fruit and herbs in them.  However, electric dehydrators use a LOT of power and must run for eight or more hours.  This adds cost and produces heat indoors as well as any environmental impact that comes with plugging in an appliance.

The permaculture way to preserve via dehydrating is to utilize the natural energy of the sun (Principle 2: Catch and Store Energy) to dry food and herbs without costly use of electricity and all the waste products and impacts that come from using the grid (Principle 6: Produce No Waste).

IMG_1815

The dehydrator is made with a series of screens stacked into a wooden box. There is air space between the screens and around their edges.  The top of the box is glass, and as the sun’s rays are harnessed, hot air builds up in the box and circulates around, drying the herbs without any work from me, save rotating the screens a couple of times over the course of the day.  It is extremely efficient if the day is sunny.

IMG_1818

Looking forward to making a batch of salves soon, and hoping for more sunny days in the next week so I can dry prune plums next!

Produce Picked

IMG_1744

So, I haven’t been blogging much lately.  We’ve been in summer overdrive – husband job-hunting (he starts his new job Monday!), ferrying kids to summer camps, derby derby and more derby, sewing and knitting like crazy in preparation for opening my Etsy store this fall, and most of all: harvesting produce twice a week with volunteers in our garden.

IMG_1794

Before I start back to regular posting, I wanted to share some pictures of the harvests over the past couple of weeks.  We’ve had all sorts of new volunteers helping, most of whom have almost no previous garden experience.  It’s been so much fun to work with them, and seeing men and women get excited about all the possibilites that exist in a permacultuer garden.  Have also loved seeing their kids to snack on ground cherries and golden raspberries, play with the ducks, and watch the observation window in the beehive while we pick fruits and veggies.

A glimpse of a portion of what we’ve been picking lately for Birch Community Services:

IMG_1750

IMG_1746

IMG_1783

IMG_1767

IMG_1761

IMG_1796

IMG_1787

IMG_1856

IMG_1850

IMG_1849

Back tomorrow with a post on my new favorite permaculture tool:  a hand-me-down solar dehydrator!


Front Garden Fruit

IMG_1471

We have a Fruit for the Home Garden workshop this Saturday, and in light of that, I’d like to share a small selection of the fruit in our front yard garden.

IMG_1448


Okay, artichokes are flower buds, not fruit, but they grow in a polyculture with one of the plum trees and a selection of grapes, which are…And I love the contrast of the grey sharp-angled foliage with the green roundness of the grape leaves.

IMG_1444

Next to the artichokes, the young Early Laxton plum as set fruit for the first time.  I’m looking forward to trying these plum, which mature earlier than most varieties, and are supposed to have a good sweet flavor and eye-catching pink blush.

IMG_1443

Next to the Early Laxton and artichokes, a small arbor supports Reliance and Interlaken table grapes.  The kids very much prefer them to my favorite variety – Concord grapes in the backyard.  IMG_1468

Hudson’s Golden Gem is a reliable, disease-resistant, conical-shaped apple, and we planted two after Bea picked them out as her favorites at a fruit tasting.

IMG_1437

The bulk of our blueberries are in the side yard garden, but we do have four highbush and four improved lowbush blueberries in a polyculture with clove currants, walking onions and such in a front bed.  Altogether, we have 18 blueberry bushes scattered around the gardens.

Fruit crops in the front yard not pictured here:  Quince, red currant, Clove Currant, pink champagne currant, Chilean guavas, Triple Crown improved thornless blackberry, Aronia berries, Goji berries, Metheley and Stanley plums, strawberries.

Looking forward to our free workshop on Saturday.  I hope folks come away from the class discovering that there are many, many fruits you can pack into a small yard, with varieties far better than one can find in the grocery store.


Unexpected

IMG_1421

Out doing my usual evening walk of the garden yesterday after dinner, weeding and pruning as I go, and something caught my eye…

IMG_1420

A friend gave us loads of new tomato varieties to try out in the garden this year.  I’ve never tasted or grown Rambling Stripe Gold before, but it was amongst the collection.

IMG_1424

And lo and behold!  In the first half of June, in Oregon – there’s a ripe one!  I was totally taken aback.  Tomatoes don’t hit their stride until late August and early September, so to find a ripe on in early June is just unheard of.  Most are flowering and only just beginning to set tiny green fruit.  This plant is absolutely packed with green fruit, as well, and still covered in blooms (which the bumblebees are enjoying very much.)

I’m going to give it another couple of days on the vine just to make sure it’s fully ripe (although, it feels ripe), and I can’t wait to see if the flavor of Rambling Stripe Gold is on par with its productivity and early maturation.

Early June Garden

IMG_1398

After a few months on break (WordPress troubles, another surgery), I’m back to blogging.

A few shots around the garden yesterday (the one above shows part of our new rain garden).   Early June is so lovely.  Everything still tidy and unfurling.

IMG_1401       IMG_1402

IMG_1410

IMG_1437

It’s shaping up to be a very good year for berries.  The kids have been picking a basket of berries to accompany every meal, and snacking on them in between.

IMG_1404

All of the apples have set very heavily this year.  I did a lot of hand-thinning after the natural fruit drop at the beginning of the month.


IMG_1429

IMG_1443

The grapes, too, have set heavily, and the vines provide lush shade.

IMG_1432

Back with more posts over the next two weeks – a little catch-up on what we’ve been doing for the past month, some new recipes and a sewing tutorial!


Back to the Routine

IMG_0746

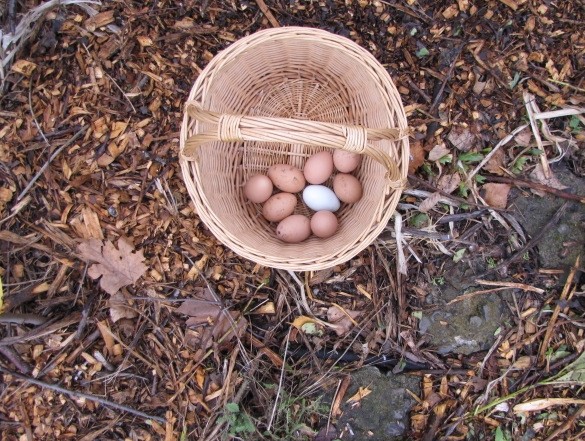
After a break of just more than a month, the chickens have finally started to lay eggs again.

IMG_0700

George is tall enough now to help me collect the eggs, and very glad to do so.

IMG_0732


IMG_0722

After collecting the eggs, George helped me turn shredded paper, coffee grounds, composted duck manure and straw bedding into the garden beds.  I was pleased to see the beds teeming with earthworms.  It won’t be too long before we’re planting in them.

IMG_0726

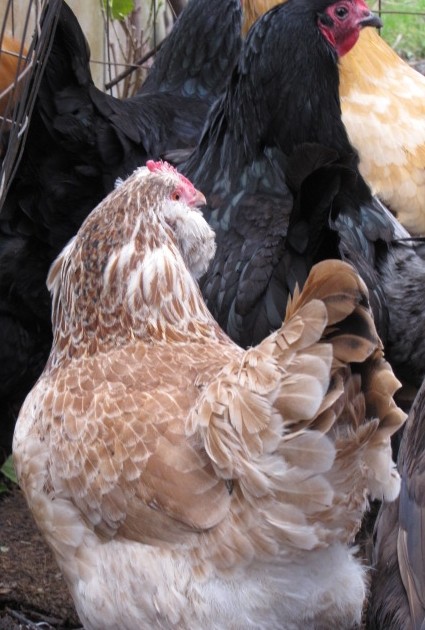
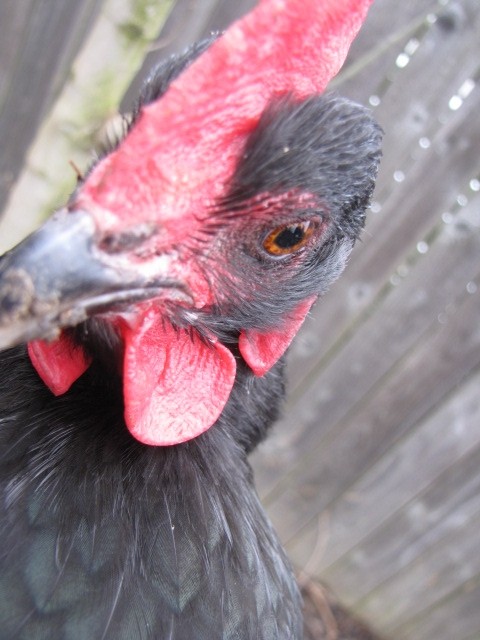
Blackie McBabTalky the Black Australorp.  She’s almost five, and doesn’t lay frequently, but the children love her.

IMG_0695

It will be good to bake more and enjoy omelettes for breakfast again now that the girls have gotten back into their routine.

Healing Salve Recipe

IMG_0459[1]

‘Tis the Season to make Christmas gifts, and Bea and I started yesterday morning, making another, larger batch of comfrey-rosemary salve.  (Joining the KCCO today.)

Comfrey, also known as knit-bone, is touted as having strong healing properties.   I have used it daily on my broken ankle once the stitches healed (don’t use the salve on open wounds), but it is also commonly used on bruises and other injuries.  It is a soothing salve to rub onto bumps, bruises, sore muscles, etc – all of which are common place in a house with 3 roller derby girls and very active, energetic kids.

IMG_0426[1]

Bea and I made this batch early in the morning before the other kids woke up.  At ten years-old, she can work with the hot wax and oil safely (with a little supervision, of course).

We have a $0.25 pot from the thrift store that is used only for beeswax-based projects.  Most of the jars were also from the thrift store, as well as some baby food jars given to me by a friend.

IMG_9869[1]

I grow loads of Russian Bocking Comfrey in my garden because it is a dynamic accumulator and sequesters all sorts of minerals in its leaves – thereby making it a great fertilizer in the garden, as well as excellent duck forage.  It has deep tap roots (up to 12 feet deep!), which help break up our dense clay soil, and its delicate purple flowers are a favorite of bees – blooming for a long stretch.

I had picked the comfrey and rosemary a few months ago and dried them, but you can also order the dried herbs online if you don’t have a source in your yard.

Once you have the ingredients gathered, the salve takes only about 15 minutes to make.  Here’s our recipe:

IMG_0460[1]

Comfrey-Rosemary Salve

3/4 cup organic olive oil 

4 Tbsp dried comfrey leaves

3 sprigs dried rosemary (you can substitute 2 Tbsp dried lavender if you prefer)

1 Tbsp vitamin E oil

3/4 cup organic coconut oil

6 Tbsp chopped beeswax

10 drops tangerine or 4 drops patchouli oil (if using dried lavender, substitute with lavender oil)

Directions:

– Infuse the dried herbs in the olive oil.  This can be done two ways:  either place the herbs and oil in a double boiler and heat gently over water (do not boil the oil over direct heat) for 30-45 minutes, or place dried herbs in the oil, cover and store in a dark place for 3-4 weeks.  (Note: Do NOT use fresh herbs – the water in them will cause your oil/finish salve to mold.  Herbs must be thoroughly dried.)

-Strain the dried herbs from the finished olive oil and discard them in the compost.

-Place the chopped beeswax, infused olive oil, coconut oil, and vitamin E oil in a pan.  Heat on medium-low heat, stirring constantly until all ingredients are completely melted.

– Immediately remove from the heat, and stir in the tangerine oil.

– Pour into jars, and let cool with the lids off.  Once thoroughly solidified, the salve will keep in a dark place at room temperature for 6 months or more. (Our kitchen was very cold when we made the salve, and it cooled very rapidly, resulting in cracks on the surface of the salve.  Next time, I will wrap towels around the jars or perhaps cover them with a pot so they cool more slowly.)

Back tomorrow for the Yarn Along!

Mending and Muscari

IMG_0329[1]

One of my favorite wool sweaters finally wore a hole in the elbow.  It was from the thrift store and had quite a bit of wear when I found it, but I liked the blue-grey color, and I’m always a sucker for wool.

Unfortunately, I didn’t realize there was a hole in the elbow until we were on our way out the door, and my eldest pointed it out to me.  With no time to darn it, I sent her back into the house for a block of foam, some roving and a needle-felting needle – I’d have to mend it while we were out and about.  Once we reached our destination, a few minutes of work and it was repaired, with a turqouise swirl and some polka dots for decoration.

IMG_0371[1]

A week later, and the patch has held up quite well.  Ruth and I spent some time together planting Muscari bulbs under the Bavay’s Green Gage Plum, and I was glad to have my workhorse of a wool sweater on.

IMG_0375[1]

Muscari are one of my favorite spring flowers, and the milder weather this week has allowed us to plant many more bulbs.  These delicate little blossoms do more than provide beauty for the gardener – all spring bulbs help suppress the growth of grass.  Grass fights its own battle, attempting to inhibit the growth of the fruit trees that shade it out, so planting bulbs naturally aids the fruit trees which they encircle.  IMG_0369[1]

While we were kneeling in the mulch to plant, Bumblebee, our Welsh Harlequin, came over to Ruth, begging for attention.  All the poultry know that Ruth will always drop what she’s doing to give scritches. IMG_0366[1]

In the winter, the poultry are loose in the yard, eating slugs, slug eggs, weed seeds, adding fertility to all the garden beds.  The trick has been how to keep them out of the beds already planted with garlic and mulched with straw (chickens relish scratching all the straw out of the beds and into the path).  They inevitably get under or over any temporary fencing we put up.  The solution has been to stake the fencing flat – so try as she might, Cookie can’t destroy the garlic bed with her scratching while we have our backs turned – but she can peck and find any seeds leftover in the straw.  (In the spring, when the birds return to their run in the orchard, the fencing comes up just as the garlic is germinating.)

Joining the KCCO today.  Back to tomorrow for the Yarn Along if I have time in the midst of Thanksgiving preparations and the girls’ derby scrimmage.