From my kitchen

Fresh Elderberry Syrup

One of my favorite fall activities is harvesting elderberries to make elderberry syrup.

I have two black elders (Sambucus nigra) and one blue elder (S. nigra ssp. cerulea), and most years can harvest 40 lbs or more of fruit from these three shrubs.


Most of the fruit can be reached from the ground, but I have a pole-pruner to help me access the large clusters up high.

We had a heavy rain which washed all of the forest-fire ash off, so it seemed like a good time to harvest the second round of fruit.


I let the poultry out of their run, so they could hunt for worms and bugs in the rain-soaked mulch.   Ducks don’t like elderberries, and the chickens will only clean up a few.  They would much rather go for the protein-rich invertebrates which abound in the shade garden.

One of the black elders makes smaller clusters than the other, but each individual berry in the umbel is larger.

All parts of the elder contain cyanogenic glycosides. The berries contain the least amount, which dissipates during cooking.   However, stems, leaves, and roots contain toxic amounts.  Elderberries need to be removed from the stems which hold them in a cluster before they can be cooked.   Even the small stems which hold the berries together in their characteristic umbel shape need to be removed before cooking.


The berries stain clothes and skin, and can be fiddly to remove from the stems.   I use a fork.  Freezing the berries first can make it easier to remove them from the stems, as well.

After the berries are de-stemmed, they are washed to remove any grit, bugs, spider webs, and dried flowers.   I then make a batch of fresh syrup, and freeze the rest in packages to make more syrup throughout the winter.   I have dried them in the past, but feel that freezing better preserves the flavor and nutrition.


I take elderberry syrup regularly during cold and flu season – straight, stirred into hot tea, or even mixed with seltzer water.  Elderberries contain very high quantities of vitamin C, and are rich in vit A, iron, B6, and potassium.  They are a nutritional powerhouse, and I feel very privileged to be able to grow them at home, where I can control how the fruit is produced.  The berries and plants are never sprayed.  The shrubs are fed with rock dust minerals, organic poultry manure,  worm castings, comfrey and compost tea.  I know that I am feeding the soil so the plant can benefit and produce for me the most nutritionally-dense berries possible.

If you’re local and interested in some of my all-organic elderberry syrup, please check out the order form HERE (details are on the form). I will be making a batch that will be ready for pickup (or delivery to Oaks Park for derby folks) on Sept 27.  Because I’ve had issues with folks ordering and not paying in the past, I’m going to take payment before I make a batch this time around.

If you have any questions about growing elders or making syrup, feel free to shoot me an email at angela@ParkrosePermaculture.com or leave a comment below. Thanks!

Tea and a Visitor

dsc_0855

One of my kids’ favorite rituals is afternoon tea.  We used to have a high tea on Thursdays, but as the kids have grown and their needs have changed, we’ve shifted to having a casual afternoon tea any day of the week they want to sit down and have it.

dsc_0879George inevitably wants to have tea every day, whether or not his siblings want to.  He loves getting out the china and his favorite mint tea and feeling very grown up.

dsc_0853

With our tea, we had the last of the Seckel pears from our tree, and the first of the medlars (well, I enjoyed them.  George wasn’t so keen.  He did like the pears – I don’t think anyone can resist a pear whose taste matches its nickname,”sugar pear”.)

dsc_0871

While George enjoyed his tea, Hal got some snuggle time with our favorite houseguest: Annabelle the Pionus parrot.  She is the most sweet-tempered, gentle parrot I’ve ever known (and I’ve known a lot of parrots).  She has such a calm demeanor and likes hanging out with the kids, although she seems to prefer Hal to everyone else – which is a good thing, because he absolutely adores her.

dsc_0857

One thing I really enjoy about tea-time is that I can sit and knit while George and I chit-chat.  Today I finished a remnant hat while we were hanging out.  I seem to have lots of small balls of various greys and yellows  in worsted weight and have made a few hats with grey and yellow stripes – I really like the combination.  I’ve now worked through all my grey odds and ends and George has asked me to make him a cotton hat with red in it, so that’s next on the list for knitting projects.  (I also have a shawl on the needles, but I usually like a mindless, easy project to fall back on at the same time, and hats or socks always fit that bill.)

dsc_0876

I’ll be back tomorrow for Ginny’s Yarn Along.

Banana-Sesame-Spelt Muffin Recipe

dsc_0784After a long derby weekend, we had a PJ day at the Baker House today to catch up and recover a bit.

dsc_0788

The younger kids spent the bulk of the morning continuing to listen to Harry Potter and the Goblet of Fire on book CD, while I got some more of the border for my Cassis Shawlette completed.  I started this shawl ages ago, frogged it, and just re-started it after making some changes.  So far, it’s not the most thrilling knit, but I’ve never made a shawl with this kind of construction before (border knit vertically and then body of the shawl picked up from the long edge), so I wanted to give it a try.

Between house chores and knitting, I got about 4 solid hours of yard work done, pruning grape and fall clean up and the like. I made a video showing some of the work I’ve been doing in the front yard as I get reading to cycle three annual beds over to perennial fruit guilds as part of our mini front yard food forest.  You can view it here.

One of the trees I mention briefly in the videos is the the pawpaw.  It’s sometimes called the Arkansas banana – it’s native to the Eastern US and is a fruit that I have a great fondness for.  While I won’t have pawpaws for a few years if I plant them this fall (they have an extremely short shelf life and are not available commercially).  In baked goods, pawpaws and bananas are interchangeable.

Since I had a ripe bananas on the counter and a hankering for pawpaws, I made banana muffins.  Not the same, but tasty nonetheless.  Here’s my favorite banana muffin recipe, and the one the kids always ask for.  We had them for lunch and again for an afternoon snack.  The leftovers will keep nicely for breakfast tomorrow.

This recipe uses tahini and spelt flour, both of which have a delicate nutty quality that melds nicely with the banana.  If you don’t have spelt flour, you can substitute with whole wheat.

Banana Sesame Muffins 

Makes 24 standard muffins

1 Preheat the oven to 400F.  Line 24 muffin cups with paper or grease well

2..Combine the following wet ingredients in a non-reactive bowl:

3 chicken eggs or 2 duck eggs, slightly beaten

¾ C whole milk

⅛ C coconut oil + ¼ C tahini melted together and cooled

3 medium bananas, peeled and mashed

1 tsp vanilla extract

¾ C packed cup brown sugar

dsc_0776

3. In separate bowl, sift together the following dry ingredients.

½ C spelt flour

scant ¾ C unbleached flour

scant ¼ C cocoa

1 tsp salt

1 Tbsp baking powder

4. Then fold following the add-ins to the dry ingredients:

¼ C sesame seeds

¼ C quick-cook oats OR toasted unsulphured/unsweetened coconut

1 Tbsp hemp hearts

5.  Now fold the dry ingredients into the wet, being careful not to over-combine.  Batter will be lumpy.  When combined, fold in:

¾ C chopped chocolate

In a small bowl, combine:  ⅓ C sesame seeds mixed with ½ C turbinado sugar

5.  Fill each muffin cup at least 3/4 full of batter, and sprinkle with sesame-sugar mixture to top.  Bake at 400F for approx 20-23 minutes or until muffins are browning on top, and set in the middle.

dsc_0782

A Morning Indoors

dsc_0764

Hal is at ReWild’s Nature Immersion program on Fridays.  It’s the highlight of his week.  He gets to run around outside all day, learn primitive skills, and engage in loads of imaginative play with his friends.  He comes home tired, filthy, and very, very happy.

It’s not just a benefit for him:  In a house with lots of kids, sending just one kid off for the day has lots of perks.  It not only provides him with adventure apart from his siblings, but it also reduces the conflict, mess, noise, etc in the house by a significant portion.  And considering that resolving sibling conflict normally comprises the bulk of my “parenting” lately, Friday is a day I’ve been looking forward to, as well.  I get so much accomplished on Fridays, all while having a quiet, peaceful morning.

dsc_0743

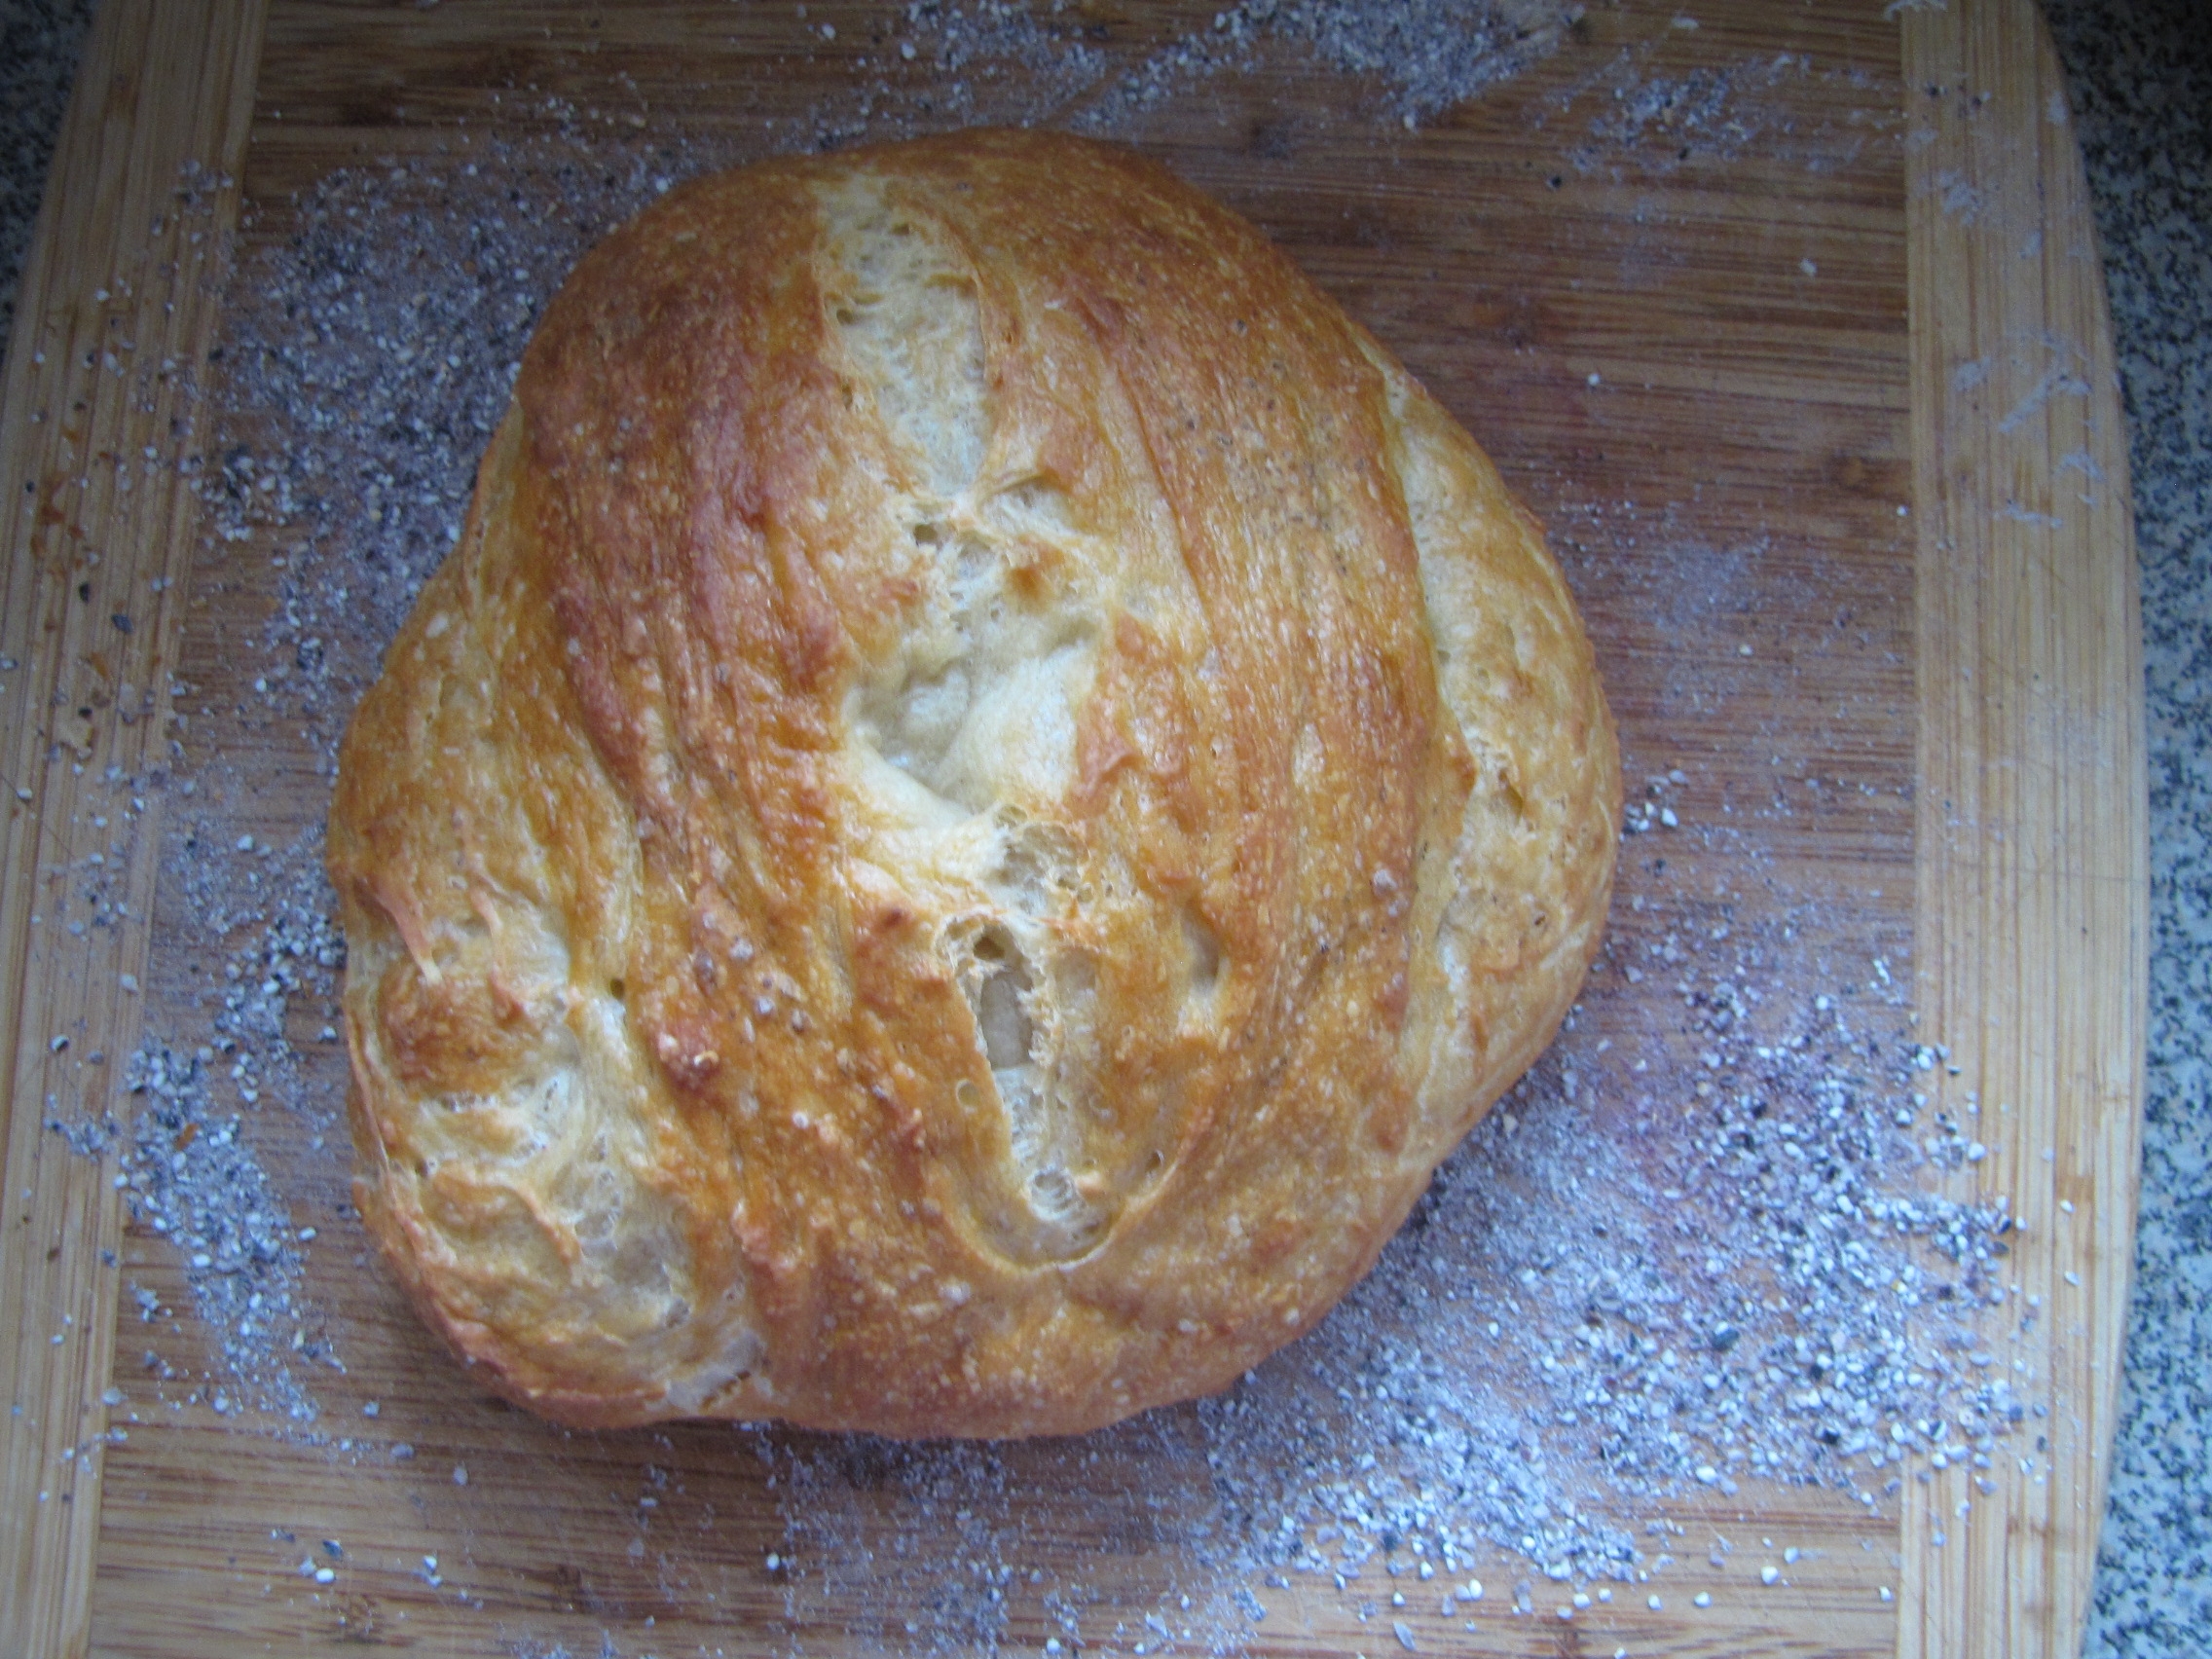
I got a loaf of sesame-spelt bread baked early this morning.  It has 2 cups of unbleached flour, and 1 cup of spelt, so it takes longer to rise, but it gets some loft eventually.  It is much less dense than an all-spelt bread, with the nutty flavor of the spelt still coming through.

dsc_0762

dsc_0760

While the bread was rising, I worked on a pair of top-down mix-n-match socks I started ages ago.  I’m down to the toe on the last sock, and then I can block them!  (Joining Ginny’s Yarn Along. These are 100% wool yarn my sister-in-law gave me some time ago.  They’re leftovers from another project she did, so I’m not sure of the brand.)

dsc_0766

While I’m knitting this morning, George has been alternating between working on a puzzle and playing with items on the nature shelf.  He loves to look at the agates and limpet shells we collected at the beach last month, and added some hazelnuts from the backyard.

dsc_0757

It seems that everywhere you look in the kitchen, there are medlars strewn about.  The kids and I keep bringing them in as they fall from the tree.  They need to sit on the counter for a few weeks to soften and be edible.  I can’t wait to eat them:  they taste intensely of autumn to me.  (See my new video about growing and eating medlars here.)

This weekend is packed with derby.  I’m officiating four bouts, in three days, as well as a few scrimmages.  But next weekend I’m taking the weekend off to work on fall garden clean-up and transition some of the front yard garden from annuals to perennials.  The plan is to add two new pawpaw trees, another pomegranate, and a “Nikita’s Gift” persimmon amongst the shrubs and herbaceous perennials I established the last two years.  Finding derby-life balance is hard for me, especially as autumn in the garden is still a busy time, but I’m looking forward to a crazy derby weekend starting today and a permaculture weekend next weekend.

Fig + 3 Citrus Jam Recipe

14figsnegronne

The dry summer and mild autumn here in Oregon have produced a pleasant surprise: the main crop of Negronne Figs have ripened!  In our cool climate, the only figs suitable to grow are those that produce a delicious breba (first) crop.  Many figs produce small, mealy breba figs that aren’t sweet and aren’t worth eating.  Some varieties – like my Desert King and Negronne figs – are prized for their sweet, abundant breba figs.  Most years the weather turns too cold for the later, main crop of figs to ripen.  However, this year the Negronne’s main crop has been producing about 10 lbs of figs per week the past three weeks.

dsc_0718

With the unexpected abundance of figs so late in the season, I’ve been cutting and freezing and preserving them, because we cannot possibly eat them all fresh.  Truly ripe figs that have the most complex and fully-developed flavor only keep for a few days, and must be utilized quickly.  One way to use up a significant portion of the bounty is to make jam.

Figs are the sweetest fruit, with a Brix rating of 20-30, and rarely as high as 40. (A very rough, untechnical definition: Brix is a measurement of sugar content, with 1 Brix = approx 1-2% sugar by volume).  They have no acid and can by cloyingly sweet.  I find plain fig jam almost overwhelmingly sweet and like to eat it with salty cheese to cut the sweetness.

Another option is to add a highly acidic ingredient to fig jam, so that its sharpness will cut the intense sweetness of the fruit.  I’ve made fig and balsamic vinegar jam, and thoroughly enjoy it – especially over ice cream.  The flavor is sophisticated and refreshing, but not particularly kid-friendly.  This time, I had citrus in the fridge, and so chose that for the acid component of the jam.  (If you like your jam quite tart, feel free to double the lime pulp and lime zest in this recipe.)

dsc_0712

Fig + 3 Citrus Jam

Makes 4-5 half-pint jars

Ingredients:

4 cups of finely chopped fresh figs (I cut them into 12ths)

2 1/2 C white granulated sugar

zest of 1 lime

2 limes

zest of 1 Meyer lemon

juice of 1 Meyer lemon

zest of 1 large orange

1 large orange

1/2 tsp sea salt

Optional: 2 -3 Tbsp Grand Marnier

Directions:

  1.  In a large heavy-bottomed saucepan, combine the chopped figs and sugar, stirring to combine.  Allow to macerate while you prepare the other ingredients.
  2. Using a microplane, zest the lemon, orange and one lime.  Juice the lemon.  Set zest aside.
  3. Remove the peel/pith from the orange.  Section out the fruit, and chop it.  Squeeze the remaining membrane and reserve the juice.  Repeat with the two limes.  (Total reserved juice = about 3 Tbsp)

dsc_0728

4.  Prepare a hot water bath and sterilize jars, lids, and rings.  Recipe makes 4-5 half-pints.

5.  Turn heat to medium on the figs and sugar.  As it warms, stir in the citrus ingredients and 1/2 tsp salt.

dsc_0734

6. Bring mixture to a full boil, and cook, stirring frequently to avoid scorching.  Periodically mash with the back of the spoon or a potato masher to break up the pieces of fig. In 45-60 min, jam will thicken to desired consistency.  Keep in mind, this is an old-fashioned jam without extra commercial pectin, and figs are low in pectin.  The citrus contains pectin and will set the jam, but it will be a little thinner than jams with added pectin.

7. Optional:

dsc_0740

Immediately before pouring jam into jars, stir in 2-3 Tbsp of Grand Marnier (taste, if you want more, add another Tbsp), and stir thoroughly.  Allow to cook for 2 minutes.  (be careful, too much alcohol will thin the jam too much.)

8. Pour finished jam into hot sterilized half-pint jars, wipe rims, place lids and rings on, and process in a hot-water bath for 10 minutes.  Jam will continue to thicken in the jar over the next 24 hours.

Enjoy!

dsc_0753

Pear-Quince Butter Recipe

dsc_0662

Yesterday I spend the morning making Pear-Quince Butter.  It’s a twist on the traditional apple butter because I’m using the ingredients I have on hand.  I have an abundance of quince trees in the garden, and the fruit is now beginning to ripen up.  I also have basket full of pears right now – some from our Seckel pear tree, but most the girls picked up in Hood River this past weekend.

I make membrillo out of quince every year, and also Caramel-Spice Pear Butter (sorry, the recipe is top-secret!), but with the quantity of both in my kitchen right now, I thought I’d try mixing them together.  I’m quite happy with the result.   Here’s my recipe:

Spiced Quince-Pear Butter

5 large quince

10 pears (I used a mixture of Comice, Seckel, Barlett, and Red Anjou)

1/4 C water

6 C sugar

1 tsp ground cinnamon

3/4 tsp ground ginger

1/2 tsp allspice

1/2 tsp ground cloves

1 tsp kosher salt

Juice of two lemons

4 Tbsp brandy (optional)

Directions

  1.  Wash the fruit, peel and core it.  Cut the quince into 16ths and the Pear into 8ths (quince are harder and take longer to cook, cutting them into smaller pieces insures they will cook at the same rate).
  2. To a large heavy-bottomed pot or Dutch Oven, add the chopped fruit and water.  Cover, and cook on medium until all of the fruit is tender (about 30 min).
  3. After fruit is tender, remove lid and reduce head.  Here you have two options:  for a super smooth butter, process fruit in a food mill.  For a more rustic butter, mash thoroughly with a potato masher.   Measure pulp.  You should have 8 cups.

    dsc_0671
    Clockwise from far left: salt, cinnamon, allspice, cloves, ginger.
  4. Return the pulp to the pot.  Add spices, salt, and sugar.  Cook, uncovered, stirring frequently, until the butter cooks down to a desired thickness (depending on the heat and frequency of stirring, about 45 min to 2 hours)
    dsc_0681
    Butter halfway cooked down


  5. Halfway through cooking down the butter, Heat up the hot-water bath canner.  Place clean jars in the canner and bring them up to a boil.  Place lids and rings in a small saucepan and warm them (do NOT boil, it damages the rubber seal).
    dsc_0680

    I use a lid-rack I found at a thrift store ages ago to keep the lids from being in direct contact with the bottom of the pan.  It also makes them easy to grab when filling jars.
    dsc_0692

  6. When butter is ready, stir in lemon juice (and brandy, if desired).  Cook 2-3 minutes.
  7. Fill half-pint jars, clean top of the jar, place lids and rings on snuggly. Process 5 minutes in a hot-waterbath canner.  Remove from heat and let cool for several hours.  Makes 9-10 half pint jars.
    dsc_0698


Chanterelle and Gruyere Tart Recipe

dsc_0541

I’ve made this Chanterelle and Gruyere Tart a few times in the past few weeks.  It’s quick and easy, and uses ingredients I’ve had readily on hand in the pantry, and in the garden.    It only takes a few minutes to put together, and is packed with autumnal flavor.  If Chanterelles aren’t in season, you can substitute with any fresh, meaty mushroom, thinly sliced.

Chanterelle and Gruyere Tart

1 piece storebought puff pastry, thawed in the fridge

4 oz chevre, crumbled

6 oz gruyere, shredded

One heaping cup chanterelles, thinly sliced

Four pieces of curly kale, stems removed, and torn into one inch pieces

Balsamic vinegar

Extra virgin olive oil

Pink Himalayan salt

Cracked black pepper

1 egg whisked with 1 Tbsp heavy cream


Directions:

1)Preheat the oven to 375 F.  Roll out the pastry.  Line a jelly roll pan with parchment paper and lay the pastry on top.  Brush the edges of the pastry with egg wash mixture and fold over 1/2 inch.  Press with a fork to seal and crimp the edges.  Add more egg wash to the outside crimped edge.  Return to the fridge to chill for 10-15 minutes if the pastry has warmed too much during this time.

dsc_0543

2) Carefully spread the chevre across the bottom of the pastry.  Sprinkle with half the shredded gruyere, the mushrooms, and the kale.  Top with remaining gruyere.  Drizzle with balsamic vinegar and olive oil, then sprinkle lightly with pink salt and liberally with cracked black pepper.

3) Bake at 375 for 15-18 minutes or until crust is browning.  Place under the broiler for 2-3 minutes or until cheese is bubbling and turning golden.  Remove from oven and immediately place on a wire cooling rack.

dsc_0551

Cut into 16 pieces.  Serve warm or at room temperature.  Enjoy!

.

End of Summer Salad

dsc_0597

A friend from derby is recovering from a broken leg and I’m taking her tomato bisque and homemade bread for dinner and needed a salad for the side dish. The garden is bursting with tomatoes and peppers, the mint has spread everywhere, and the fall curly kale is ready to start harvesting.  I have a big block of feta in my fridge and a lot of Israeli couscous in my pantry.  And thus, this salad came together.

(Note: The recipe serves four, but some of the quantities look large in the photos because I made a quadruple batch to share with my parents and so our family could have some for dinner, too.)

End of Summer Israeli Couscous Salad

Serves four

2 cups Israeli couscous (sometimes sold as “pearl couscous”)

2 1/2 C water

2 tsp salt (I prefer pink Himalayan)

1 1/2 Tbsp extra virgin olive oil

2 C chopped tomatoes (I used a mix of cherry and beefsteak tomatoes)

1/2 C finely chopped sweet peppers (I used pimiento and part of a yellow bell pepper)

1/4 sweet onion, very finely chopped

2 large pieces curly Scotch kale, washed, ribs removed, and chopped

2 tsp fresh mint, cut in a fine chiffonade

2 tsp red wine vinegar

1/8 tsp cracked black pepper

6 ounces feta, crumbled

Directions:

  1.  In a medium saucepan, bring the water and salt to a boil.  Add the couscous, cover and cook for 8-10 minutes or until couscous is tender and cooked through.  Remove from heat, remove lid, toss gently with the olive oil, and allow to cool to room temperature.

dsc_0592

2.  In a large bowl, combine all chopped veggies, mint, pepper, vinegar, and feta and gently toss.

3.  Gently fold the cooled couscous into the bowl of veggies. Add salt and additional pepper to taste.  Garnish with sprigs of mint, and serve at room temperature or chilled – your choice. Enjoy!

dsc_0602


Chai-Spice Oatmeal Muffin Recipe

IMG_3588

My youngest child, George, loves muffins.  Several mornings a week, he requests muffins for breakfast.  And he wants variety.  Sometimes I make banana-tahini muffins, sometimes blueberry with streusel topping, sometimes molasses spice muffins.   Thanks to G’s desire to be surprised with new types of muffins, I am always working up new recipes.

IMG_3581

We have a lot of chai tea mix leftover from the holidays, so I have been working up a recipe for Chai-spice muffins.  Our chai mix contains powdered milk, black tea, sugar, cinnamon, clove, cardamon, anise, and ginger.  Over the past week I’ve baked several revisions and the kids gave me their honest feedback of every attempt.  Here’s the winner:

George’s Chai-Spice Applesauce-Oatmeal Muffins

1 1/2 C old-fashioned oats, uncooked

3/4 C spelt flour (you can substitute whole wheat)

3/4 C unbleached flour

1 tsp baking powder

3/4 tsp baking soda

2 Tbsp chai tea mix

1 C applesauce (unsweetened)

3/4 C firmly-packed dark brown sugar

1/2 C whole milk

1 egg

3 Tbsp oil (I use hazelnut, but you can use vegetable)

3/4 C chopped dark chocolate or chocolate chips

Optional: sprinkle tops of the muffins with brown sugar before baking.  

Directions:

1)Preheat oven to 400 F.  In a large bowl sift together dry ingredients

2)In a separate bowl, whisk together applesauce, brown sugar, milk, egg, and oil.

3)Fold wet ingredients into dry until just combined, then fold in chopped chocolate.  Be careful not to overmix.

4)Fill lined muffin tins with batter.  Tins will be nearly full to the top.  Sprinkle with brown sugar if desired.

5)Bake at 400 F for 22-24 min, rotating halfway through.  Let muffins rest for 5 min before removing from pan and cooling completely on a rack.  Makes 12 muffins.

IMG_3586

I am behind on my blogging, but it has been for good reason (and for once, that reason isn’t roller derby!).  I’ve joined the blogging/writing team at Azure Standard, and have been busy working on my first two pieces.  Keep an eye out for my posts in Azure’s new Healthy Living blog.  I’ll be writing about gardening, permaculture, beekeeping, poultry keeping, and sharing LOTS of my original, healthy recipes.

Apple Cider Vinegar Caramels Recipe

IMG_3145

I’ve always loved making candies at the holidays – particularly nut brittles and toffees.  This year, I’m trying something different.  And I have the Portland Village School to thank for the inspiration:  Earlier this month, I had a table at that school’s craft fair.  During the last hour, the volunteers brought each of us vendors a couple of apple cider vinegar caramels to help us get through the last bit of the afternoon.  The caramels were delicious, and I loved how the ACV cut the sweetness of the soft, rich caramel.  So, I set out to come up with my own version to make for gifts this year.

IMG_3127

Angela’s ACV Caramels (with Pink Himalayan Salt)

Ingredients

-4 Tbsp raw apple cider vinegar (you can use Bragg’s or homemade) (Note: when making this recipe for myself, I prefer a stronger ACV flavor, and use 6 Tbsp of vinegar)

-3/4 C brown sugar

-3/4 C granulated sugar

-3/4 tsp sea salt

-1 1/2 C heavy cream

-2 tsp vanilla extract

IMG_3125

Pink Himalayan Salt for sprinkling

Directions:

NOTES ON SAFETY: Candy-making involves boiling sugar, and can be dangerous and cause serious burns, so work carefully.  Always work with a bowl of ice water nearby in case boiling sugar splashes on your skin.  Also, as the caramel boils, it will bubble and foam up quite high in the pan – make sure your saucepan is deep enough to prevent the boiling sugar mixture from overflowing.  

1)Line an 8×8 square pan with parchment paper, and butter the parchment.

IMG_3124

2)In a saucepan on medium heat, add the apple cider vinegar and simmer until vinegar has reduced by half

3)When vinegar has reduced, add the sugars, heavy cream and sea salt to the saucepan.  Continue to cook on medium, and add a candy thermometer to the pan.

4)Cook, scraping down the sides now and then, until the mixture reaches 240 F.  This will take several minutes, and the boiling mixture will foam and rise up quite a bit – if it approaches the top of the pot, stir it back down.

5) When the caramel reaches 240 F, immediately remove from the heat and carefully stir in the vanilla extract.  Quickly pour into the parchment-lined pan.

IMG_3133


6)Let pan of caramel sit on the counter for 2-3 minutes and then sprinkle with desired amount of pink Himalayan salt.  Transfer pan to the refrigerator for a few hours until caramel is set.

7) To cut the caramel:  Turn caramel out onto a lightly buttered cutting board.  Coat both sides of your knife blade thinly with butter.  Cut into squares.  If you find the caramel is tearing or sticking instead of cutting, re-apply butter to the knife.

8) IMG_3147

Place each square in a rectangle of wax paper and twist ends to close.  Store caramels in the fridge and eat within 2 weeks.

Recipe Variation: Omit apple cider vinegar.  Heat caramel mixture to 245 F, remove from eat and add vanilla extract to the caramel, also add 2-3 Tbsp whiskey (be careful, the alcohol will boil immediately when it contacts the hot caramel).  All other directions are the same.


Recipe © 2015, Angela Baker.  Please don’t reprint or use photos without permission.  Thanks.


Autumn Gifts

IMG_2488

I’ve been busy the last few days making things for loved ones.  I have lots more to share, but am behind on uploading and editing photos.  So, for now, a few pictures of the gifts We’ve been making this week.

Above:  A little indoor fairy garden as an early birthday present for Bea, who maintains the fairy garden outside in the yard, and is always sad to see it go dormant over the winter.  Now she’ll have her own little garden to tend to right in the windowsill.

IMG_2457

I have an abundance of beets, and my dad really loves beet salad.  George helped me make him this one with candied nuts, bleu cheese, and a balsamic dressing.


IMG_2496

IMG_2498

Lastly, I finished and blocked a shawl for a friend who is going through a difficult time right now.  It’s a prayer shawl, made in 100% Brown Sheep wool.

More soon.  Hope your weekend is filled with good things.

Herbal Salves


IMG_2339

The past few weeks, I’ve been working on batches of healing salves, both for custom orders and to stock our soon-to-open Etsy store.  We grow the herbs with all organic methods (of course!), and dry them in a solar dehydrator, utilizing only the energy of the sun. Other ingredients in the salves include local beeswax from natural beekeepers, and organic oils.

IMG_2223

IMG_2325

The herbs (such as calendula, above) are infused into organic coconut oil and organic olive oil by sun-infusion or by simmering in a double boiler for 6-8 hours.  Don’t the blossoms turn the oil a lovely sunny shade?

IMG_2316

All of the salves are made in small batches with custom essential oil scents.  As of right now, I’m making four types of salves:

Calendula-Plantain Soothe Salve for rashes, ezcema, and dry irritated skin.

Arnica-Vervain Bruise Balm for bumps, bruises and sports injuries.

Comfrey Bone Balm for broken bones, bone bruises, sprains.

All-purpose Healing Salve with Calendula, Lavender, Plantain, Rosemary, Yarrow.

IMG_2322

While the salves are cooling and setting up on the counter (and filling the house with the soothing scent of sweet orange oil and cedarwood), I’m off to print labels for the tins.  The rest of the day is filled with prep for homeschool co-op tomorrow, Life of Fred mathematics, and some fall clean-up garden projects.

Blessings on your weekend!

Buttercups and Quince

IMG_2195

Harvesting by myself in the garden this morning.  Picked 65 lbs of produce – the bulk of which was winter squash and quince.  The quince are just starting to ripen, so I didn’t pick very many, but a few were definitely ready.  Quince (Cydonia oblonga) may not be the most lovely fruit in the world – looking like a misshapen pear covered in shedding fuzz – but the aroma from this crate of fruit was nothing short of heavenly.  The scent is likened to guava and honey with overtones of vanilla and rose.

These ancient pomes are a fruit worth keeping in cultivation and in the kitchen.  In fact when people ask me what fruit tree they should pick if they only have room for one, I always say, “quince!”  Naturally dwarf, with a lovely shape, handsome bark, stunning fragrant pink flowers, quince are an excellent landscaping tree.  Most varieties are self-fertile, so you only need one.  A quince will also bear twice as much fruit as an apple tree the same size, and the fruit are pestered by far fewer insects than apples.  I love them so much, I have five varieties in my garden, although three are too young to be producing yet.

IMG_0156[1]

My favorite way to enjoy quince is to turn it into membrillo – a Spanish quince paste made from cooking the high-pectin fruit for hours and hours until it becomes a beautiful orangey-red.  It is then poured into a dish to cool, where it sets into a dense, slightly grainy jelly that is amazing on toast or with Manchego cheese.

Quince are very hard and most varieties cannot be eaten raw, but roasted they turn pink and sweet and fill the kitchen with a delicious fragrance.  Any apple pie or applesauce is augmented significantly by the addition of quince to the recipe.  Any roasted pork or poultry dish would also pair beautifully with roasted quince.


IMG_2198

IMG_2197

As I was ripping up dead winter squash vines and spent tomatoes, I ended up with the first few witner squash of the season.  Most of the vines are still going strong, and there are dozens more squash that will be picked over the next few weeks.

Most of the squash I plant are Buttercup varieties.  Buttercups are a type of Cucurbita maxima, and have the benefit of being a meal-sized squash, not a hulking behemoth the modern family has trouble making use of.

The one above is “Burgess Buttercup” and has consistently been rated the best-tasting winter squash variety.  It is slightly dry with dense bright orange flesh.  It is fantastic for roasting, and holds its shape in soups and stews.  I have steamed and mashed it and made pumpkin rolls that were everyone’s favorite at the holidays.


IMG_2201

Honestly, I’m looking forward to the end of the garden year.  Volunteers have ended their shifts for 2015, and the next few weeks I will be harvesting by myself – more quince, oodles of winter squash, ground cherries, Inca Berries, lingonberries, and the like.  Then, we’ll be down to cleaning up the garden, planting garlic, and growing only what our family eats off of for the winter (kale, leeks, etc).  As much as I love running the garden project, winter is a nice sabbatical, and a chance to focus on indoor activities and hobbies.

Autumn Fires


IMG_2158

We’re slowly working on getting out the autumn decorations and switching the Nature Table over from summer to fall.  The children have been collecting items from the yard and around the neighborhood.  It seems like every time I step outside, I find someone’s little collection of goodies on the front step or back table.

I think some of the nature-mindedness is due to the time of year, but some of it is due to a wilderness study we’ve started:

IMG_2130

I’m teaching a class at our homeschool co-op based on the book My Side of the Mountain by Jean Craighead George.  It is one of my favorites from childhood.  The main character, Sam, runs away from his home in New York to live in the wilderness.  Every week at co-op, we’re discussing a few chapters of the book, making crafts that correspond with the chapters, and learning a wilderness survival skill that Sam utilizes in that section of the book.

Bea is the only one of my kids taking the class, but the other children didn’t want to miss out, so each week I’m reading the assigned chapters aloud, and the whole family is learning the skills we’ll test out in class.  The hardest part so far has been reading only the assigned chapters and not reading ahead – everyone wants to know what happens next!

IMG_2163

After reading our chapters, it was George’s turn to be my kitchen helper and we baked a Sun Cake in honor of the shrinking days now that the autumnal equinox has passed us.  (You didn’t know a four yr-old could get so much powdered sugar on the floor and counter instead of the cake but he had fun doing it.)

IMG_2166

The cake is a basic yellow butter cake (2 8-inch rounds), with orange glaze and candied orange peel.  I would normally put orange marmalade in the middle, but my sister had just brought us back a little jar of wild huckleberry jam from her trip to Glacier National Park, so I used it instead (a very tasty substitution, if I do say so).

While George and I finished up the cake, the older kids watched a few videos on primitive methods of starting fires, including how to make tinder bundles and start a fire with flint and steel.  (They already know how to use a bow drill to start a fire thanks to a fews summers’ worth of Trackers camps.)

In our chapters we read aloud today, Sam initially fails at fire-making, only to succeed a few days later.  The kids’ assignment is to learn about making a fire without matches and then collect items with which to make a tinder bundle.  (At co-op on Friday, the students in my class will try various types of tinder bundles and methods and see if we have the same troubles Sam does, or if we can succeed in catching an ember and starting a fire.)

IMG_2171

When the cake was done, we all went outside to collect items we thought would make good tinder.  The neighbor boys lent a hand, and the kids gathered everything from pine needles to dry leaves and an old birds’ nest.  Bea used her pocket knife to shave off bark curls, and lamented the lack of cattails in the neighborhood, from which we could gather the fluff for excellent tinder.

In honor of our fire-making adventures and the beginning of fall, this Robert Lewis Stevenson poem seemed fitting to leave you with:

Autumn Fires

In the other gardens
And all up the vale,
From the autumn bonfires
See the smoke trail!

Pleasant summer over
And all the summer flowers,
The red fire blazes,
The grey smoke towers.

Sing a song of seasons!
Something bright in all!
Flowers in the summer,
Fires in the fall! 

–   Robert Louis Stevenson


Putting Up Plums

IMG_2003

September is the month when the various kinds of prune plums ripen in succession.  I have so many, I scarcely know what to do with all of them.  When the Shropshire Damson starts producing next year, I will be absolutely flooded with plums at the end of summer.


IMG_1977

We had a brief run of rain, followed by hot weather, and now more rain, and the late plums are all splitting faster than I can pick them.

IMG_2007

When jams, sauces, plum brandy are all made and still there are buckets of very ripe plums left, the solution is to dehydrate them.  Afterall, prune plums – with their intense sweetness and freestone habit – are perfect for drying.

The kids built a blanket fort in the living room this afternoon, and I got around to washing and halving bowls and bowls of plums to fill the dehydrator trays. (It’s cloudy and rainy, today, so I couldn’t use the solar dehydrator, but that’s okay, because it’s chilly in the house tonight, and the heat from the electric dehydrator is filling the kitchen with the delicious honey aroma of the drying fruit.)

We go through a lot of dried fruit outside the summer months.  Aside from eating them whole, prunes go into much of my winter cooking.  One of my favorite dishes is a tagine with beef or lamb and prunes, pumpkin and chickpeas with a side of couscous.  If you don’t think you like prunes, try them in a tagine and you’ll discover how great they can be.

If you have a favorite plum recipe, I’d love to hear it, because I have more plums waiting to be picked!


Healing Salve Recipe

IMG_0459[1]

‘Tis the Season to make Christmas gifts, and Bea and I started yesterday morning, making another, larger batch of comfrey-rosemary salve.  (Joining the KCCO today.)

Comfrey, also known as knit-bone, is touted as having strong healing properties.   I have used it daily on my broken ankle once the stitches healed (don’t use the salve on open wounds), but it is also commonly used on bruises and other injuries.  It is a soothing salve to rub onto bumps, bruises, sore muscles, etc – all of which are common place in a house with 3 roller derby girls and very active, energetic kids.

IMG_0426[1]

Bea and I made this batch early in the morning before the other kids woke up.  At ten years-old, she can work with the hot wax and oil safely (with a little supervision, of course).

We have a $0.25 pot from the thrift store that is used only for beeswax-based projects.  Most of the jars were also from the thrift store, as well as some baby food jars given to me by a friend.

IMG_9869[1]

I grow loads of Russian Bocking Comfrey in my garden because it is a dynamic accumulator and sequesters all sorts of minerals in its leaves – thereby making it a great fertilizer in the garden, as well as excellent duck forage.  It has deep tap roots (up to 12 feet deep!), which help break up our dense clay soil, and its delicate purple flowers are a favorite of bees – blooming for a long stretch.

I had picked the comfrey and rosemary a few months ago and dried them, but you can also order the dried herbs online if you don’t have a source in your yard.

Once you have the ingredients gathered, the salve takes only about 15 minutes to make.  Here’s our recipe:

IMG_0460[1]

Comfrey-Rosemary Salve

3/4 cup organic olive oil 

4 Tbsp dried comfrey leaves

3 sprigs dried rosemary (you can substitute 2 Tbsp dried lavender if you prefer)

1 Tbsp vitamin E oil

3/4 cup organic coconut oil

6 Tbsp chopped beeswax

10 drops tangerine or 4 drops patchouli oil (if using dried lavender, substitute with lavender oil)

Directions:

– Infuse the dried herbs in the olive oil.  This can be done two ways:  either place the herbs and oil in a double boiler and heat gently over water (do not boil the oil over direct heat) for 30-45 minutes, or place dried herbs in the oil, cover and store in a dark place for 3-4 weeks.  (Note: Do NOT use fresh herbs – the water in them will cause your oil/finish salve to mold.  Herbs must be thoroughly dried.)

-Strain the dried herbs from the finished olive oil and discard them in the compost.

-Place the chopped beeswax, infused olive oil, coconut oil, and vitamin E oil in a pan.  Heat on medium-low heat, stirring constantly until all ingredients are completely melted.

– Immediately remove from the heat, and stir in the tangerine oil.

– Pour into jars, and let cool with the lids off.  Once thoroughly solidified, the salve will keep in a dark place at room temperature for 6 months or more. (Our kitchen was very cold when we made the salve, and it cooled very rapidly, resulting in cracks on the surface of the salve.  Next time, I will wrap towels around the jars or perhaps cover them with a pot so they cool more slowly.)

Back tomorrow for the Yarn Along!

Our Daily Bread

IMG_0345[1]

We bake bread several times a week here.  When the girls were little, we only made bread once a week.  But now with four active, growing children, we can polish off a loaf every day – sometimes in just one meal.  Thankfully, it is an activity I have always enjoyed – especially when the kids help.  (One day, we hope to get a wood-fired bread oven built in the backyard that would be available for the community to use when we fire it up once a week.  But for now, we are content to warm the house on a chilly night by baking in the kitchen.)

IMG_8442Recently, I got together with some moms from our homeschool co-op, and a guest came to share her orange-glazed sticky bun recipe with us.  She also shared a beautiful poem
(found in an old cookbook) about the artistry and importance of the simple act of baking bread, and I want to share it with you:

Our Daily Bread by Grace Noll

An ancient rite, as old as life is old:

A woman baking bread above a flame

Its value is far greater than pure gold,

it is ageless, timeless, and the simple name

Of bread is wholesome as the summer sun

That has lit and warmed the fields that men might eat;

It is as clean as are the winds that run

Their light-food way across the waving wheat.

A loaf is only half a loaf unless

We share it, and unless we say

Our grace above it, asking God to bless

That bread that He has given day by day

O women, handle flour as you should!

It is a thing God-given, priceless, good.  


Oregon Autumn Tart

IMG_0287[1]

Sometimes, an abundance of ingredients in the pantry necessitates the creation of a new recipe.  We had bag of fresh local cranberries in the fridge, a few handfuls of lingonberries from the garden, and a glut of locally-grown hazelnuts.  A perfect collection of ingredients for a truly Oregonian Autumnal tart.

IMG_0296[1]

Oregon Autumn Tart

Ingredients:

1 sheet puff pastry

For the filling:

2 1/2 C fresh cranberries and lingonberries, washed 

1 1/2 C granulated or unrefined natural sugar (you can use 1 C for a more-tart dessert)

zest of one orange (I prefer to use a microplane for a very fine zest)

For the topping:

1/2 C unsalted butter, softened

1/2 C light brown sugar

1/2 C granulated sugar

2/3 C unbleached flour

pinch of salt

1/4 tsp nutmeg

1 heaping C hazelnuts, coarsely chopped

IMG_0297[1]

Directions:

In a large bowl, combine butter, sugars, flour, salt and nutmeg.  Using a pastry cutter or a clean hand, cut butter into other ingredients until it is in pea-sized pieces.  Then, fold in hazelnuts.  Set aside. (Can be made one day in advance and refridgerated.)

IMG_0288[1]

In a large skillet, combine berries, orange zest, and sugar.  Cook on medium heat, stirring often.  (As the berries pop, their juices will dissolve the sugar.)  Use the back of your spatula to crush the cranberries as the cook, and continue to simmer until mixture is thickened and all berries are beginning to cook down.  Remove from heat and allow to cool completely. 

While berries are cooking, roll out puff pastry to fill a jellyroll pan.  Place on parchment paper, and then in jellyroll pan.  Roll the edges of the puff pastry over and use a fork to crimp them down.

Preheat oven to 375F.  Spread cooled berry mixture evenly over the pastry with a spatula.  

Sprinkle streusel-nut topping over the berries, pressing it down gently.

IMG_0304[1]

Bake for 25-30 minutes until pastry is puffed and golden, berries are bubbling, and streusel topping is begins to turn golden.

IMG_0303[1]

Allow the tart to cool thoroughly before cutting into squares.  Serve with whipped cream if desired.

I confess, leftovers of this tart made for a pretty darn good November breakfast with a cup of coffee.

Hope you are enjoying all the good things of the season, too.


Archangel

IMG_0174[1]

The forecast for today is miserable – snow, freezing rain.  In anticipation, we finished winterizing the garden and got the garlic crop planted and mulched (weeks and weeks later than normal).   The duck house and chicken coop have been mucked and loads of fresh straw added, since the birds are not yet acclimated to the cold weather just now coming our way.  With the outdoor chores done, we can keep to the house knowing everything is taken care of outside.

IMG_0259[1]

I got a pot of white bean soup going first thing so I wouldn’t have to worry about dinner this afternoon.  As usual – no recipe, just using up what we have: to the soaked beans, we added 2 ham hocks, a finely chopped sauteed onion, 6 cloves of fermented garlic, La Ratte fingerling potatoes  (above) and Nantes carrots dug from the garden on Monday, and Fordhook Giant Swiss Chard plucked this morning (and cut up very finely so the kids will eat it).

I also threw in a handful of finely chopped golden raisins – they melt into the broth and add not only vitamins, but a subtle sweetness that complements the salty ham and adds complexity to the dish.  Later, Ruth will start a pot of brown rice and we’ll call that good for dinner.  Simple, nourishing, and perfect for a snowy day.

IMG_0220[1]

While the kids are making a Lego explosion all over the living room, we’re finishing our book on CD and I’m hoping to cast on this beauty (a lace-weight adaptation of this pattern).  It’s been a long time since I’ve knit a shawl for myself, and I am already ahead on my Christmas knitting (thanks to all the time off my feet with that broken ankle), so I thought a small project just for myself might be okay.  The yarn is Malabrigo Lace, in the colorway Archangel – found on deep clearance online (with free shipping!).  Fingers crossed it will be finished in time to wear for Thanksgiving dinner.

Elderberry-Rose Hip Syrup

IMG_0073[1]

A friend very kindly picked me loads of wild rose hips.  These red-orange fruits of fall are loaded with vitamin C, lycopene and beta-carotene.  They can be dried for tea, or used fresh for syrup and jam.  (Take note – the seeds inside are covered with irritating hairs, and if the fruits are cut up, the hairs need to be removed.  The seeds and outside of the fruit are edible.)IMG_0069[1]

Late in the summer, when our elderberries were in full production (and I was still out of commission), my husband picked and froze loads of berries for me.    Adding the rose hips to my elderberry syrup seemed like a great way to boost the health-benefits of this winter-time supplement.

Here’s my updated recipe:

Elderberry Rose Hip Syrup

Ingredients:

5 cups fresh or frozen elderberries (see prep below)

2 cups fresh unsprayed (preferably wild) rose hips (see prep below)

thumb-sized piece of ginger, skin peeled off

5 cups water

4-5 cups organic unrefined sugar

1/4 cup balsamic vinegar

IMG_0062[1]

Step 1: Remove all stems – even the smallest ones – from the berries (see my notes on elderberries and cyanide here.  (If using frozen berries: Let the berries thaw slightly (as seen above),  then use a fork to easily knock them from the stems.  Discard all stems and leaves in the compost.  Rinse berries to remove any debris or spiders.

IMG_0089[1]

Step 2: Rinse the rosehips, and remove any that are soft and mushy.  With your fingers, pull off the dried brown petals from the blossom end of the hip (also called a “haw”).  Measure out two cups of whole hips (the hips will not burst when cooked, so I don’t cut them open and remove the hairs/seeds for this recipe).

Step 3: Add berries, hips, ginger, and 5 cups water to a heavy-bottomed pan.  Bring mixture to a boil, then reduce to a simmer with the lid off, for 45 minutes.

Step 4: Strain the liquid ad berries, using a fine strainer or clean tea towel, carefully crushing the hot fruit pulp as you do so.  Discard the mashed fruit.  Measure the quantity of juice.  It should be around 5 cups.

Step 5:  Add strained juice back to the pan.  For every cup of juice, stir in 2/3-1 cup of sugar (less sugar will yield a runnier final product).  Bring mixture to a boil, and boil, stirring frequently, until mixture is reduced by one-third to one-half, and thickens to desired viscosity.

Step 6: Add balsamic vinegar (or substitute with 1/3 cup apple cider vinegar for a brighter flavor), and stir.  Ladle hot syrup into jars, and store in the refrigerator for up to six months, or process in a hot-water bath canner.
IMG_0097[1]

The syrup is very good over ice cream, or pound cake, or mixed with a little hot tea or brandy.

IMG_0100[1]


As a health supplement, the syrup is commonly taken as 1/2- 1 tsp daily in the fall and winter.  My children enjoy it in a small glass of seltzer or orange juice.

Back tomorrow with some garden work from today.  Hope you had a restful weekend.

October bounty

IMG_0122[1]A few images from the past week:

IMG_0116[1]


Picking highbush cranberries (Viburnum trilobum) back by the chicken coop.  There are many nurseries that stock this species (or group of species), but unless you acquire a variety specifically selected for eating, the fruit will be highly unpalatable.  These are from a specialty nursery and the fruit taste very much like a true cranberry (Vaccinium spp).

The birds get about half the fruit, but those we manage to pick substitute nicely for cranberries in any dish.  They also make a lovely red jelly, and dehydrate well.  If you have room, they are worth growing, especially as the plant is less fussy than true cranberries, and the fruit is ready weeks and weeks before the lingonberries.

IMG_0103[1]

Bacon-fat rubbed all over a chicken before roasting yields a spectacularly crispy skin.  This chicken with roasted carrots and onions fed us for three meals: One roast chicken dinner, leftovers for pot pie, and a batch of bone broth.  The garlic, carrots, rosemary, sage came from the garden.

IMG_0120[1]


Picking quince, which will be made into membrillo in a few days.  In the meantime, they fill the kitchen with a delightful floral – almost tropical – aroma.

IMG_0106[1]


Checking on the few monster “Sweet Meat” winter squashes.  Because October continues to be mild, the vines are still green and growing, so the squash are still in the garden.   Looking forward to making soup, gnocchi, and roast squash from these giant beauties.

IMG_0114[1]


Another blessing of the mild weather:  we continue to pick a handful or two of golden raspberries and Inca berries every day for snacks.

IMG_0086[1]Cleaning a gorgeous bag of wild rosehips picked for me by a friend.  They were made into elderberry-rosehip syrup – the recipe for which I will share later in the week.


Simple Kimchi Recipe

IMG_9947[1]   Most of us have come down with the first cold of fall.  If you ask me, nothing is better for a cold than kimchi.  The spicy sourness of this traditional food eases cold symptoms and it is rich in probiotic power.  (It is also good for easing morning sickness, especially when made into soup with noodles.)

Actually, one doesn’t need an illness or excuse to make and eat kimchi.  This lightly-fermented probiotic condiment is simple to make, and is delicious on anything from pizza to scrambled eggs.   Throw some in the middle of your grilled cheese and you won’t be sorry. There are many variations, but most kimchi starts with Napa cabbage.  From there, family recipes vary quite a bit.  I arrived at my own recipe after trying many, many different recipes, combining the elements I liked from each.  I also use a hot pepper paste recommended by the owner of my local Asian market, which I prefer to recipes calling for powdered pepper blended with dried shrimp, sugar, and other ingredients.

Here’s my recipe:

Simple Kimchi

  • 2-2 1/2 lbs of Napa cabbage
  • 1/2 cup kosher salt
  • 2 large glass or ceramic (non-reactive) bowls
  • cold water to cover the cabbage

Prepare ahead: Chop Napa cabbage into one to one-and-a-half inch pieces, including the ribs.  Divide the cabbage between the two bowls, sprinkle each bowl with 1/4 cup kosher salt and gently massage the cabbage a few times (do NOT used iodized salt.  It will give an off flavor to the finished product).  Add cold water to each bowl until the cabbage is covered (you may need to add a plate on top to help keep the cabbage submerged.)

Let bowls of salted cabbage sit at room temperature for 12-24 hours.  Then drain the bowls and rinse cabbage thoroughly in cold water to remove the salt.

Dry the cabbage with a clean tea towel, scrunching gently.  Place the wilted cabbage in a collander and allow it to drain completely.   IMG_9955[1]   Now that the cabbage is prepared, you are ready to put the kimchi together.  (A quick note:  The pictures won’t match the recipe exactly – Our Asian market was out of daikon, so I used three large carrots this time.  Kimchi is very adaptable.  Sometimes, if I can’t find daikon, I will use two Granny Smith apples, an extra carrot, or add another 1/2 lb of cabbage.) In one of the large glass bowls, gather:

  • One small to medium white daikon, peeled and cut into matchsticks
  • 2 large carrots, peeled and grated
  • 6 scallions, root end and the very dark green portions removed, and finely chopped
  • 1/3 cup Korean hot pepper paste (if your brand doesn’t include sugar, add 1 tsp sugar to it)
  • 1/4 cup fish sauce (Golden Boy brand is very good, but if you can’t find it, ask your local Asian grocer which s/he prefers.)
  • A thumb-sized piece of fresh ginger, grated (including juice!)
  • 5-7 cloves of garlic, crushed

IMG_9949[1]   I used to use ground hot peppers, and mixed them with other ingredients, including sugar and dried shrimp.  One day, the owner of our Asian market saw me scanning the shelves and asked what I was looking for.  I told him hot pepper powder for kimchi, and he said, “You should try this instead.  It’s what all my Korean customers buy.”

IMG_9952[1]I’m very glad I tried it.  The pepper paste is delicious, spicy, sweet, salty, and makes a great kimchi.  I don’t like my kimchi super spicy, so if you do, increase the amount of paste to suit your taste.  If you are worried about using up the whole tub, it also makes a fantastic spicy rub for BBQ beef or pork.

IMG_9954[1]   The market has an overwhelming array of fish sauces.  The flavor can vary quite a bit, so if you aren’t sure which to pick, ask the grocer.  If you haven’t cooked with fish sauce before, be prepared – it smells horrendous.  But it is full of delectable umami flavor, and vital to the dish.  Flavor isn’t the only reason it is necessary, however – fish sauce is fermented, and will help jump start the fermentation of your kimchi. IMG_9962[1] IMG_9964[1]   Mix the ingredients in the bowl together until the garlic, ginger and pepper paste are thoroughly distributed.  Then, by hand (you may wish to wear a glove because the paste can make your skin burn a bit), add the cabbage and mix it into the other ingredients, scrunching it with your hand as you go. IMG_9973[1]   Put the kimchi into a fermentation vessel (or two quart jars), packing the ingredients in tightly as you go.  Amongst fermented condiments, kimchi is the most notorious for making a lot of liquid, bubbling over and escaping the vessel.  Because of this, I leave ample head space before adding the weight. IMG_9975[1]   Place the weight and lid on your vessel.  This will keep mold spores and other contaminants out.  If using a mason jar with lid and ring, leave the ring loose, so gases can escape and your jar doesn’t crack.  Place the vessel on a plate to catch any juice that bubbles over during fermentation.

IMG_9972[1]Leave the kimchi on the counter at room temperature for 24-72 hours, tasting it every day, and moving it to the fridge when it as bubbly and sour as you like.  Be aware that by the second day, a lot of liquid may have bubbled over.  This is normal, and a sign that the good bacteria are creating a health pickled food.  (Kimchi is lightly fermented, and unlike sauerkraut, is ready in days instead of weeks.  Leaving kimchi on the counter too long will result in a mushy, unpleasantly sour final product.  Once it is moved to the fridge, kimchi will still slowly ferment.  Enjoy it in the first two weeks after you make it for the best possible crunch and flavor.)

(Joining Wooly Moss Roots for her Gratitude Sunday today.  Very grateful that in the midst of feeling crummy, I can make something to help us feel better and get better.  It’s good to take care of my family after months of being unable to do so.)

More from out in the garden early in the week.

Snowy Yarn Along

IMG_9232


George peered out the window this morning and asked, “Where all my snow go?”  Winter’s brief visit has ended, leaving us a landscape of sodden ground and emerging daffodils.

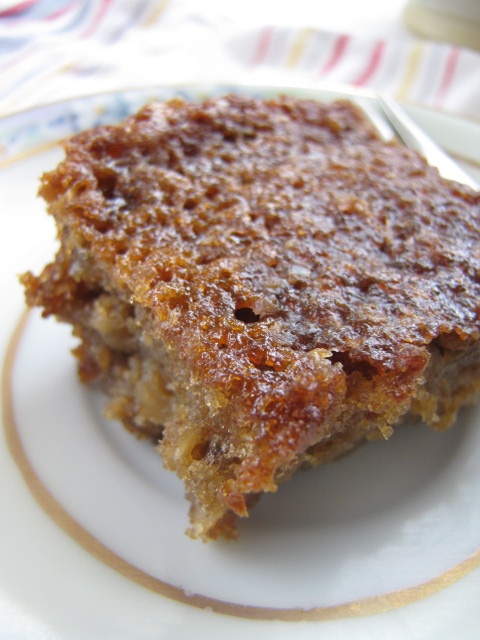
While we were snowed in for four brief days, I baked – and my voracious mob of children consumed – four loaves of bread, endless desserts, and two 9×13 dishes of oatmeal applesauce cake.  The original gluten-free recipe can be found here, but due the flurry of baking and our inability to get to a grocery, I was forced to rework the recipe around the contents of my pantry.  The resulting changes yielded a moist, chewy, delicious dessert as good or better than the original, so I thought I would share the altered recipe here:

Make-Do Oatmeal Applesauce Snack Cake

In a small sauce pan, combine:

1 C whole milk

1 1/2 C applesauce 

1 heaping C rolled oats (NOT steel-cut)

Cook together on med-low heat, until oats are cooked thoroughly.  Allow to cool to room temp.

While the oat mixture cooks, use a stand mixer with paddle attachment to cream:

1/4 C unsalted butter

1/4 C hazelnut oil (or other mild-flavored oil)

3/4 C sugar (I used natural unrefined sugar)

1/4 C maple syrup

1 C dark brown sugar

1 tsp pure vanilla extract

Add 2 large eggs (I used duck eggs), one at a time, and beating thoroughly between each addition.

In a separate bowl, combine dry ingredients:

1/2 C whole wheat flour

1/2 C spelt flour (you can use an additional 1/2 C whole wheat if you don’t have spelt flour)

2 tbsp flaxseed meal

1 tsp baking soda

1 tsp salt

1 tsp cinnamon

1/8 tsp nutmeg

pinch of clove

With mixer on low, slowly add dry ingredients and mix until just combined.  Fold in cooled applesauce mixture.  Pour into a greased 9×13 casserole dish, sprinkle with natural sugar.  Bake at 350F for 30-35 minutes, or until a cake tester comes out relatively clean.  Cake will be moist and gooey.  

IMG_9227[1]


In the midst of cabin fever, worked on lots of craft projects.  Between outings in the snow, I accomplished a fair amount of knitting, while the kids went through a ream of construction paper.  The living room was strewn with paper snippets, duct tape, crayons, stickers, and creative energy.  Ruth was cranking out Valentine’s, Bea built a blue paper TARDIS, and Hal and George created a giant stack of doodles.

Sandra’s Slouchy Beret (above) was a fast, easy project – perfect for knitting while watching Dr. Who with the family.  It is made from scraps of yarn, and completed in a few hours.  The beret is currently blocking (a necessary step), and I’ve already cast on another quick-knit.

Sharing with Ginny’s Yarn Along today.  I hope to be back before the weekend with some gardening posts, as we redesign some beds, add perennials, and begin seed starting for the 2014 garden year!!


Meyer Lemon


IMG_9189

Portland is in the midst of a rare snow storm, and all our weekend plans (derby, derby, speed skating, and more derby) have been canceled.  Instead, we have been playing in the snow and sledding and making snow ice cream.

And baking.  Lots of baking.  Something about the arrival of snow, inability to do garden work, a chilly house…a few days into the cold front, and I’ve done so much baking we’ve run out of butter.  And sugar.

IMG_9191

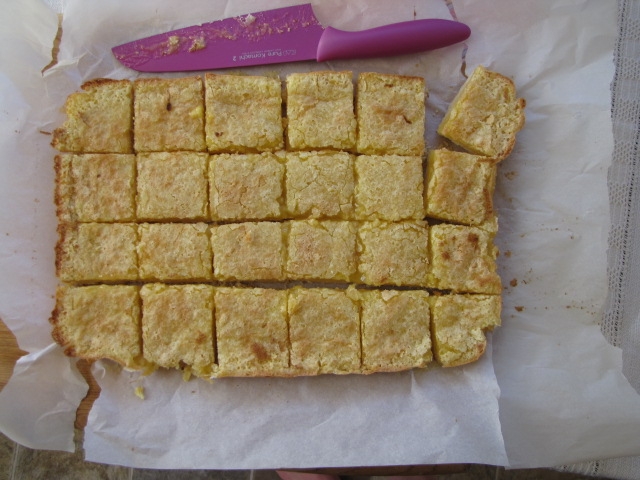
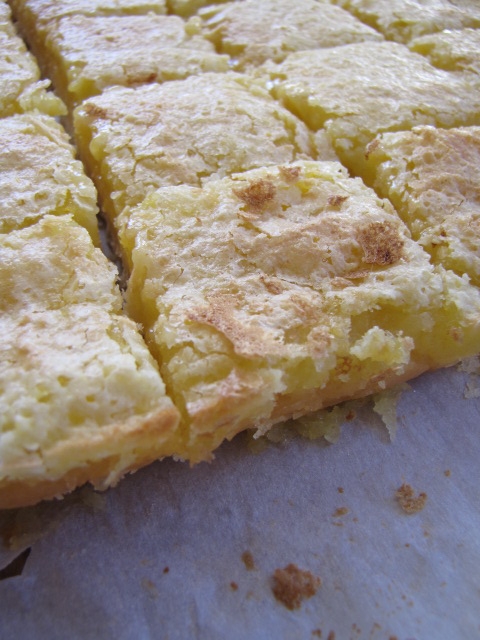
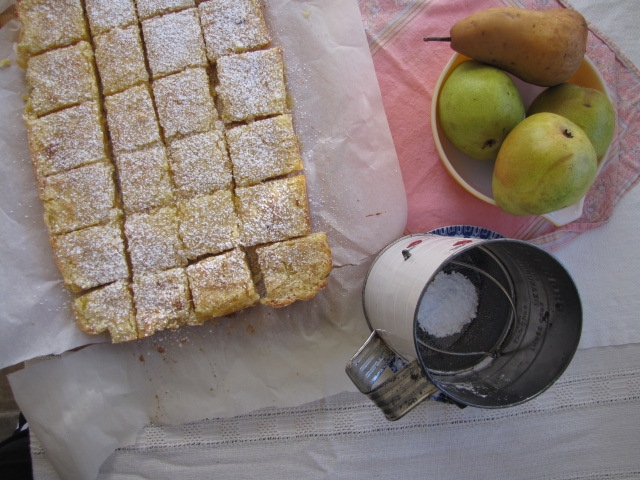
Meyer lemons are in season right now, – a perfect opportunity to try a new lemon bar recipe.  They were delicious!  (Just a note, the lemon bars are gooey, and the original recipe recommends lining the baking dish in aluminum foil.   I don’t like to bake anything acidic in foil, and used buttered parchment instead.  As you can see, the bars came out easily, and baked perfectly.)

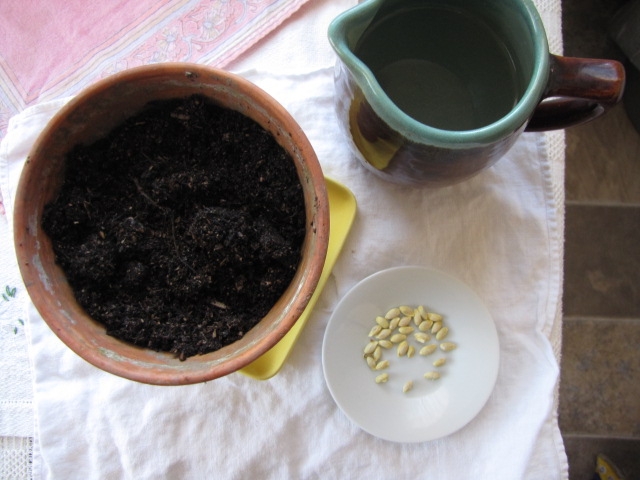
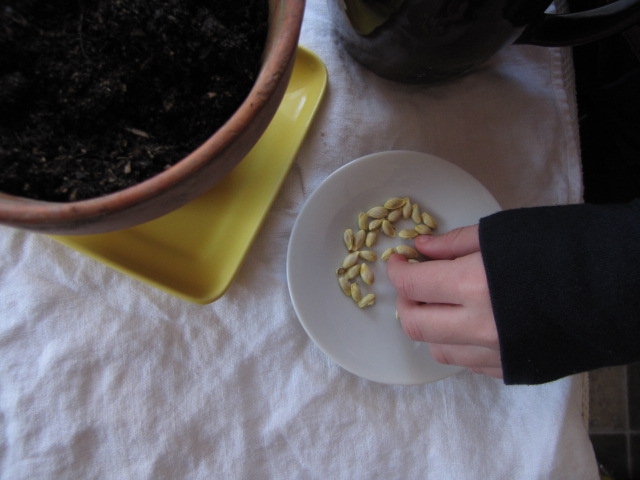
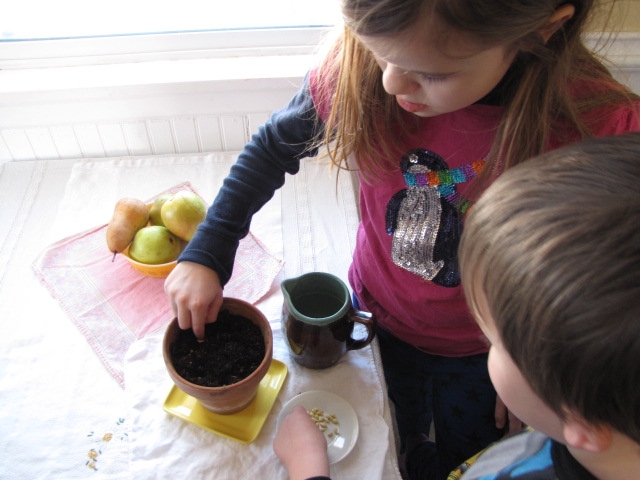
IMG_9182With the leftover seeds, Bea wanted to try out an activity she saw on Pinterest.

IMG_9184 IMG_9185We put the pot in a sunny window and hope they germinate.

IMG_9197Looks like the snow will continue through the night, so Ruth and I are making one of our favorite bread recipes after supper.  That way, we’ll have a hearty breakfast of homemade bread, marmalade, and scrambled eggs to bolster us before we head out to play in the fresh snow.  Who knows how many years it will be before we have the opportunity to build snowmen again?


Midwinter Sunshine

1712


Off the needles:   A simple pair of mitts for a gift exchange, to which I added a little needle-felted embellishment.

IMG_9072

Ruth painted a cheery sun on the card and we sewed a drawstring gift bag to round out the gift, and packaged it up.   It was sent it on its way across the country, where it will bring a fellow Grinnellian some Christmas cheer.

IMG_9066

IMG_9087

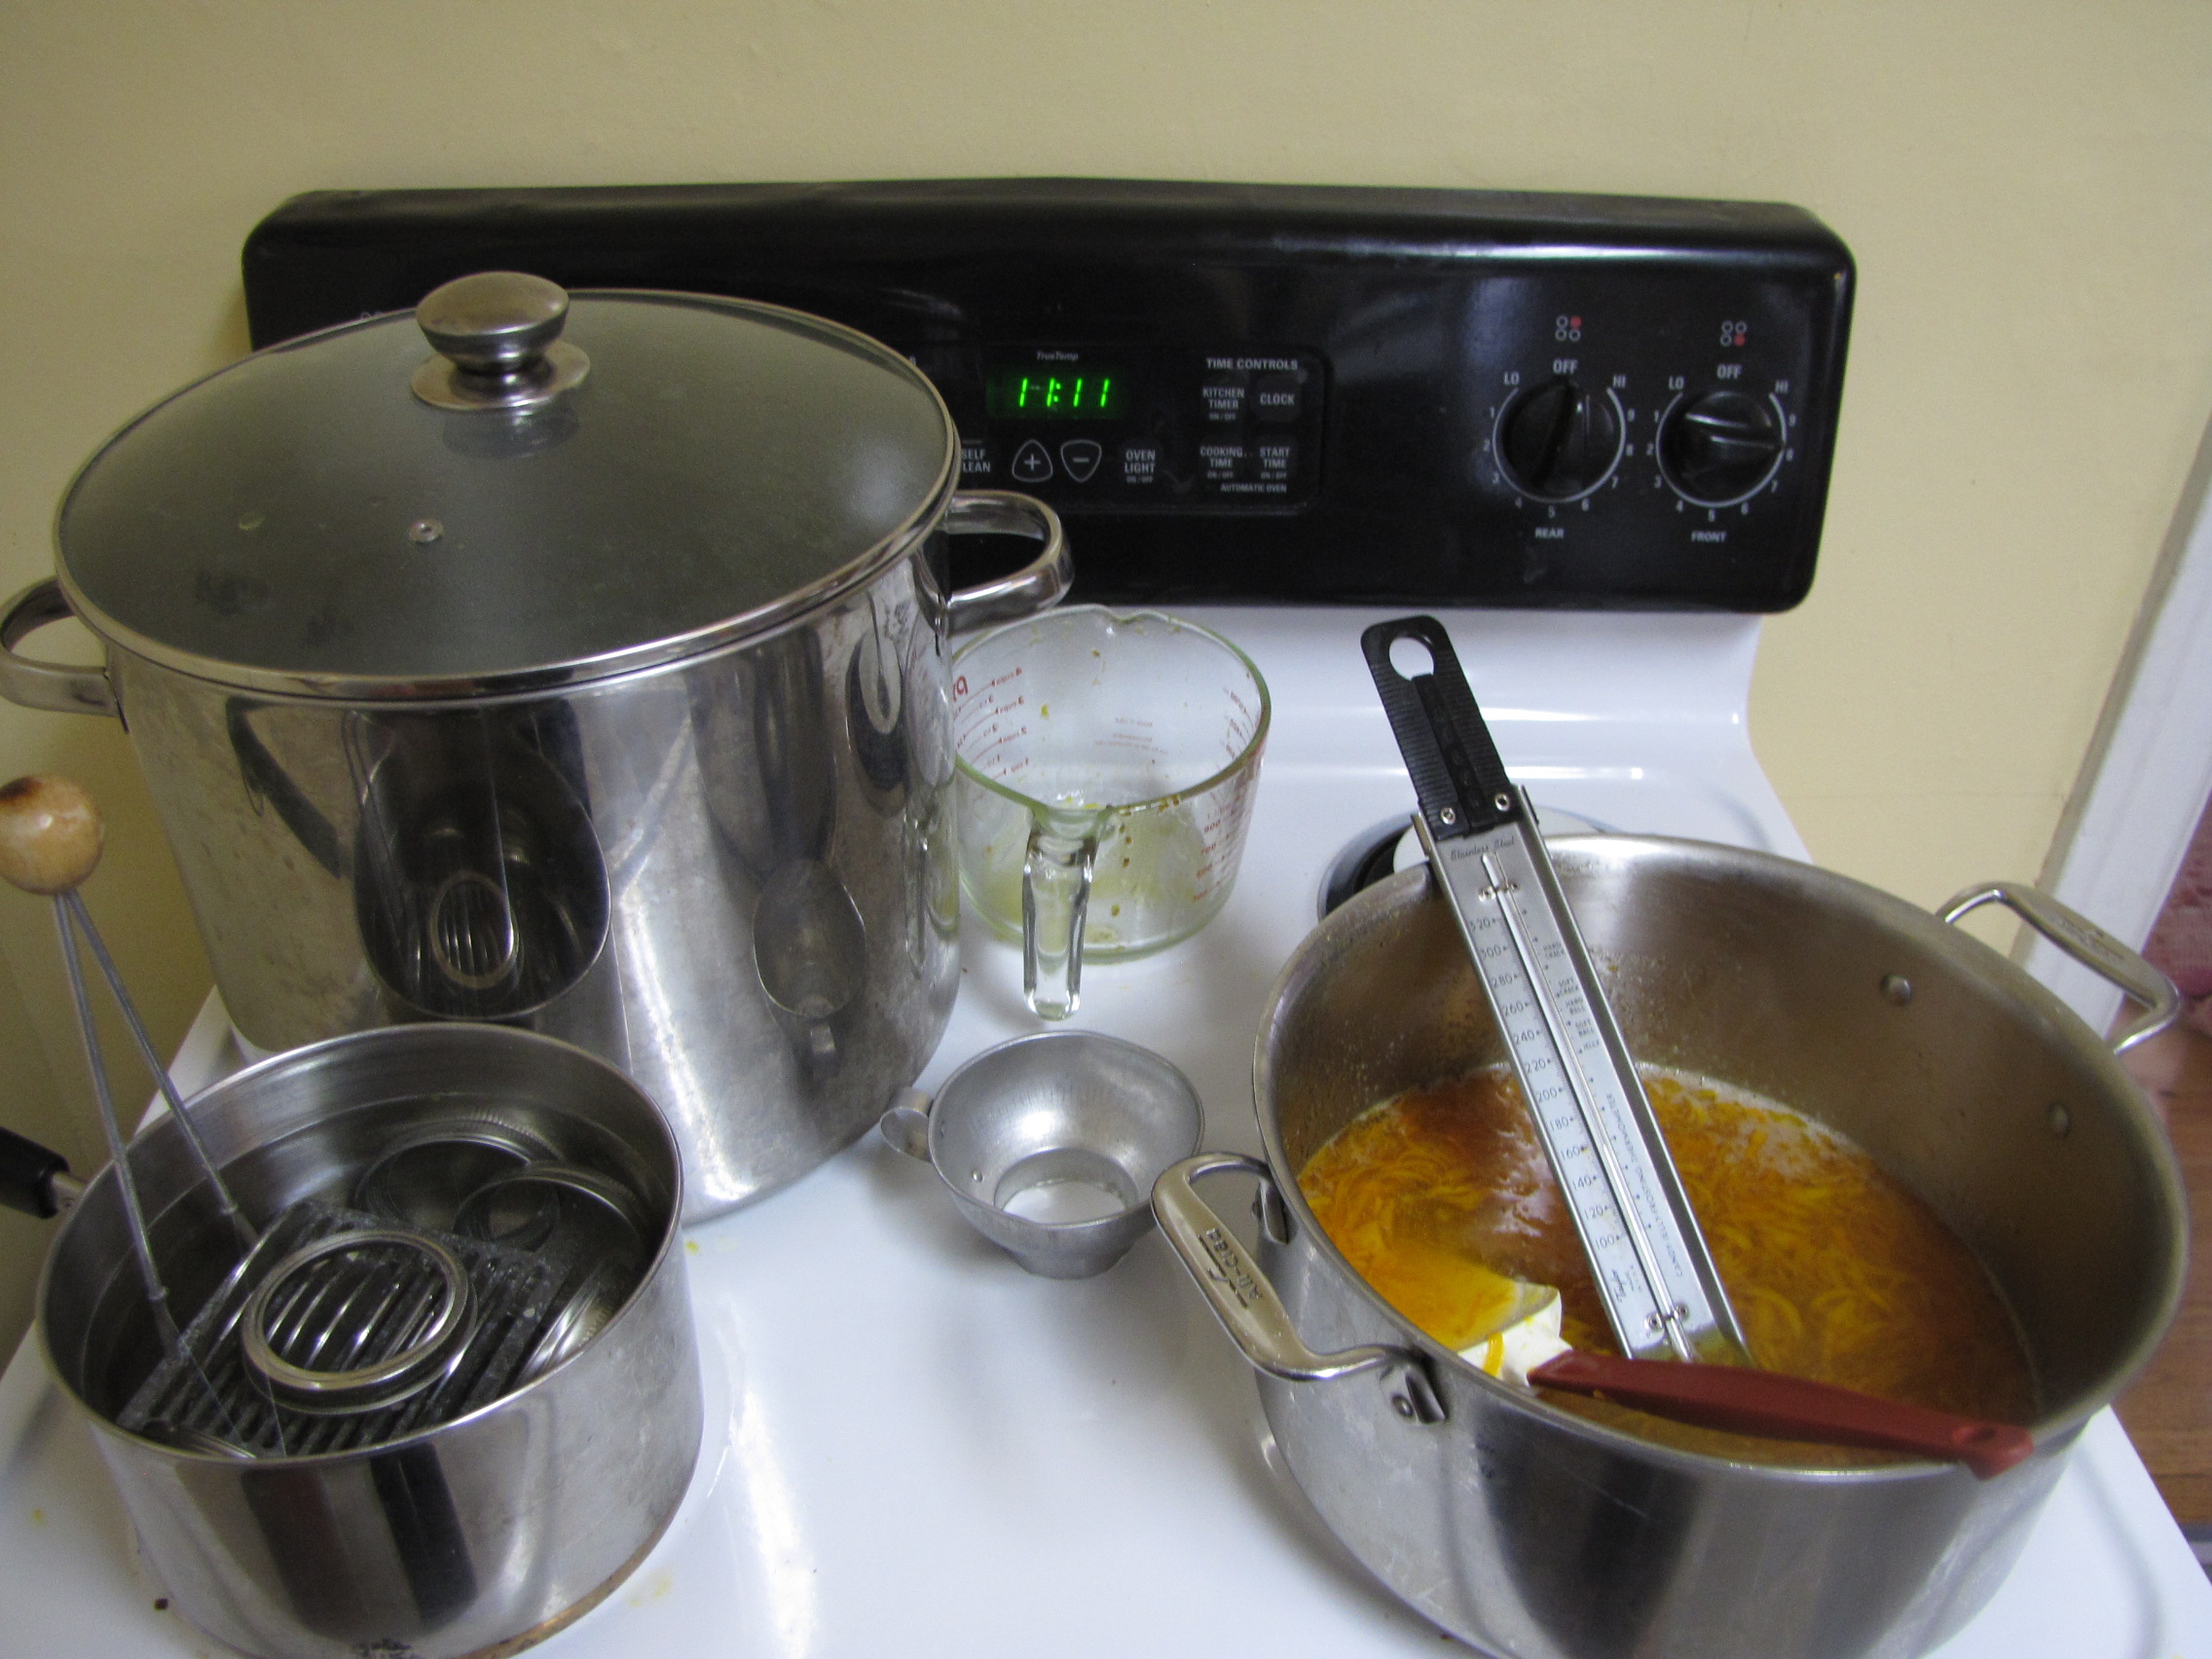
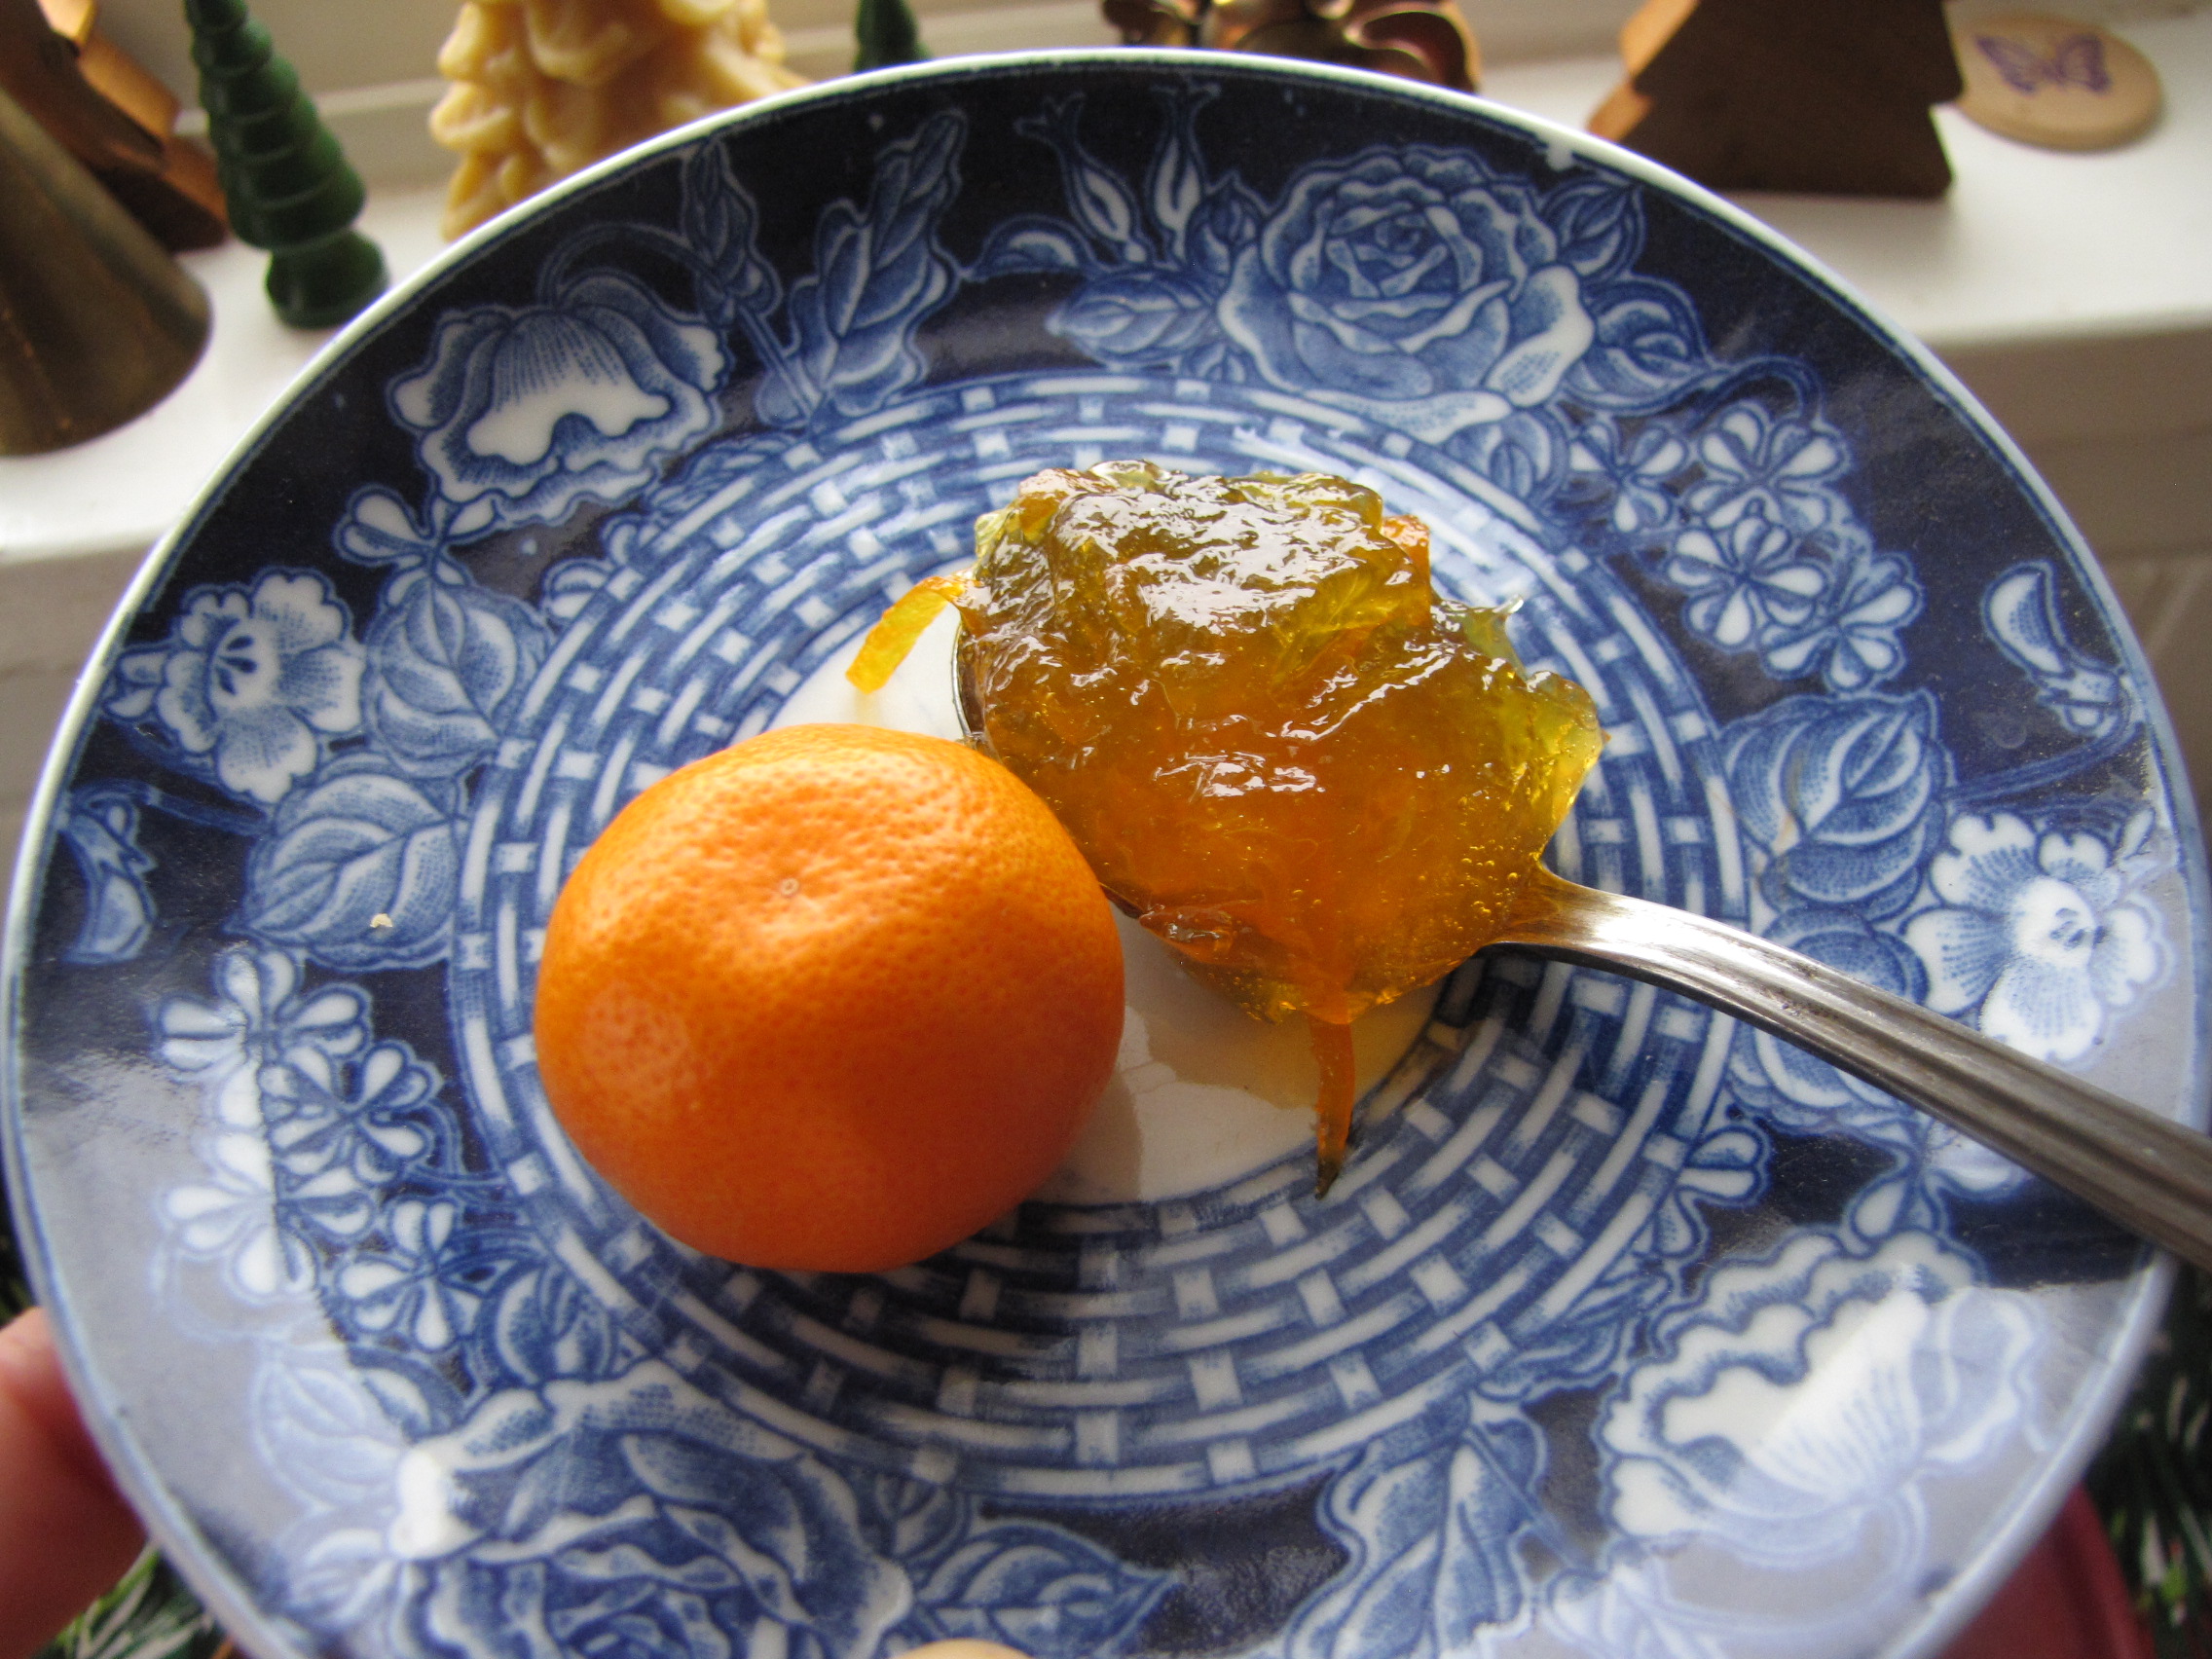
To bring our own family a bit of sunshine in midwinter, a batch of sunny bright marmalade was in order.  I was planning on plain old orange, but when I managed to get my hands on a bowl full of calamondins this week, I knew they were destined for marmalade perfection.  Calamondins are petite, seedy and extremely sour citrus.  However, jam connoisseurs (like Bea, who absolutely relishes marmalade) consider marmalade made with these little oranges to be the finest around.

Calamondins have a slightly smoky, musky – almost black currant – undertone that lends a subtle complexity to the finished jam.  The peel melts in as it cooks, providing texture and flavor, without any detracting chunkiness or bitterness.  If you are lucky enough to be able to source calamondins, the flavor is well worth the extra effort of seeding and slicing dozens of miniature oranges.  If not, you can substitute satsuma tangerines for sweeter finished product, or Meyer lemons for an extra tart marmalade.  Here is my recipe:

IMG_9094

Calamondin Marmalade for Bea

Calamondins (see substitutions above), halved, seeded, and sliced paper thin, to equal 3 cups of pulp + peel (about 40 fruits)

2 1/4 cups water (or 3/4 cup water for every cup of citrus pulp)

White sugar

Directions:

-In a medium heavy-bottomed sauce pan, combine pulp and water.  On medium heat, bring to a boil, and simmer for 15 minutes.  Remove from heat and allow to cool.  (You can do this the night before and refrigerate it.)

-Prep all your canning equipment.  Bring hot water bath canner full of water up to a boil.  Sterilize jars, heat lids and rings.

-Measure pulp.  It should equal 4 cups (give or take).  In a large heavy-bottomed pot, combine sugar and pulp in a 1:1 ratio (add 1 cup of white sugar for every cup of pulp).  Bring to a boil, and cook until jelly point (22oF) is reached.  (Alternately, you use the spoon method to determine when the jam is finished.).

-Citrus is high in pectin, so be careful not to overcook, or you will have unpleasant sheets of rubbery pectin in the finished product.  Remove jam from the heat, and stir once a minute for four minutes (this distributes the peel, so it does not all float to the top of each jar).  After four to five minutes, the jam can be jarred up.

-Pour marmalade into hot sterilized jars, add lids and secure rings.  Process 1/2 pints in a hot water bath canner for five minutes.

And to bring a little cheer to your midwinter as we turn back to the sun, a few lines from one of our favorite books of poetry - A Visit To William Blake’s Inn by Nancy Willard – and its delightful Marmalade Man:

The man in the marmalade hat
bustled through all the rooms,
and calling for dusters and brooms
he trundled the guests from their beds,
badgers and hedgehogs and moles.
Winter is over, my loves, he said.
Come away from your hollows and holes.