Alcatraz – This Moment
Joining with Amanda again for This Moment.
Joining with Amanda again for This Moment.
The year we bought our home, the children got me several lavender plants for my birthday, and then Mother’s Day.
The vast majority of the harvest from these aromatic and culinary lavenders goes to Birch Community Services, along with all of the other produce grown here. However, after cutting the plants back hard in early summer, they often set a second, smaller bloom in late August -early September. It is these that we keep for our family’s winter culinary and craft needs.
A few mornings this week, we got up early to bring in the aromatic lavenders, cutting them at the base of the flower stalks, down where the stems meet the foliage. We bundled them and set them on the front stairs to dry in the sunshine. (The florets are much easier to remove from the stems when thoroughly dry.)
Bea and Hal (with a little “help” from George) stripped the flowers from the stems. I gave them a big, deep wooden box in which to do this, so that none of the previous little blossoms would be lost.
Did you know that the flowers aren’t the only useful part of the lavender plant? After we removed the flowers, we bundled the stems together and tied them with bits of cotton string. They make great aromatic fire starters. Throw them into your fireplace with your newspaper and kindling, and you will have a sweet-smelling fire going in no time.
The blossoms are now sealed up in glass jars and tucked into the dark back corner of a cabinet, where they will keep for until we are ready to craft with them. It feels like such an extravagance to open up those jars in the middle of some dark and rainy winter afternoon, sift our fingers through the contents, and breathe in that clean smell of late-summer.
If you have any room in your garden for even one or two lavender plants, I encourage you to cultivate some.  Give them a sheltered, well-drained place where they will be shielded from the harshest of winter winds and won’t get “soggy feet.” The bees and butterflies will thank you, in turn you will be rewarded with a decadent feast for your senses.
Joining in with Amanda for her Friday link up.
Exceptionally dry weather, an effort to cut back on the water bill, strange heat surges and dipping night temperatures, all are bringing the garden year to a close. Many crops are still producing, despite the scruffy appearance of the yard.
A few shots from the garden yesterday evening:
Picking more of these beauties.
Picking elderberries while the kids play with the neighbor boys.
Waiting for the Concord Grapes. So many stunning grapes on the cusp of perfection.
Quetzalcoatlus, our loquacious chocolate Indian Runner, hopes you enjoyed a peek into what’s going on in our mid-September garden.
Later this week – a new recipe, crafting with the kiddos, and some more from the garden.
Off the needles, for a friend having her first baby. Absolutely loved this hand-dyed, very soft wool (picked up at my neighbor’s yard sale), and added in some vintage undyed wool sock yarn in places to get enough yardage to complete this pattern.
A very easy and relaxing knit, and the results are adorable. Will definitely be making more of these.
Went to make an afternoon pot of tea, and got distracted by how incredibly dusty and precariously stacked everything was in the china cupboard. Ended up dusting and reorganizing for a solid hour while George napped and the big kids ran around in the sunshine. (Had I ever dusted in there? Spider webs galore on the top shelf. Ugh).
Also found some time to finish up some baby shower gifts before the herd of elephants came stomping in from outdoors and woke the baby.
Little projects seem the easier to complete these days. Quick and mindless is best. The last complicated lace shawl I attempted was frogged pretty quickly, because knitting off charts while chasing 4 kids inevitably ends in too many mistakes.
Baby socks in hand-dyed spindle-spun. Pattern here.
Never did get around to that pot of tea. Maybe tomorrow…
Spent the early hours this morning washing thrifted dishes we found yesterday. I cannot resist old tea cups – they make great hostess gifts when combined with a box of tea and a little jar of honey. Also loving the blue and white dessert dishes, and at 30 cents each, how could I pass them up?
Also washed out a vintage hand-knit sweater in the sink with a little Eucalan. It was marked down from to 50 cents from 3 dollars since it had a small green stain near the shoulder, which mostly soaked out. This feels like such a treasure – to wear something made over many hours, by hand, by a fellow knitter, decades ago.
I feel very blessed to live just a few streets away from the best thrift store in Portland. The volunteers are so kind, the prices so much more affordable than the big thrift stores, the store always tucked full of wonderful things, and it supports a good cause. Every two weeks, all items with a new color price tag becomes 25 cents!!
All told, our Sunday afternoon trip yielded:
A vintage board game
1 1/2 yrds of grey wool fabric (which will become winter trousers for the boys)
1 1/2 yds grey liner fabric (for inside the trousers)
6 blue and white Japanese dessert dishes
6 assorted Japanese tea cups
3 mis-matched, hand painted saucers
2 child-sized Japanese rice bowls
a bamboo basket for (for yarn? Toys?)
zippers
2 wool J.Crew sweaters (to be turned into winter Longies for George)
vintage lace-work hand-knitted sweater
set of drawing pencils (for Ruth)
hand-sewn and embroidered South American skirt
2 sets of leggings for George.
Total = $18.55!!
Now that we’ve started our homeschooling year, we have again begun our Thursday ritual of serving afternoon tea and snacks in the breakfast nook.
Sometimes I bake something fancy, like a linzer torte, or banana whoopie pies or gingerbread with whipped cream, but this time, since we’re just getting back in the swing of things, I kept it simple. Bea made graham cracker and Nutella sandwiches, and we put out tangerines and a bowl of tamari almonds and called it good.
We’ve been doing this since Ruth was preschooler, and the kids really enjoy the ritual. We pretend like we’re practicing our best manners, but its a time of silliness, faux British accents and lots of giggling. It is also a time we can sit down and reconnect during the busy week.
Summer and all its freedoms are such a blessing, but it is good to slowly be returning to the rhythms of fall.
Just a few of these guys I picked for an afternoon snack the other day, but this autumn crop is ripening like crazy. Are you familiar with this unusual and tasty fruit?
This fruit grows on leggy plants 3 1/2 – 4 ft tall, and is produced on the underside of branches. The plant’s leaves are palm-sized or a bit bigger, with velvety-soft texture and a slight purple-ish hue.  It is one of my favorite annual crop plants, with a handsome shape and gentle on the skin (especially well-suited to a child’s garden).
Fruit are produced in slightly fuzzy, lantern-shaped husks (also known as “capes”), which turn from green to yellow and dry to a papery texture as the fruit matures.
Ripe ones are easy to spot on their bright yellow husks. The first-set fruit (and thus the first to ripen) are closest to the stem, with younger fruit extending out and down the branches.
Fresh off the plant, the fruit tastes taste like lime + pineapple and are refreshingly tart, with a hint of sweetness. The citrus quality makes them a great addition to sangria or iced tea when sliced up.
Baked in a pie or tart, they mellow and are simply delicious. Jams are also fantastic.
Do you know this sweeter relative of the tomatillo?
It is the Cape Gooseberry, Physalis peruviana, also known as the Giant Ground Cherry, Pok Pok,or Aztec Berry.
Next February, when you’re starting your tomatoes and tomatillos from seed, consider starting a half-dozen to a dozen of these truly special heirlooms.
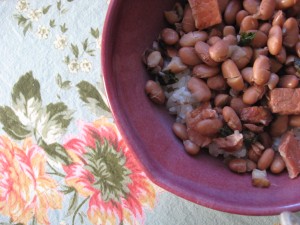
Today we had homeschool co-op, followed by a trip to OMSI for the Lego sculpture exhibit, followed by the grocers. Friday is typically exhausting for all of us, and it’s nice to come home to find dinner is just about ready. A bit of prep the night before, then throw everything in the crockpot before we leave the house, and we have a simple, nutritious meal with little effort Friday night – all I have to do is start a pot of rice and put out the dishes.
This week’s Friday night dinner is comprised of pinto and kale (with ham and shallots). The meal works double duty:Â I make a big enough batch that leftovers can be used for bean burritos or enchiladas on another busy night later in the week.
The total cost for this dish is just over $4.50, if you include the fact that I grew the kale, shallots and garlic, and the beans are purchased in bulk. Again, that’s $4.50 for the main dish for two dinners for a family of 6.  Add in rice (also purchased in bulk at the Asian market), and the cost for this dinner is just about $0.95/person.
Here’s the recipe:
Pintos, Kale and Ham One-Pot
Thursday night, prep the following ingredients:
2 1/2 cups of dry pinto beans, sorted and rinsed (sometimes I use cranberry or red beans)
5 ounces of uncured ham (or bacon), chopped
4-5 shallots (about 1 1/2 cups), finely chopped
3 cloves of garlic, minced
1-2 tsp brown sugar
2 Tbsp olive oil
1. In a large bowl, combine beans with 8 cups of cold water. Cover with a plate and let soak overnight.
2. In a skillet on med-high heat, cook ham pieces until browned and crispy. Remove, add olive oil, shallots, and garlic, and brown sugar, stirring frequently, until caramelized, about 10 min. Remove from pan with ham.
3. Add 1/3 cup of water to the pan, scraping and stirring to deglaze (don’t lose all that yummy flavor you’ve built up on the pan!). Add the liquid to the shallot/ham combo. Cover and refrigerate overnight.
The Next Morning:
1. Drain beans, and put them in your crockpot. Add the ham/shallot combo to the beans. Just barely cover with water. Then add:
1 Tbsp Penzey’s Ham Base
1 bay leaf
2 big handfuls of chopped kale (or spinach)
2 tsp Smoked Paprika
1/4 tsp ground black pepper
Stir ingredients in crockpot. Put on “low” setting for 8-10 hours. Serve over rice, or with rustic bread. Garnish with shredded cheddar if desired.
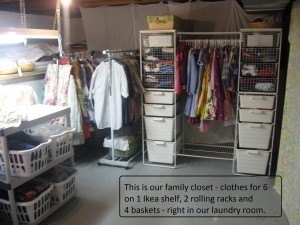
After quite a few late nights sorting, cleaning and organizing, we’ve successfully moved everyone’s clothes into a “Family Closet” laundry system in the basement. No more hauling laundry up and down the stairs. No more baskets of clean laundry strewn about the house. No more laundry on the floor of the girls’ room.  And believe me, homeschooling 4 kids and running the Teaching Garden means I will gladly take any reduction in chaos and increase in spare time that I can get!
Why did we not do this sooner? A number of larger families we know had recommended it to us, and after researching a bit on the subject (visit my Laundry board on Pinterest), we pulled together a few pennies and dove in. 4 boxes of clothes went to Goodwill, 2 to the consignment store, and a ridiculous amount of junk was purged from the basement.
So far, we’re saving several hours a week doing laundry, the house is less messy/cluttered, and the kids are helping more with the laundry chores. And there’s a bonus – we have three large closets upstairs that will be getting converted into a reading nook, a mini sewing room, and a cozy kids’ hideaway.
So, here’s the tour of our Family Closet on a $200 budget:
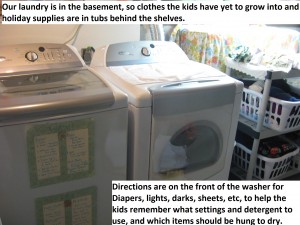
The three older kids are learning to do the laundry. There is a step-stool next to the washer so kids can load and unload laundry with ease. Mama does the bleach and delicate laundry and helps kids with the other loads. We’re all a team and we help care for each other, and part of that is working together to get the chores done so we all have more free time to spend playing and creating as a family.
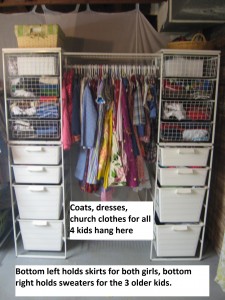
This “Antonius” system from Ikea is the inspiration for our Family Closet. Our friends have one and keep laundry for their 6 kids in it. Ours is full with 4, although we also store winter coats in ours, and the boys have lots of extra pants because, in our experience, boys go through pants like crazy. Cost: $170. This is the bulk of our expense.
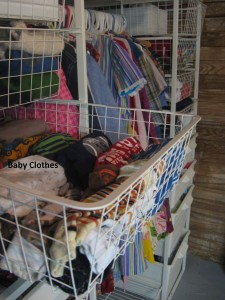
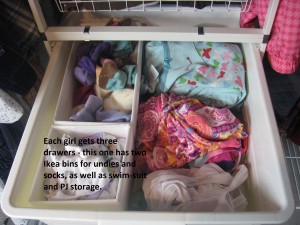
6 fabric boxes from Ikea – $12.
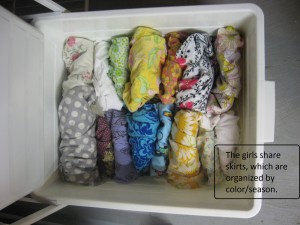
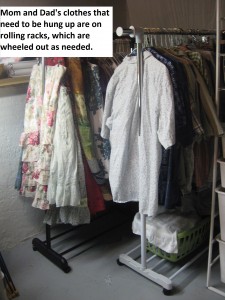
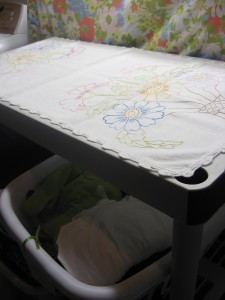
Shirts, socks, shorts, yoga pants, etc for Mama and Dad are in hampers on this shelf. We are both quite tall, so our clothes take up space! Two hampers each. Cost $12. The shelving they sit on came with the house.
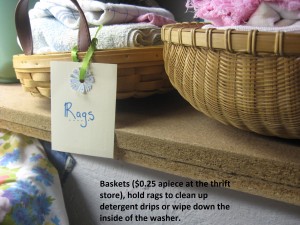
When kids do laundry, things get spilled. There are also spray bottles with vinegar-based cleaner on this shelf next to the rolling racks. Storage tubs of too-big clothes and Easter decorations are behind these baskets.
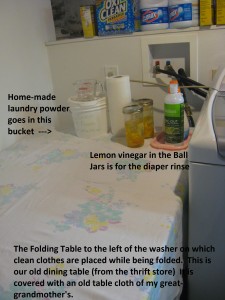
I would like to put shelves on the wall to the left (which is the outside of the bathroom), but that’s not in the budget at present. Cleaning supplies sit on the table for now.
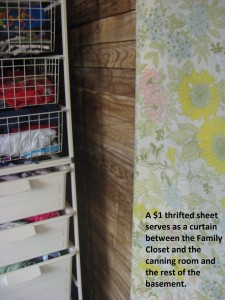
We’d like to add more lighting in the Family Closet so it feels less “basementy”, and put on a few finishing touches, but for a super-low-budget remake of a previously wasted space, I couldn’t be happier. Our next project is to clean and organize the other 1/3 of the basement (1/3 being laundry, 1/3 being the wood-framed canning/brewing room) and turn it into an office. After that, we’ll be working on the upstairs closets and making them into functional spaces for our family.
Hope you enjoyed our Family Closet tour. Thanks for visiting.
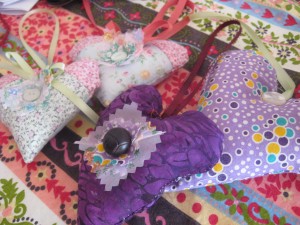
Yesterday was a bit of a rough day (flat tire, grouchy kids, nothing major), and I’m recovering from yet another round of mastitis (feeling better, but trying to take it easy), so we’re trying to have a low-key morning. It seems like the perfect time to finish a few Christmas gift projects while we listen to the remainder of our current book on CD.

Ruth and Bea collected the English lavender from our bushes this past summer, dried it, and stored it in jars specifically for making sachets over the winter.  Ruth (nearly 9) requested that we make more heart-shaped sachets today, although yesterday I made a few birds as well, using this fabric bird as inspiration. Bea (age 7) sticks with rectangles, which are easier for her to tackle on the sewing machine (see end of this post).
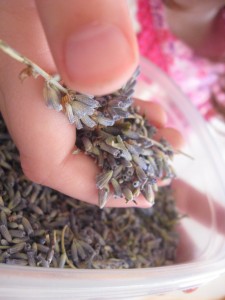
So far, Hal simply enjoys sifting, sorting, scooping the dried lavender while we work. His contribution to the project is snipping up the scraps of fabric into teensy itty bits, and he is sure that is somehow tremendously helpful. :) Ah, well, it’s good practice with scissors and hand-eye coordination for him.
The girls were allowed to pick out a 1/4 yd of remnant fabric from the fabric store for this project, and I’ve been using thrifted odds and ends. Buttons are from our button jar of scrounged/thrifted/found buttons, and the ribbons and lace are also from the thrift store.   Not only are the sachets a frugal homemade craft, but also make handsome, practical gifts the girls can put together themselves now that they are more confident in their sewing skills.
Here’s how we make them:
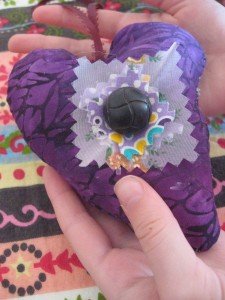
Ruth’s Lavender Hearts
Materials (per sachet):
– scraps of fabric approximately 4-5inches tall and wide, depending on desired shape/style of heart
– 3 Tbsp dried lavender flowers (you can also use cloves + diced dried orange peel, or dried rosemary)
– large handful of wool for stuffing (I use the un-spinnable bits of white/natural roving from the seconds/mill-end bags I purchase for dyeing and spinning. Un-dyed is best, especially if using light-colored fabric, so it does not show through.)
– bits of lace/buttons, embroidery floss, beads, etc for embellishment
– 1 piece of 8-10 inch-long narrow ribbon if you desire to hang the sachet from a door-knob or hook.
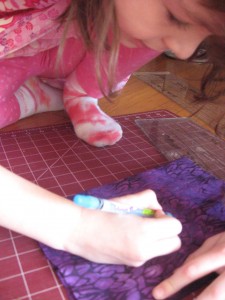
1. Place two pieces of equal-sized fabric facing each other, and pin in the middle (You can use two whole-pieces, or, for a more folksy look, or to use up those teeny bits of a lovely print, create patchwork blocks instead.)Â With tailor’s chalk or a pencil, free-hand a heart shape onto one of the blocks.
2. Stitch hearts together, leaving a small hole along one side (not at the point!). Trim away excess fabric, leaving a 1/4-inch seam allowance (I find it’s easier for Ruth to sew firs,t and cut after and that way she is more likely to produce a heart she is happy with.)
3. Flip fabric right-side out, using the tip of a chop-stick or pencil to press the heart’s point crisply.
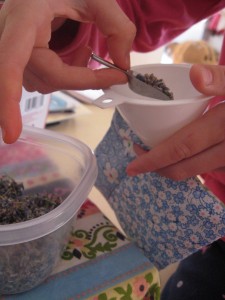
4. Using a funnel, fill each lobe of the heart with 1 Tbsp of dried flowers. With the help of the chopstick, press wool stuffing into the rest of the heart (more stuffing = nicer-looking finished product. Don’t skimp!) When heart is halfway filled, pour in last tablespoon of lavender flowers in the body of the heart.
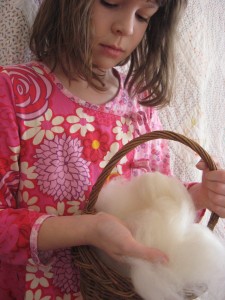
5.  Finish filling with more wool until sachet is desired fluffiness. Using an invisible stitch (such as that used on quilt binding), fold in the seam allowance and close the hole.
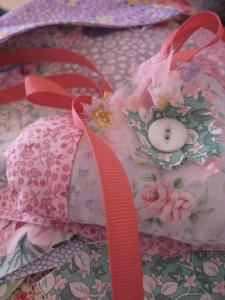
Attach embellishments to your heart, and finish with a loop of ribbon tacked firmly to the top for hanging up your heart.
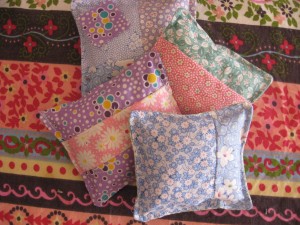
If your child is younger, s/he may enjoy this project more by making simple pillow-shaped drawer sachets like the ones below that Bea and I made together:
(Since I was sick over the weekend, I did not get to finish the second post on tactile play for preschoolers. I will do my best to get it up later this week.)
Happy Christmas crafting!
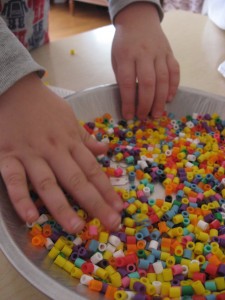
Grandma Jan and Cousin Ruby got the children Perler Beads last week. I have fond memories of making Perler Bead crafts with friends as a child, and was pleased to see how much the children enjoyed them, too.
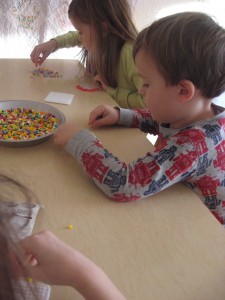
Hal spent the first few minutes just running his fingers through the beads in the pie tin. As a 3 year-old, he really enjoys the process of tactile play more than completing a project. When he settled down and started to work with the form, applying each bead one by one, fine-tuning his hand-eye coordination and fine-pincher grip.
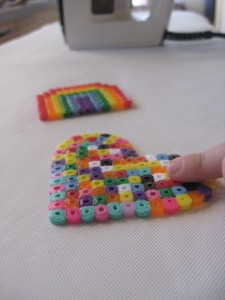
The girls, being 7 and almost 9, focused on the design element, and did the ironing themselves. And we all helped clean Perler beads up from every corner of the living room floor afterward. 🙂
For more on tactile play for the preschool child, please come back and check out tomorrow’s post here on sensory play, and also this thoughtful post by Not Just Cute.
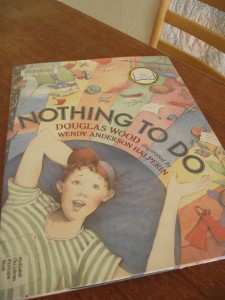
The children are really enjoying this book. It’s those days where we have “nothing to do” that the kids engage in deep, meaningful learning on their own terms.

This week we’ve been playing a lot of card games (Bea’s favorite), which reinforce cooperation, strategy, addition, subtraction, memory recall for the girls, and help Hal ( age 3 1/2)Â with number recognition.
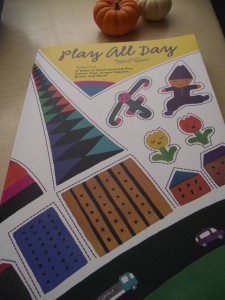
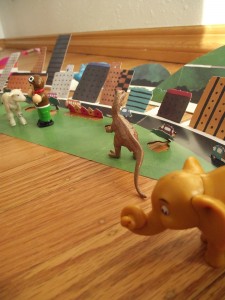
Our friend Dr. Ellie gave the children this paper punch-out book, and Hal has particularly been enjoying the city play mat in it. It has been really neat to see him maturing in his play, and listening to the detailed conversations his toys have with each other. 🙂
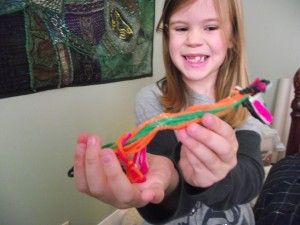
In the mornings, when it’s been too cold for the kids to play outside, and we have down time, all of the children have been sculpting with Bendaroos. Bea likes to create her own designs (a “long neck” dinosaur, above), while Ruth prefers to follow the directions in the pack (a Toco Toucan, below)

What learning are your kids engaging in when they have nothing scheduled to do?

George Peregrine Baker
was born on June 27 at 7:05 am
weighing 8 lb 5 oz.
Little George is now 4 weeks old, and life is starting to feel a bit more stable. (I managed to bake chocolate-chip banana bread, work in the garden, do a few loads of laundry, and even make a simple dinner tonight without too much stress. Things are going much better than last week, when we were subsisting off grilled cheese sandwiches and yogurt, and couldn’t manage to get out of my PJs before 11 am.) Overall, it’s been quite a rough start – we’re taking it day by day, but it’s totally worth it to add George to our family.
George was born at 40 weeks, 5 days (the earliest of any of my kids!), and considering his big brother was born after less than three hours, I thought things would be pretty quick, but this labor was about 8 1/2 very difficult hours. He was OP (“sunnyside up”), and the labor was pretty excruciating and I was stuck at 6 cm for hours and hours.  Once he finally turned, he was born within 5 minutes (I caught him! That’s 4 for 4!). In retrospect, I’m grateful he wasn’t well positioned, or he’d likely have been born long before we got to the hospital.  He is healthy and a great nurser and looks like a perfect blend of his three older siblings.
I ended up with a PPH again, but it took several hours, a few doses of pitcoin and a hefty dose of misoprostol to get it under control this time. And when George was 6 days old, I ended up needing to be treated for dehydration and double mastitis, so that has slowed my recovery even further, and I am anxious to get back up to full speed. Our entire family are very thankful for the friends who brought meals, and my sister who kept the kids while I was in the hospital and afterward helped with laundry, etc. We’re also grateful for our neighbor who cared for the ducks & chickens both times we were in the hospital, and my MIL and SIL who helped watch the girls while I was so ill the end of that first week. We could never have made it through without the support everyone offered. Thank you all so much!!
George is a bit of a colicky baby, and that plus a very-energetic (and destructive!) 3 year-old brother, and two intense older sisters makes for a challenging mix of needs around the house.  I have no idea how I’m ever going to get my house clean again, much less maintain it. The thought of tackling homeschooling in the fall scares the living daylights out of me.  But, we’ll adjust to the new dynamic in the household, and before we know it we’ll have settled in to the new normal around the Baker house. Things get a little easier every week, for all of us.
Oh, here’s a photo of the whole Baker family back when George was 2 weeks old:

Clockwise from lower left: Harold (Hal) age 3, Grandma Bishop and Grandpa Bishop (visiting from Florida), me (Angela) holding George, Casey, Ruth age 8.5, and Beatrix (Bea) age 6.5.
I’ve got a new quick update on the garden coming very shortly, and a few recipes after that. As things ease up a bit, I’m looking forward to posting a more frequently. Thanks for your patience and God bless!
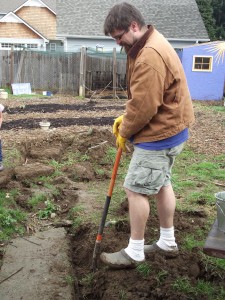
Last year, we discovered a long line cutting through our entire yard (back door all the way to the far fenceline), where plants did not grow well. A little digging turned up a concrete pathway about 3 inches under the sod (9-12 inches under the sheet-mulched beds). We assume it was a path going back to where a garden shed or some other structure once stood (our house was built in 1922, so who knows how long ago this was put in.)
We had been attempting to remove the concrete bit by bit last summer, but it was very slow going. My husband finally got fed up, and two weekends ago, began digging up the path and busting up the concrete with a sledge hammer for 8 hours/day. We ended up with about 1200 lbs of concrete chunks.
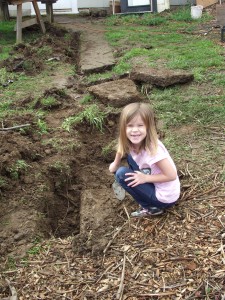
Were we upset that we now had a huge pile of concrete to deal with? Heck, no! We turned it into an opportunity to build an urbanite back patio off the mudroom door!
Here’s what we did to build our $32 salvaged patio:

An existing 4×5 ft concrete pad sat directly off the back door. We left this, and the beginning part of the mystery path in place, and then laid out blocks in an organic, undulating shape around this area to create the patio outline. (This area had previously been almost permanently muddy – it’s very shady, gets heavy foot traffic, and with all our NW rain, no grass ever grew there.)
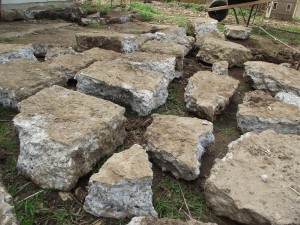
You can see that the urbanite chunks were varying thicknesses. This created a little more work on our part to get the 2% slope properly set up.

After laying out the general shape and making it with string, we stacked the blocks and began removing soil to create a bed for the sand (the soil was relocated to the holes made by removing the concrete from the yard.)
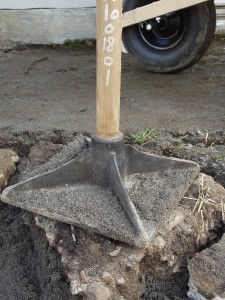
We laid down 4 inches of sand (hence the $42 price tag – it was 1.5 yds), and then used a level and a tamper to create a 2% grade away from the house for water drainage.
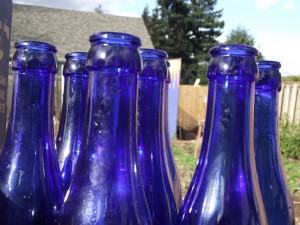
We had three big boxes of blue glass bottles sitting in the basement, and thought they’d be perfect for accent points and filler between the blocks (we had originally collected them from friends in the hopes of using them for brewing, but they were small bottles, and we couldn’t find corks or caps to fit).

Concrete blocks were laid down with bottles to fill in the holes (a lot of wiggling and adjusting was needed since the blocks varied so much in thickness).

We then backfilled the cracks with more sand, and swept off the excess. (This step is a little messy, since it was pouring down rain by this time, and it’s hard to sweep of wet sand from the blocks!)

The surface is not perfectly even (we knew there was no way it could be!), but we carefully checked to make sure that no lips existed where one could catch a toe at the point where any blocks met.)
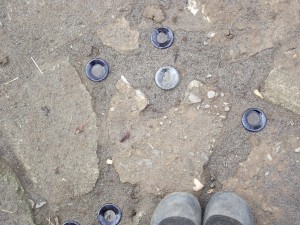
We hope to plant creeping thyme and other foot-traffic friendly herbs in the cracks when the weather warms a bit, but for now are VERY happy to have a space right out our back door that is not a mud pit! And doubly happy to have found a way to reuse items (concrete/urbanite and used glass bottles) that would have otherwise ended up in the landfill.
Working on any thrifty, re-purposed, scrounged projects at your place? If you blogged about them, send me the link, I’d love to include it here!  Thanks!
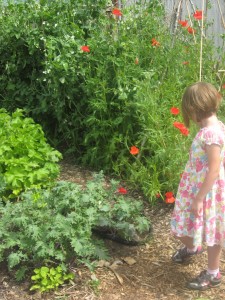
I often get asked why we have chosen to live the life of an urban homesteader. Why put in all those hours picking slugs, shoveling manure, sewing clothes from thrifted fabric, mucking out the chicken coop, or canning peaches when we could buy a tin of them at the store?
Yes, it is hard work, and we have struggles and failures along the way. But, honestly, having the freedom to become urban homesteaders has enabled us to care for ourselves, our land, our family, our community.
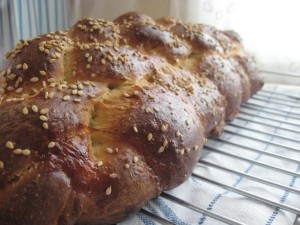
We care for our bodies by growing and making nourishing food.

We care for our children, and strive to provide them with a free, happy childhood (and what could make a better childhood than being outdoors, digging in the dirt and playing with the chickens?)
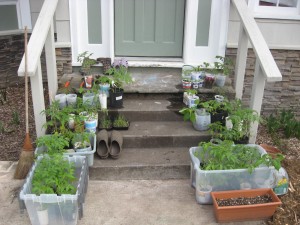
We care for our community by partnering with others to grow nutritious, organic produce for urban families, and share seeds, seedlings, and knowledge so others can grow their own food, too.
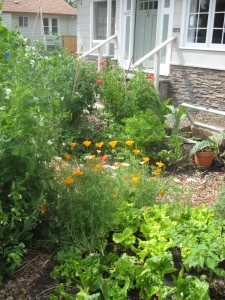
We care for our land by practicing permaculture principles, increasing our soil’s fertility, planting native plants, and encouraging wildlife to make a home here.
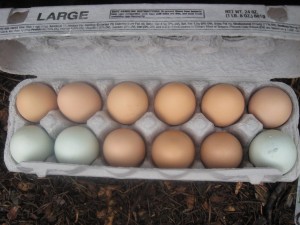
We care for our animals by giving them a happy, organic life where they can roam and follow their instincts. They in turn care for us by giving us hours of entertainment, companionship, pest control, and delicious eggs.
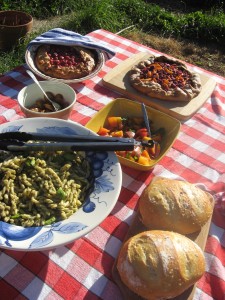
We are truly blessed to live a life that nourishes us body and soul. We believe that all people in the city have the right to increase their food security through sustainable, economical agriculture and homemaking. Homesteading belongs to all people who wish to reach out and embrace it. It is not a gimmick or a trademark, it is a right and a joy. Please visit the other blog posts and videos celebrating urban homesteading at Take Back Urban Homesteading and help us as we strive to keep urban homesteading free and open to all who want to live this life!
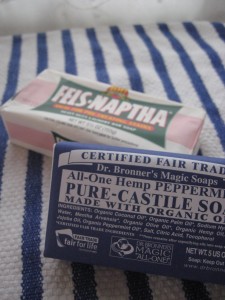
My sister and I have talked about making homemade laundry soap for years – it’s so much more economical, and environmentally friendly, plus it’s so easy to make. I’d shied away from it because, frankly, the laundry soap my friends were making looked like snot, and I wasn’t up for it.
Then, a friend told me that she had started making Amanda Soule’s recipe for powdered laundry soap. It was like a revelation! I didn’t have to make snotty noodle soup soap! I could make laundry powder!
I did some fishing around on the internet, and tried some recipes, and here’s the one I like best (a blending of several):
Larksong’s Laundry Powder
1 Bar Fels Naptha Soap
1 Bar Dr. Bronner’s Peppermint or Lavender Soap (it’s 3x as expensive as Fels Naptha and I found two bars is too strong of a scent for me) OR you can use 1 bar Ivory soap.
4 cups Washing Soda (soda ash)
4 cups Natural Borax
(you can also add 1 cup of Baking Soda if you need it – I sprinkle it on diapers in the pail, so I didn’t add it)
Directions:
1. Unwrap Fels Naptha soap, place on a paper towel, and microwave for 1 1/2 – 2 minutes.  (Caution!! Soap will be very hot!!)
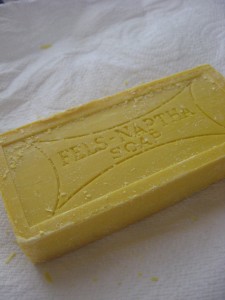
Here’s a bar of Fels Naptha laundry soap straight out of the paper.
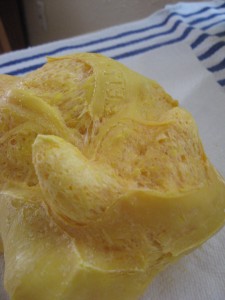
This is what it looks like after 2 min in the microwave – it puff up, and is very easy to quickly grate.
Repeat with Ivory soap. Note: Dr. Bronner’s is a castile soap, and tends to melt in the microwave more than puff up, so I just grate it as-is. It takes a little more elbow-grease, and the kids usually aren’t up for it – they much prefer to grate the “puffy soap”.
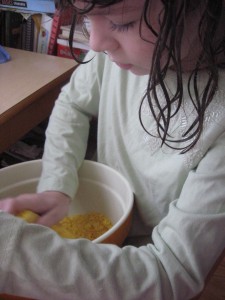
Let soap cool thoroughly (about 10 min), and grate into a bowl.
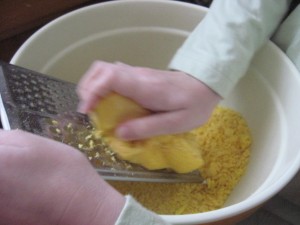

Measure and stir in borax, washing soda (and optional baking soda).   Stir thoroughly, and pour into a sealable bucket.  Makes 32-64 loads, depending on whether you have a conventional machine or an HE machine.
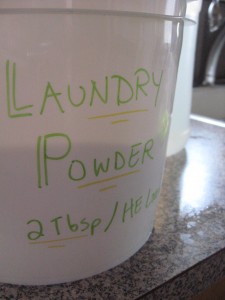
Soap flakes have a tendency to settle to the bottom, so I invert the bucket a few times before measuring.
You may have to fiddle with the measurements a bit – depending on your machine, and how dirty your laundry is –
I use 2 Tbsp per load for our HE machine, and 3 Tbsp for diapers (since it’s low-sudsing, it’s perfect for HE machines), and I had read that folks with conventional machines use 3-4 Tbsp per load.
Next time I think I’ll use ivory instead of Dr. Bronner’s mint soap, and add a little orange or lemon essential oil – while the mint is nice, I think I prefer my laundry to smell like citrus.
I estimate my total cost per load is about $0.09! Not too shabby!
My apologies on not being in this space in more than a month.  I am in my 10th week of pregnancy with our fourth child, and I am pretty incapacitated by bad, bad morning sickness. The house is a disaster, laundry is piling up, dishes undone, my kids are eating Ramen noodles and PBJ sandwiches. I see the house, the garden deteriorating around me, the kids falling behind in their studies, missing my attention and interaction with them, but I’m just not able to accomplish much of anything. And for me – someone who thrives on having 18 zillion projects going at once, loves to cook all day long with her kids, loves to make muddy messes in the yard, loves to bring meals to moms with new babies – I find I’m battling my frustration and sense of defeat at my total inability to “live my life” as much as I’m battling the exhaustion, throwing up, 24/7 nausea.
We are thrilled and overjoyed at the expectation of another child, and I know it’s a small sacrifice for such a great gift, and so many other women go through exactly what I’m going through, but right now, in the moment, I’m definitely struggling, and it’s all I can do to get through each day, much less accept the realization that I won’t be cooking for Thanksgiving this year, and Christmas gifts will likely not be finished on time.
So, in light of things, I may be posting a bit here and there, but not much until we get to Florida for Christmas, and I am feeling better.
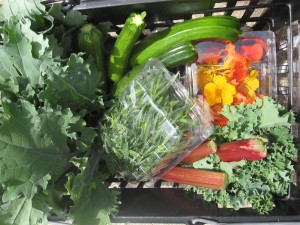
A few things picked one morning this week in the BCS Teaching Garden! Lots of Blue Lake pole beans, summer squash, kale, French Tarragon, chives, Italian flatleaf parsley, spearmint, nasturtium flowers, and a little bit of rhubarb.
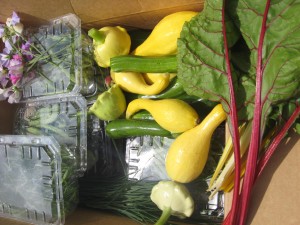
We currently have volunteers coming three days a week to help with the harvest, and they even got a large (17 plant) raspberry patch planted last week. Now, to get supports build for the canes and finish the shed before the rains come in the fall!
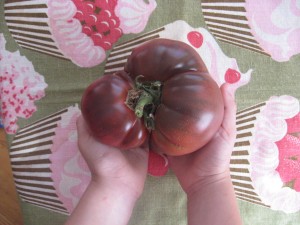
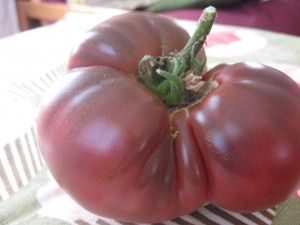
And Wednesday, we had one more gorgeous Black Krim tomato. Isn’t it funny how precious the first tomatoes are? Each one is cherished…but soon there will be enough fresh, organic heirloom tomatoes for the BCS families to enjoy! The hot sunny weather today and this weekend should finally help ripen the buckets and buckets of green tomatoes still on the vine!
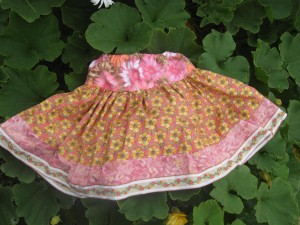
A few more twirly skirts for the girls (yes, I’m addicted to sewing these!)
This one, which is a bit shorter (hits just below the knee on Little Hen) is a mix of thrift store fabric and 1/2 yd of clearance fabric, and thrifted ribbon (at the bottom). Total cost = $2.10!
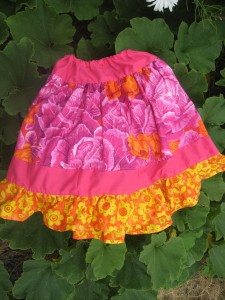
This is my favorite – so bright and cheerful – it’s 1 yd of Kaffe Fassat‘s red cabbage print (on clearance for $3/yd!), some thrifted pink cotton and remnants of orange and yellow batik-print fabric from another project. Total cost, estimated at $4.
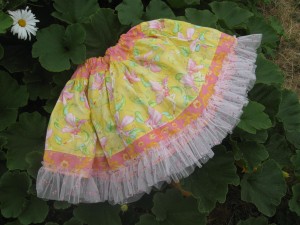
This one will be a birthday gift for Firecracker – it’s everything she could possibly want in a skirt – fairy print, sequin-bedecked tulle, and yellow and pink color scheme. It was a bit of a splurge – $12 for 3 yds of clearance fabric (one of each color), but I only used 1/2 yd of the fairy print, and about 1/3 yd of the tulle and pink print, so there is a lot of fabric left.

The tulle is added to the front of the skirt for two purposes – 1)it’s extra ruffly and pretty that way and 2)it prevents the itchy edge from being against the skin, since it’s not on the inside of the skirt.
Okay, I promise – that’s all for sewing updates for a while! I’m off to clean all of the fabric mess out of the living room, and the next post will be a recipe! Check back soon!
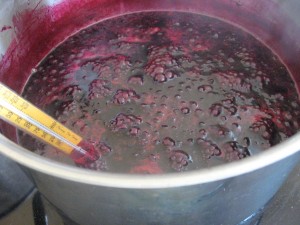
Little Hen’s new favorite jam:Â Black Currant!
I’ve always loved a little Cassis in my hot tea in the winter, but this is the first year we’ve tried jam made from these relatives of the gooseberry, which have a distinctive, smoky/ musky flavor.
Black currants are full of pectin, so they are perfect for jam – all you need is currants, sugar, water, and a little lemon juice. (Although, next time, I think we’ll try adding some cardamom or cloves, as Sarah@ UrbanMamas suggested).
Here’s what we did:
Sterilize jars, wash lids and rings and get them hot. Have canner going and almost up to a boil. Then, you can start making the jam –
In a heavy bottom pot, bring to a boil:
2 1/2 cups water plus 5 heaping cups black currants, stems removed, and washed (that’s how much we picked). Reduce and simmer 15 minutes, crushing berries against the side of the pot.  (Berries should be soft and well cooked.)
Add in 6 cups sugar + 1/4 cup of lemon juice and return mixture to a full boil. Continue to boil until you have reached the setting point (22oF) (check often – mine took about 15 min – you don’t want to over cook!).
Remove jam from the heat, and continue stirring once a min for 5-7 min (this helps distribute any berries so you don’t have floating fruit). Pour into hot, sterilized jars, place lids and rings on, and process 5 min in a hot-water-bath canner.
Enjoy!