Moderation and Economy

Off the needles…pale blues.

dsc_0642

Thrifted yarn and easy patterns = two finished shawlettes.


dsc_0646

I think this yarn is alpaca.  It’s two shades done in stripes to get enough to make a shawlette.  The knitting is easy, mindless, meditative.

dsc_0647

This yarn is a wool/alpaca blend.  Simple feather n fan style shawlette.  Wish there had been more to make a larger shawl.  I’m just about done with a larger autumnal shawl in worsted brown and purple with a feather n fan border, and will post pics when I get it finished (maybe next week?)

dsc_0657

This one is a birthday present for my mom next week (Shh! Don’t tell!).  I used to dislike feather n fan patterns and favor more delicate, intricate lacework.  But with four busy kids, and needing to put my work down frequently, I have learned to appreciate a simple, predictable pattern.

I’ll be in Salem tomorrow reffing a derby bout, but will be back Sunday with a new recipe.

Blessings on your weekend!

Little Quilt for Lucky Lola

IMG_3226

My dear friend, Trish, from Lucky Lola Studios asked me to make her a little quilt she could use for newborn portraits.  Something pastel and gender neutral.  My local thrift store is the perfect place to pick up bags of scrap fabric for $0.50-$2.  It’s often vintage or good quality quilting remnants from Fabric Depot.  If you’ve got a use for little bits of this and that all the way up to fat-quarter sized pieces, their grab-bags can be a good deal.

A while back, I found a bag that was all 5×5 or smaller pieces or strips of Depression-Era reproduction fabric.  Most of the pieces were 2 inches or smaller, but some were long strips.  I’d been holding it back for the perfect project, and it seemed like just enough to fulfill Trish’s request.


IMG_3228

My favorite pieces were these teacup prints!  Just enough to cobble together eight squares for the main blocks.

IMG_3230

Since we’re on the subject of handwork, I wanted to share these books my sister-in-law got us for Christmas.  All of the scenes are made from felted wool!  The kids and I have loved looking through them and Ruth has been researching more about how to make felt figures with wire frames underneath.

IMG_3229

I finished the quilt with some machine quilting and used some vintage thrift store fabric for the back and thrifted bias tape for the binding.  Looking forward to getting it off in the mail this weekend!

Solar Dehydrator

IMG_1806

A friend recently gave me her well-loved solar dehydrator.  I have been chomping at the bit to try it out, and yesterday picked a bunch of herbs (that will eventually go into salves) and set to drying them.

IMG_1799

I spent some time in the evening gathering calendula blossoms and comfrey (shown here), broad-leaf plantain, raspberry leaves, rosemary, lavender, and costmary.  The calendula blossoms come in an array of peaches, yellows, oranges since I let them freely self-sow around the garden and express their natural genetic diversity.

IMG_1816

I have two electric dehydrators and make a lot of dried fruit and herbs in them.  However, electric dehydrators use a LOT of power and must run for eight or more hours.  This adds cost and produces heat indoors as well as any environmental impact that comes with plugging in an appliance.

The permaculture way to preserve via dehydrating is to utilize the natural energy of the sun (Principle 2: Catch and Store Energy) to dry food and herbs without costly use of electricity and all the waste products and impacts that come from using the grid (Principle 6: Produce No Waste).

IMG_1815

The dehydrator is made with a series of screens stacked into a wooden box. There is air space between the screens and around their edges.  The top of the box is glass, and as the sun’s rays are harnessed, hot air builds up in the box and circulates around, drying the herbs without any work from me, save rotating the screens a couple of times over the course of the day.  It is extremely efficient if the day is sunny.

IMG_1818

Looking forward to making a batch of salves soon, and hoping for more sunny days in the next week so I can dry prune plums next!

Quick Project – First Aid Kit

IMG_1394

A little sewing from the weekend:   There tends to be a seasonality to my craft habits, and summer time is sewing time.  When life gets a little stressful (and I can’t go skate), I can retreat to the sewing machine upstairs, rummage through the scrap pile, and crank out a few quick projects.  And feel a little better.

IMG_1395

I found this tutorial on Pinterest, and whipped up some little First Aid Kits for gifts.  Bea asked if I’d make her one from scraps of strawberry fabric, so this one is for her.

IMG_1397

IMG_1391

These kits were a great use of scrap fabric (which I have in abundance thanks to our local thrift store) and took about 20 minutes start to finish.  I think I’ll be making quite a few more for gifts.

Back to tomorrow with an update from the orchard.

Healing Salve Recipe

IMG_0459[1]

‘Tis the Season to make Christmas gifts, and Bea and I started yesterday morning, making another, larger batch of comfrey-rosemary salve.  (Joining the KCCO today.)

Comfrey, also known as knit-bone, is touted as having strong healing properties.   I have used it daily on my broken ankle once the stitches healed (don’t use the salve on open wounds), but it is also commonly used on bruises and other injuries.  It is a soothing salve to rub onto bumps, bruises, sore muscles, etc – all of which are common place in a house with 3 roller derby girls and very active, energetic kids.

IMG_0426[1]

Bea and I made this batch early in the morning before the other kids woke up.  At ten years-old, she can work with the hot wax and oil safely (with a little supervision, of course).

We have a $0.25 pot from the thrift store that is used only for beeswax-based projects.  Most of the jars were also from the thrift store, as well as some baby food jars given to me by a friend.

IMG_9869[1]

I grow loads of Russian Bocking Comfrey in my garden because it is a dynamic accumulator and sequesters all sorts of minerals in its leaves – thereby making it a great fertilizer in the garden, as well as excellent duck forage.  It has deep tap roots (up to 12 feet deep!), which help break up our dense clay soil, and its delicate purple flowers are a favorite of bees – blooming for a long stretch.

I had picked the comfrey and rosemary a few months ago and dried them, but you can also order the dried herbs online if you don’t have a source in your yard.

Once you have the ingredients gathered, the salve takes only about 15 minutes to make.  Here’s our recipe:

IMG_0460[1]

Comfrey-Rosemary Salve

3/4 cup organic olive oil 

4 Tbsp dried comfrey leaves

3 sprigs dried rosemary (you can substitute 2 Tbsp dried lavender if you prefer)

1 Tbsp vitamin E oil

3/4 cup organic coconut oil

6 Tbsp chopped beeswax

10 drops tangerine or 4 drops patchouli oil (if using dried lavender, substitute with lavender oil)

Directions:

– Infuse the dried herbs in the olive oil.  This can be done two ways:  either place the herbs and oil in a double boiler and heat gently over water (do not boil the oil over direct heat) for 30-45 minutes, or place dried herbs in the oil, cover and store in a dark place for 3-4 weeks.  (Note: Do NOT use fresh herbs – the water in them will cause your oil/finish salve to mold.  Herbs must be thoroughly dried.)

-Strain the dried herbs from the finished olive oil and discard them in the compost.

-Place the chopped beeswax, infused olive oil, coconut oil, and vitamin E oil in a pan.  Heat on medium-low heat, stirring constantly until all ingredients are completely melted.

– Immediately remove from the heat, and stir in the tangerine oil.

– Pour into jars, and let cool with the lids off.  Once thoroughly solidified, the salve will keep in a dark place at room temperature for 6 months or more. (Our kitchen was very cold when we made the salve, and it cooled very rapidly, resulting in cracks on the surface of the salve.  Next time, I will wrap towels around the jars or perhaps cover them with a pot so they cool more slowly.)

Back tomorrow for the Yarn Along!

Elderberry-Rose Hip Syrup

IMG_0073[1]

A friend very kindly picked me loads of wild rose hips.  These red-orange fruits of fall are loaded with vitamin C, lycopene and beta-carotene.  They can be dried for tea, or used fresh for syrup and jam.  (Take note – the seeds inside are covered with irritating hairs, and if the fruits are cut up, the hairs need to be removed.  The seeds and outside of the fruit are edible.)IMG_0069[1]

Late in the summer, when our elderberries were in full production (and I was still out of commission), my husband picked and froze loads of berries for me.    Adding the rose hips to my elderberry syrup seemed like a great way to boost the health-benefits of this winter-time supplement.

Here’s my updated recipe:

Elderberry Rose Hip Syrup

Ingredients:

5 cups fresh or frozen elderberries (see prep below)

2 cups fresh unsprayed (preferably wild) rose hips (see prep below)

thumb-sized piece of ginger, skin peeled off

5 cups water

4-5 cups organic unrefined sugar

1/4 cup balsamic vinegar

IMG_0062[1]

Step 1: Remove all stems – even the smallest ones – from the berries (see my notes on elderberries and cyanide here.  (If using frozen berries: Let the berries thaw slightly (as seen above),  then use a fork to easily knock them from the stems.  Discard all stems and leaves in the compost.  Rinse berries to remove any debris or spiders.

IMG_0089[1]

Step 2: Rinse the rosehips, and remove any that are soft and mushy.  With your fingers, pull off the dried brown petals from the blossom end of the hip (also called a “haw”).  Measure out two cups of whole hips (the hips will not burst when cooked, so I don’t cut them open and remove the hairs/seeds for this recipe).

Step 3: Add berries, hips, ginger, and 5 cups water to a heavy-bottomed pan.  Bring mixture to a boil, then reduce to a simmer with the lid off, for 45 minutes.

Step 4: Strain the liquid ad berries, using a fine strainer or clean tea towel, carefully crushing the hot fruit pulp as you do so.  Discard the mashed fruit.  Measure the quantity of juice.  It should be around 5 cups.

Step 5:  Add strained juice back to the pan.  For every cup of juice, stir in 2/3-1 cup of sugar (less sugar will yield a runnier final product).  Bring mixture to a boil, and boil, stirring frequently, until mixture is reduced by one-third to one-half, and thickens to desired viscosity.

Step 6: Add balsamic vinegar (or substitute with 1/3 cup apple cider vinegar for a brighter flavor), and stir.  Ladle hot syrup into jars, and store in the refrigerator for up to six months, or process in a hot-water bath canner.
IMG_0097[1]

The syrup is very good over ice cream, or pound cake, or mixed with a little hot tea or brandy.

IMG_0100[1]


As a health supplement, the syrup is commonly taken as 1/2- 1 tsp daily in the fall and winter.  My children enjoy it in a small glass of seltzer or orange juice.

Back tomorrow with some garden work from today.  Hope you had a restful weekend.

Homebodies

IMG_9977[1]

Autumn is settling in, and we’ve put the feather comforters and extra quilts on the beds.  My ankle hasn’t healed enough to drive yet, so we spend our week keeping busy at home.  Any moment it isn’t raining, we’ve been in the garden.

Some images from our quiet week around the house.  Above: Hops, rosemary, and comfrey drying in a sunny window seat.

IMG_9913[1]

Collecting columbine seeds for Christmas gifts, and a few to sow around the garden.

IMG_0006[1]

Baking bread.  The kids can eat a loaf every single day, and I certainly don’t mind baking.  This is molasses-shredded wheat bread (my kids love shredded-wheat cereal, and we save the crushed bits in the bottom of the bag for making bread.   Tossing a half-cup into the recipe adds a nice texture, and nothing goes to waste).  Butter spread on top when the loaf is warm makes for a soft crust children enjoy.IMG_9989[1]

The Nature Table is transitioning over for autumn.  It includes whatever the kids collect: birch bark, a paper wasp nest, as well as shells and rocks discovered in children’s pockets when we go to do the laundry.

IMG_9987[1]

A volunteer brought the children a nest she found in our raspberry patch.  We find several every year around the yard, but the kids always get excited about them – they have an almost mystical quality because of their ephemeral nature, and each one is unique.

The perpetual calendar in the upper right is from MamaRoots, and was a birthday gift to Bea last year.  She dutifully keeps track of it for us, and it is one of the best instructional toys we’ve purchased.

IMG_0001[1]A few days in the sun, rotated a few times a day, and the hops and such have dried, and been packed into jars until we need them.

Autumn is always bittersweet – I love the baking, sticking close to home, the warm wooly things of fall.  But the garden winds down and is put to bed for the year, and the weather turns grey and rainy and chilly.  Especially this year, where I missed an entire summer laid up on the sofa with my leg, the changing of the seasons hits a little hard.  Fall is here though, and I’ve got to take the good things the season offers and be content… seems like the right time to bake some gingerbread.

Blessings on your weekend.


Hop Blossoms and Dragonfly Wings

IMG_9857[1]

A few pictures from the last two days:

The boys helped me pick hops this afternoon, which we will dry for tea.  Usually, we pick them for brewing beer, but I’m told a few blossoms steeped in hot water with a little honey makes a very soothing bedtime tea, so we are going to try it this winter.

IMG_9803[1]

IMG_9808[1]

Baking sesame-oat and shredded-wheat spelt breads yesterday so the kids could have a snack before derby scrimmage.

IMG_9798[1]

My ankle swells very quickly, and I spent a lot of time with my foot propped up, reading to the children and knitting Christmas presents.  Dragonfly Wings is off the needles, but still needs to be blocked.  I enjoyed this pattern very much – it was easy and quick to knit.   Looking forward to see how it blocks up.

IMG_9870[1]

Before the weather gets too cold and the comfrey dies back, I have begun collecting the leaves to dry, in order to make a batch of comfrey-rosemary salve.

More soon, including a recipe for the comfrey salve.


From the Fig Tree

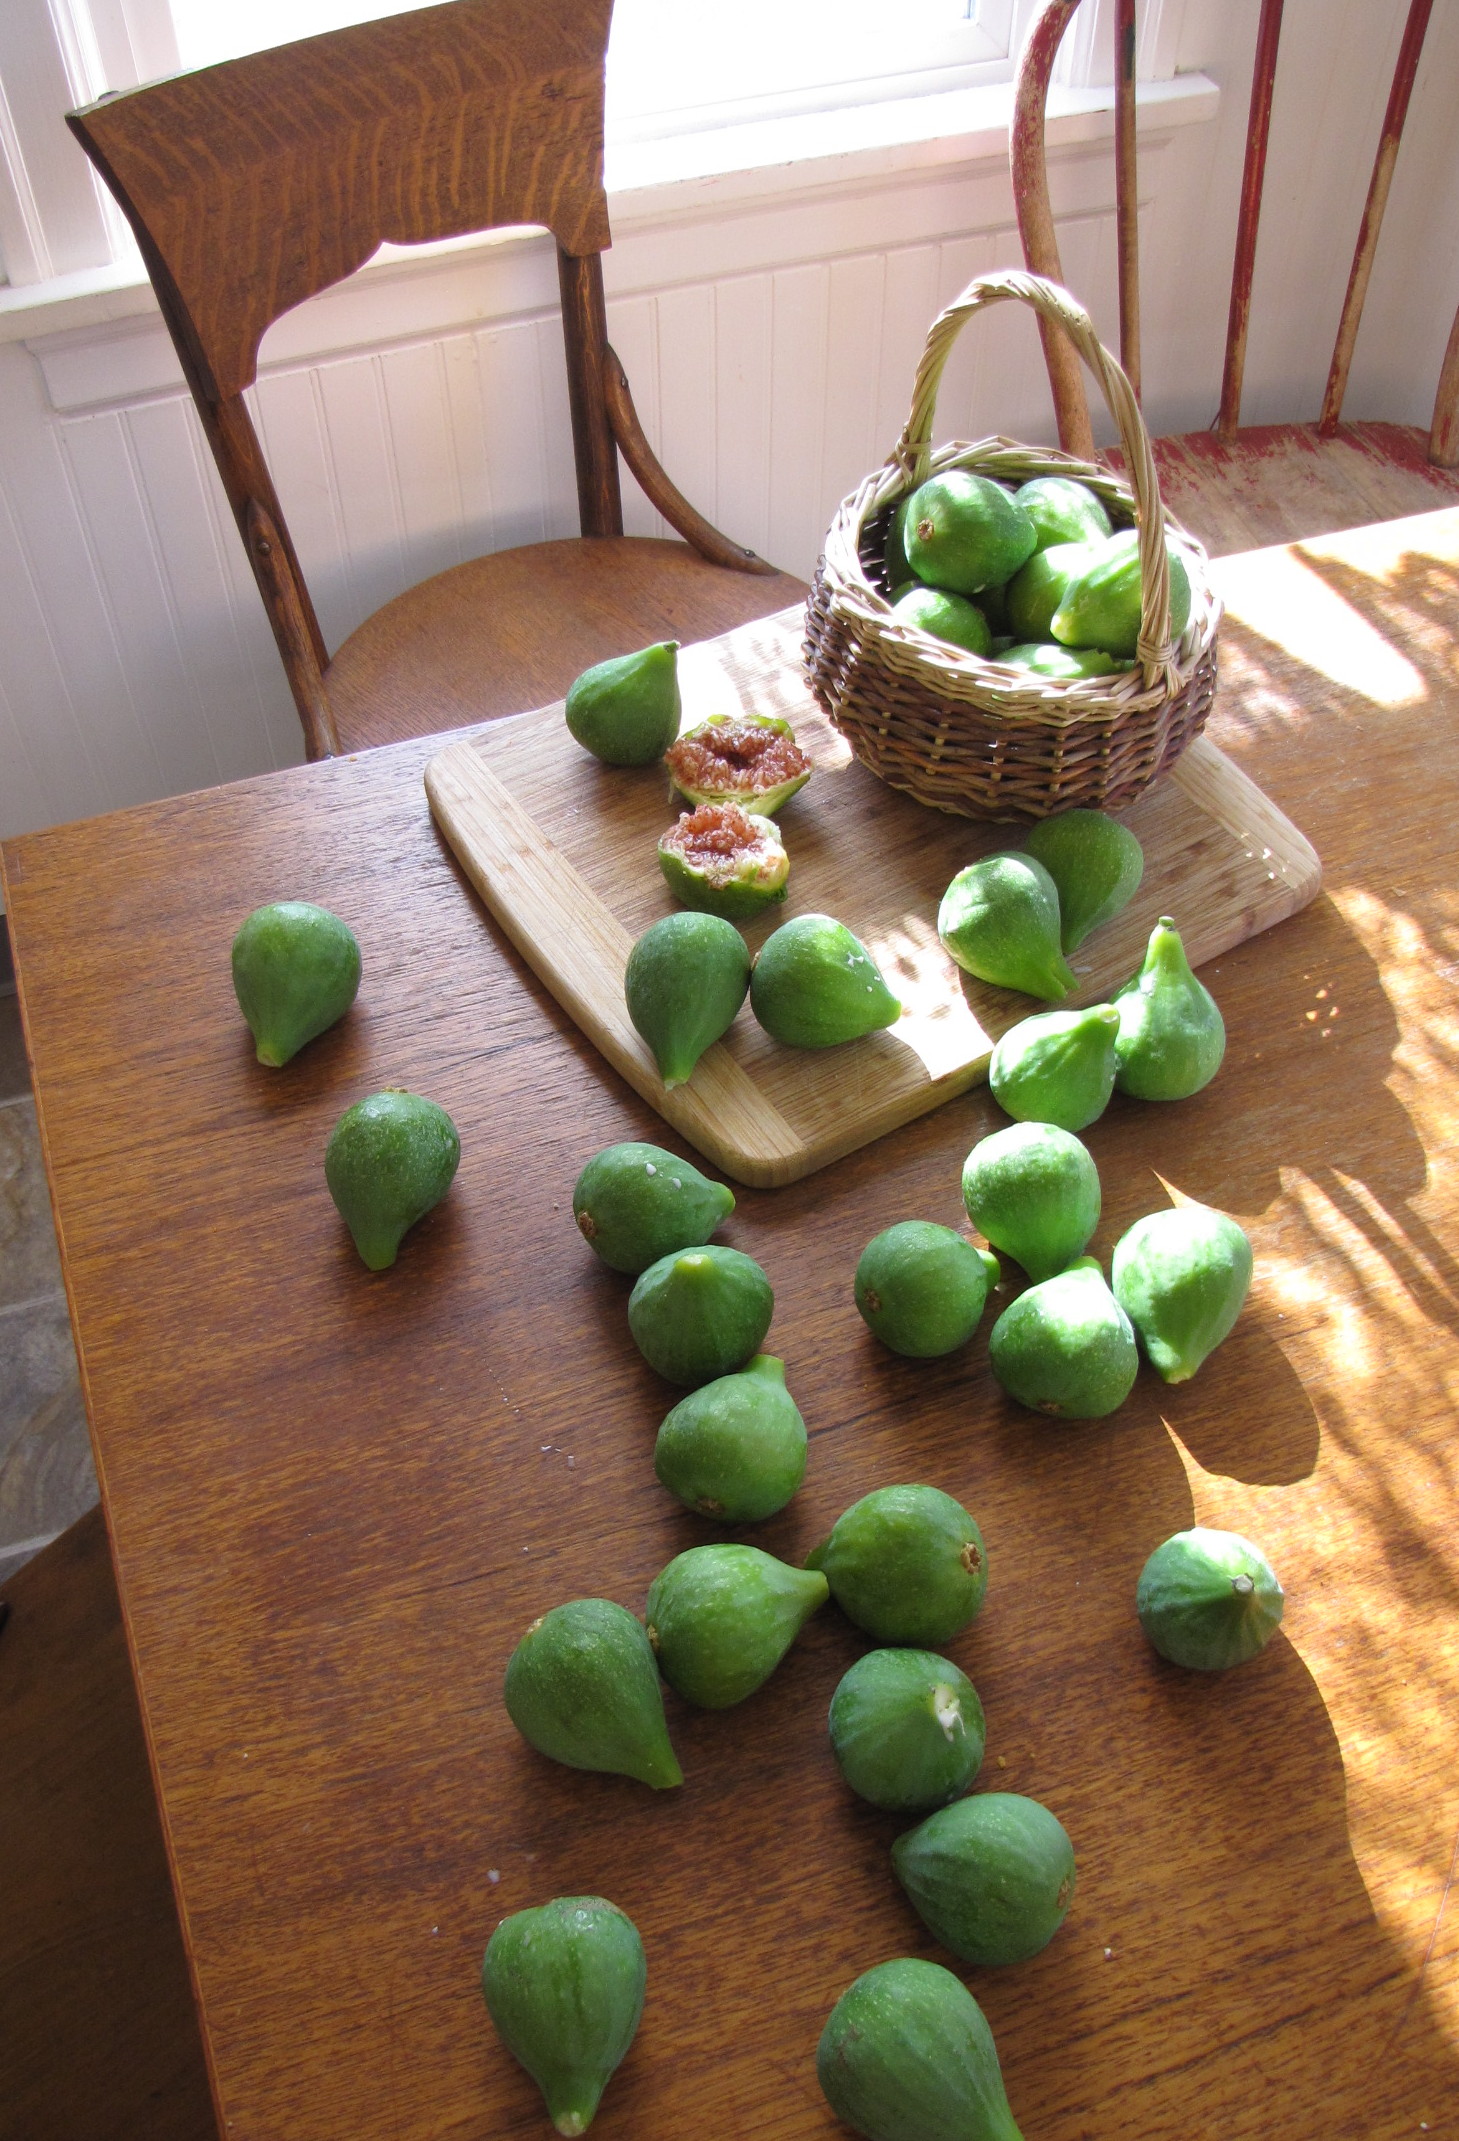
IMG_8705

A cascade of very fresh, very ripe figs the kids poured out onto the kitchen table.  They are from a neighbor’s tree.  She doesn’t know the variety (they are actually her next-door neighbors, but a large portion of the immense tree overhangs her driveway, and no one family can consume the vast quantities of fruit.

IMG_8706

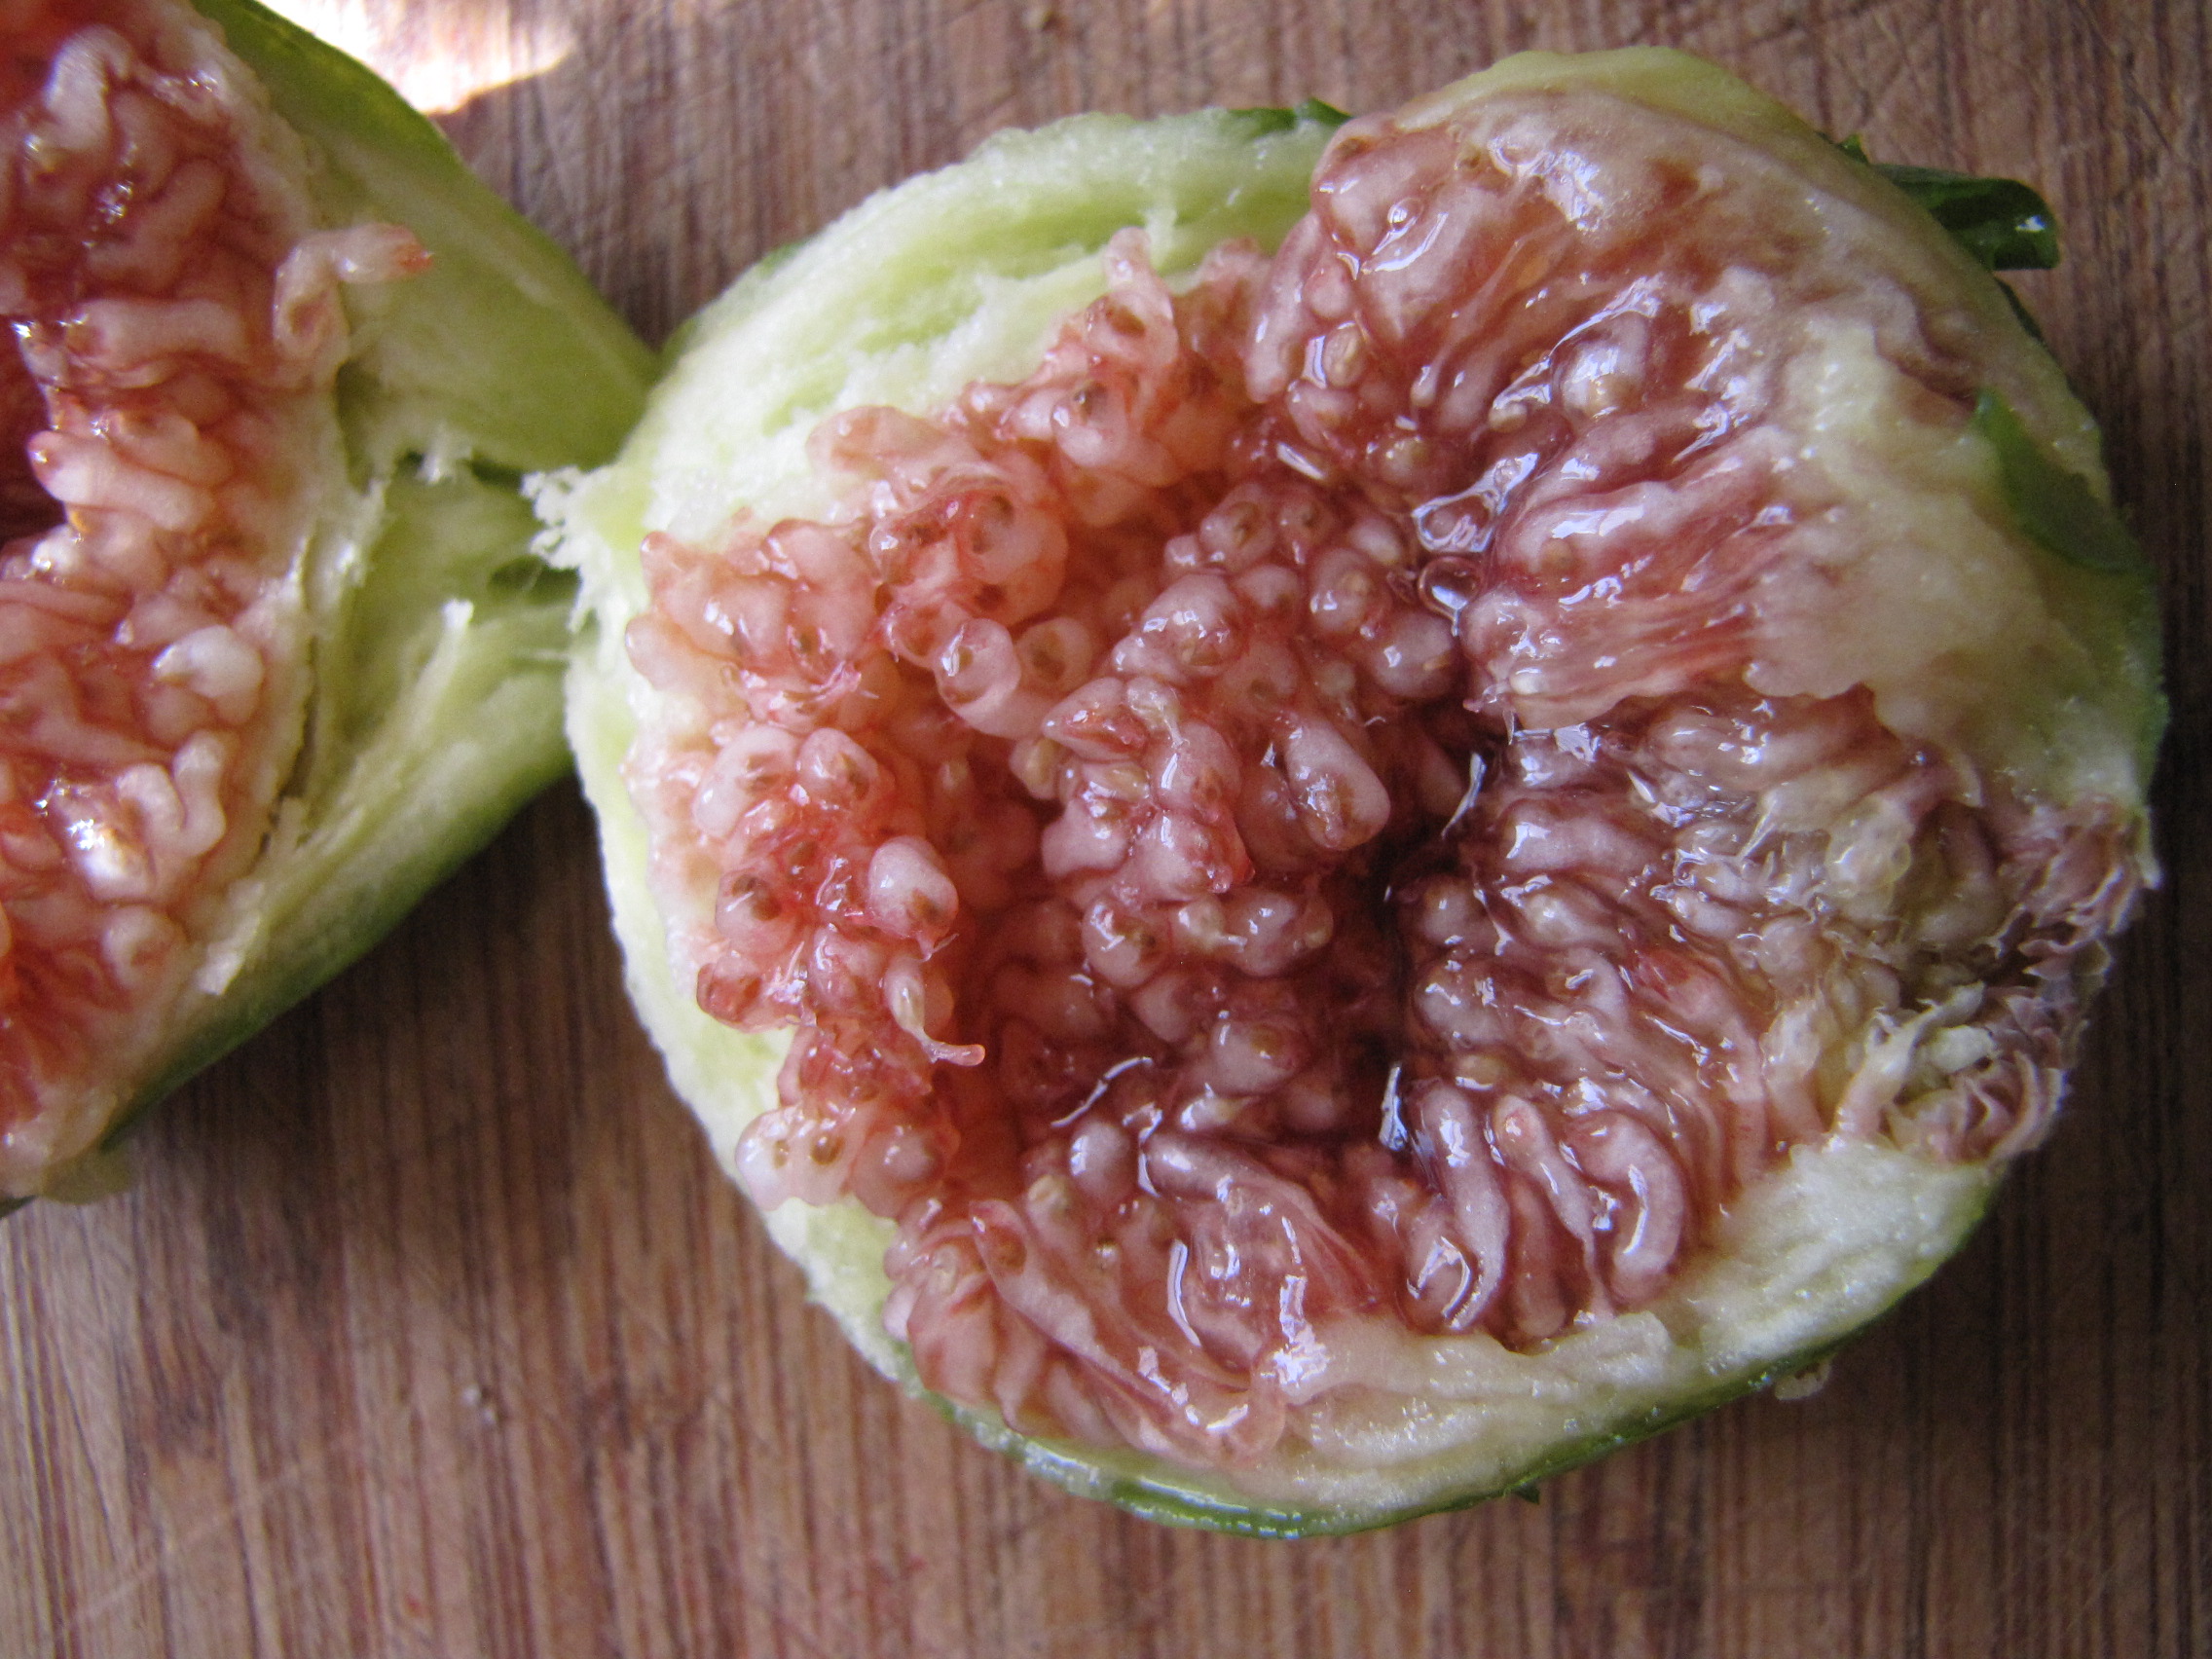
The figs are pale green with a pink flesh, and very soft and sweet.  I think they may be “Desert King”, which does quite well in our climate, and typically produces a large good-quality breba crop (we have a young one in our yard, and it has exactly eight nearly-ripe fruit on it).

I’m planning on starting a small (one gallon) batch of fig wine with some this weekend.  The rest we are eating fresh, or on toast with mascarpone.  I have my eye on these quick fig recipes, though.  Numbers 6 and 8 look particularly good.

I’d also like to try Temperate Permaculture’s fig recipe.

If you’re picking figs, wear gloves, so what happened to me doesn’t happen to you.

For all things “fig”, the knowledge bank at Figs4Fun is the place to visit.

Do you have a favorite fig recipe?  A favorite variety?


I will be back with more posts over the weekend.  We will be busy with the girls’ Roller Derby practices, birthday parties to attend, Sunday Parkways, and such.  The weather promises to be perfection, so every un-scheduled moment will be spent in the garden.  So much ripening, and so much in bloom, I hope to share pictures of it all.

Elderberry Kombucha

Kombucha going through a second fermentation to produce a fizzy, fruity final drink.

A few folks have asked for the recipe for a recent batch of elderberry kombucha.   There isn’t much of a recipe – it is simply kombucha put through a secondary fermentation with fruit added.  Here is the process:

I am currently brewing my kombucha using the Wild Fermentation group‘s method of 3 black tea bags, 2 green tea, and 1 oolong for each gallon of water.  You can also set up a continuous brew system, which I hope to set up in a crockery dispenser very soon.

Once the kombucha has reached the desired level of tangyness, remove the SCOBY, and reserve a 1/2 cup or so of kombucha to jump-start your next batch.

From here, you have a few choices.  The first option is starting a secondary ferment of your  booch right in the jar, and starting your new batch of kombucha (with SCOBY) in a new vessel.  This is how I have always done it previously – usually with lemon juice and a little brown sugar, or diced strawberries.  Covered and left on the counter for a few days, it will turn into a fizzy, fruity version that my kids find quite superior to plain-old kombucha.

The downside of this is that the entire gallon is one flavor.  This means you are taking quite a risk when experimenting with flavor combinations.  That persimmon-molasses kombucha I thought would turn out so great?  Yeah, well, that was a whole gallon none of my kids would drink.  But there is another option.

A while back, I had pinned a blog post from My Gutsy that featured fruit combinations for secondary fermentation of kombucha.  It was very late at night, and I was skimming whole-foody type blogs and knitting and half-dozing off, and I should have read her post more closely.  She does her second ferment right in the bottle!  Brilliant!  Why hadn’t I ever done this before?  Now, I can try small batches of different flavors, and it is already bottled up and ready to go when I am scrambling to get out the door for homeschool park day or church or what-have-you.

She recommends  re-using kombucha and tea bottles (about 16 oz), adding 1/4 cup fruit juice or puree and filling the rest of the bottle with booch, but also gives ratios for other sizes of glass containers.  I used some chia-drink and iced-tea bottles I had washed out and saved in our basement canning room (I knew they would come to good use someday!).

For some of the bottles, I picked a few blackberries from the yard, crushed them, and added a little orange juice.  For some, I used my old stand-by scaled down to = 1 Tbsp lemon juice and 1 Tbsp brown sugar.   For the remainder of the bottles, I went with elderberry syrup:

IMG_8688

For each 16 ounce jar, I added 2 Tbsp of elderberry syrup.  Because the syrup already contains quite a bit of sugar, and the elderberries have a strong and distinctive flavor, I thought it might be best to start with 1/2 of Gutsy’s recommended amount of fruit juice.   I was sure to leave a good 2-inches of head-space to prevent breakage, and left it on the counter, tightly sealed, for two days.

The resulting drink is a beautiful magenta color (see top photo), and has just the right amount of sweetness and berry flavor plus fizz.  Of all the flavor combinations we tried, the kids loved the elderberry best (George could be heard shouting, “BOOOOCH!! More  BOOOCH!!” Halfway across Sellwood Park).  So, today when I bottled up another round of kombucha, every jar has an added immune-boosting dose of  elderberry syrup.

A few notes of safety –

1)Raw elderberries contain some cyanide (which cooking removes), and the stems and seeds contain even more.   Please follow my safety guidelines, which can be found here, and do not add raw elderberries to your kombucha.

2)Kombucha is a living food, and helps populate good intestinal flora.  Begin consuming kombucha or any fermented or cultured food in small amounts (a Tbsp or so at a time).  Ease it into your diet in order to avoid digestive upset, gas, etc.)

The Best Dilly Beans EVER

IMG_8672

Lately I’ve been getting back to making home fermented foods, for our health and for simplicity’s sake.  I routinely make sourdough, yogurt, and buttermilk, but had gotten away from cultured vegetables (life gets busy).  But the past several weeks, I have re-discovered how much we love lacto-fermented veggies.

Lacto-fermentation is the process of using beneficial bacteria (primarily Lactobacillus acidophilus and L. bifidus) to create lactic acid and ferment raw fruits and veggies into foods that are more easily digestible and have more bio-available nutrients.  The process also preserves food for many months.

The garden is bursting with produce, but my schedule is hectic and time is precious, so even setting aside the health benefits, lacto-fermentation is the best option for preserving and enjoying much of our garden produce.  Unlike canned pickles, lacto-fermented veggies do not require heating up the kitchen and hours slaving over a canner on hot summer days.  They only require a few minutes to prep the ingredients, a little care in setting up the ferment.

IMG_8642

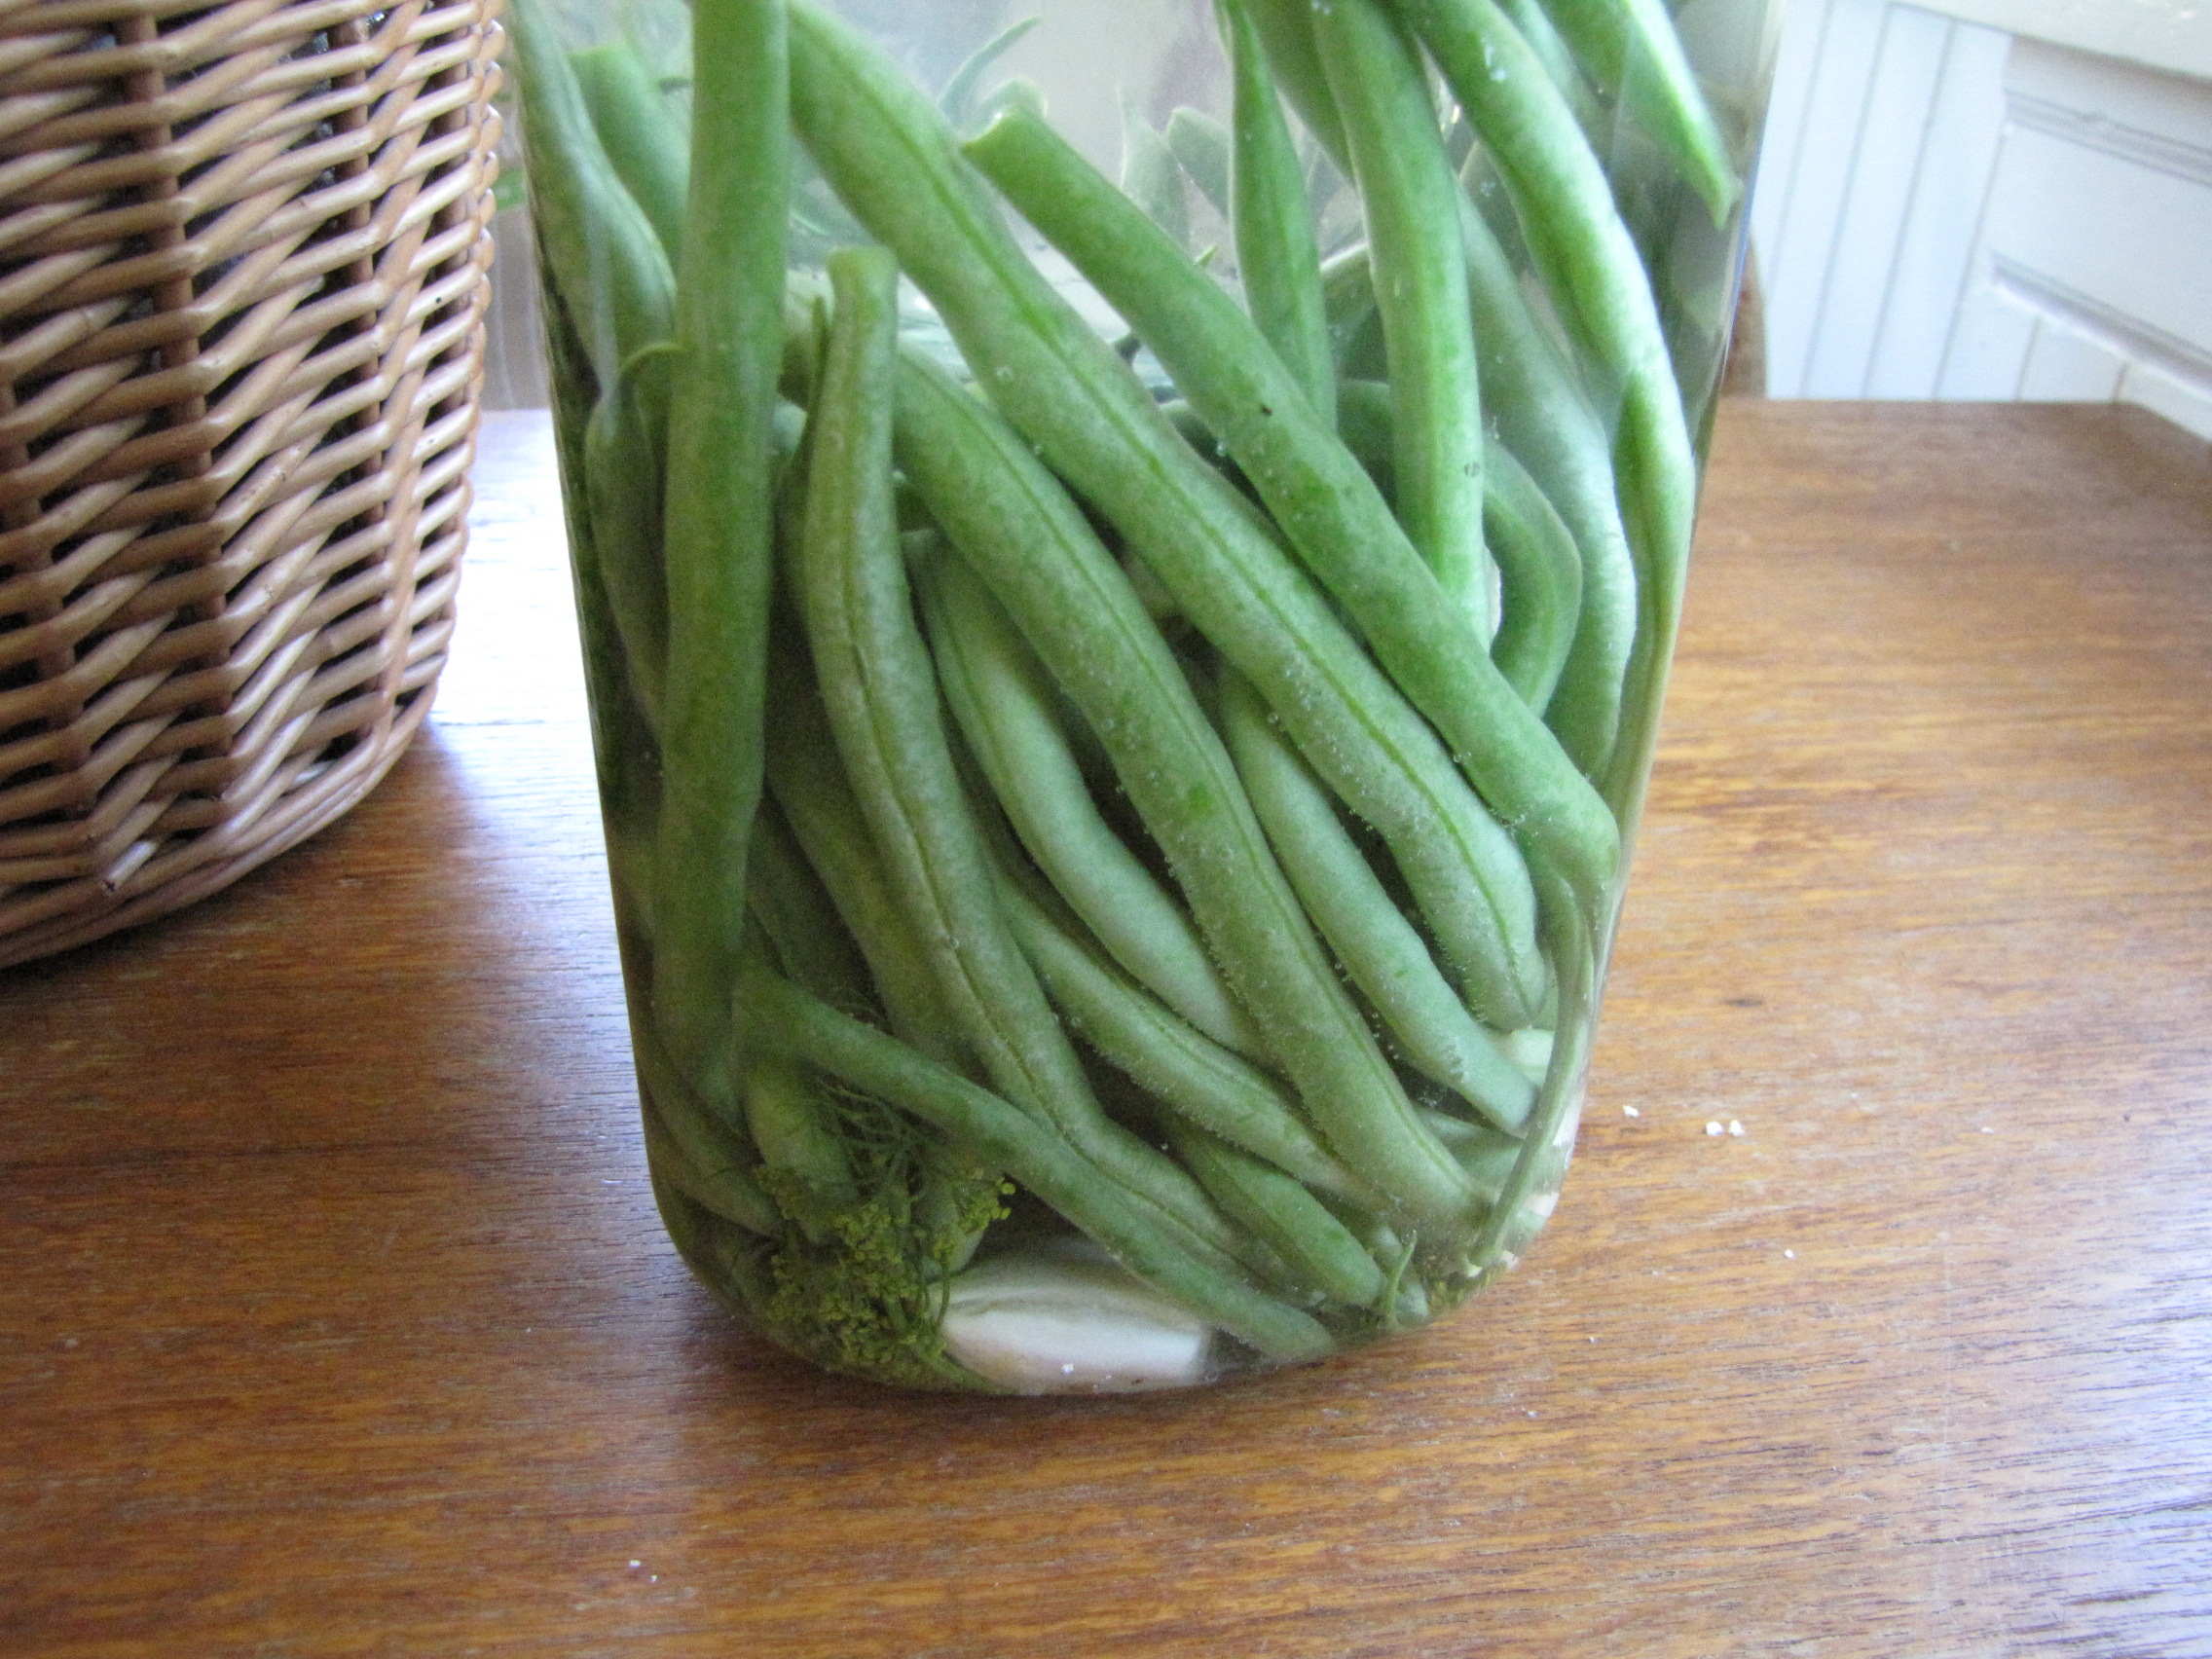
Today, a batch of Dilly Beans finished after five days on the counter, and I couldn’t wait to crack into the jar.  I must say, they are superb.  They are exponentially better than the less-than-crisp hot-water bath canned bean pickles I’ve made in the past.  A completely different and superior food, and I can’t stop eating them!  These beans are crispy, crunchy, salty, tangy, with just the right balance of dill and garlic.  Did I mention how crunchy they are?

Here’s my recipe, but first a few notes that will help your fermentation be successful:

On the brine – in order to create the proper environment for the good bacteria and inhibit mold growth, the brine MUST be salty enough.  The traditional ratio is 3 Tbsp of salt for 1 Qt. of water.  Also remember that all of your pickles must be fully submerged in the brine – any pieces sticking up out of the brine may mold or grow funky bacteria and spoil your batch.

For a less salty, and quicker fermenting brine:  omit 1 Tbsp salt and substitute in 1/4 cup whey from making yogurt, creme fraiche, or cheese.  (You can strain a cup or so of store-bought yogurt with active cultures (REAL yogurt, not one with added guar gum and thickeners and such) to get your whey if needed.  I like Nancy’s Organic Wholemilk Plain.  It’s what I use as a starter for homemade yogurt, too.)

On the fermenting vessels – My friends at The Liberated Kitchen suggested picking up large fido jars at Ross or Marshalls.  What a great idea!  For $3 or $4 each you can snag half-gallon and gallon-sized jars which work great for fermenting.  I pack my veggies in, add the brine, and then insert a small juice glass to push the veggies under the brine before sealing it up.  (Note: I used to believe that you had to burp the jars to reduce pressure and avoid spill-over or breakage, but have since learned that Fido jars actually allow gases to escape through the gasket, without oxygen re-entering or the need to burp the jars.)

Best Dilly Beans EVER

1 1/2-2 lbs of fresh, organic green beans

4 cloves of garlic, smashed with the side of a knife

2 heads of dill buds/flowers OR a good handful of dill fronds (which aren’t as potent)

1 heaping tsp black peppercorns

Enough brine to cover the beans +1 inch (My beans were quite long, and I needed about 1 3/4 Qts.)

Directions:

1)Place garlic, dill, and peppercorns in the bottom of the jar.

2)Stack beans (standing up on their ends) into the jar.

3)Fill jar with brine, being sure to fully cover beans, but leaving headspace.

4) Leave on the kitchen counter (60-80F is ideal) for 5-10 days, until desired tangyness is achieved, then move to the fridge (Be sure to  check the contents daily, and don’t overfill or  you may break your jar, especially if it is warm in the house and it ferments rapidly).  Will keep for several months in the fridge.

For more info on lacto-fermentation and other fermented foods, plus tips on trouble-shooting and inspiration from other fermenters, visit the Wild Fermentation FB Group.

Yarn Along – Just Barely

IMG_8090

Life is so frantic lately, I almost didn’t make Nicole’s KCCO or  Ginny’s Yarn Along this week.  I am having trouble keeping my head above water some days.  It seems to be a constant problem – four kids, busy schedules, deadlines, nowhere to cut back and simplify.  When life gets like this, I’m going to drop a ball somewhere, I just don’t know where yet…

This week, I’m re-reading some of of my favorite permaculture books.  I am working on a research project, and while I thought most of my reading would take place late at night (thanks to chronic insomnia), the kids had other plans.

Ruth and Bea (ages 10 and 8) found the stack of 7or 8 permie books and asked if we could read through them together.  Ruth, ever the artist,  is fascinated with all the diagrams and base maps and sketches.  Bea, ever the idealist, enjoys thinking about designing for conservation of resources and regeneration of the land.  We all enjoy reading them together.

(Our favorite is Jenny Allen’s Australian book, Smart Permaculture Design.  Oh, if only we could grow mangoes and avocados!)

IMG_8096George is growing like a weed, and has outgrown some of the wool soakers I made him a while back.  Those that still fit take a while to dry on the line, so we’re a little short in the rotation.  Over the last few months, I’ve collected some cashmere and merino sweaters from the thrift store (for $1-$2/each), and today I hope to get them cut up for more longies and short soakers.   There should be enough to make four for George and two infant-sized ones for baby shower gifts.

IMG_8106In the late winter, I tend to be a little burned-out on knitting, and try to fill the void with spinning projects.  Last week some folks here and on the Facebook page commented on all the spindle spinning, and asked what I had going on the wheel.

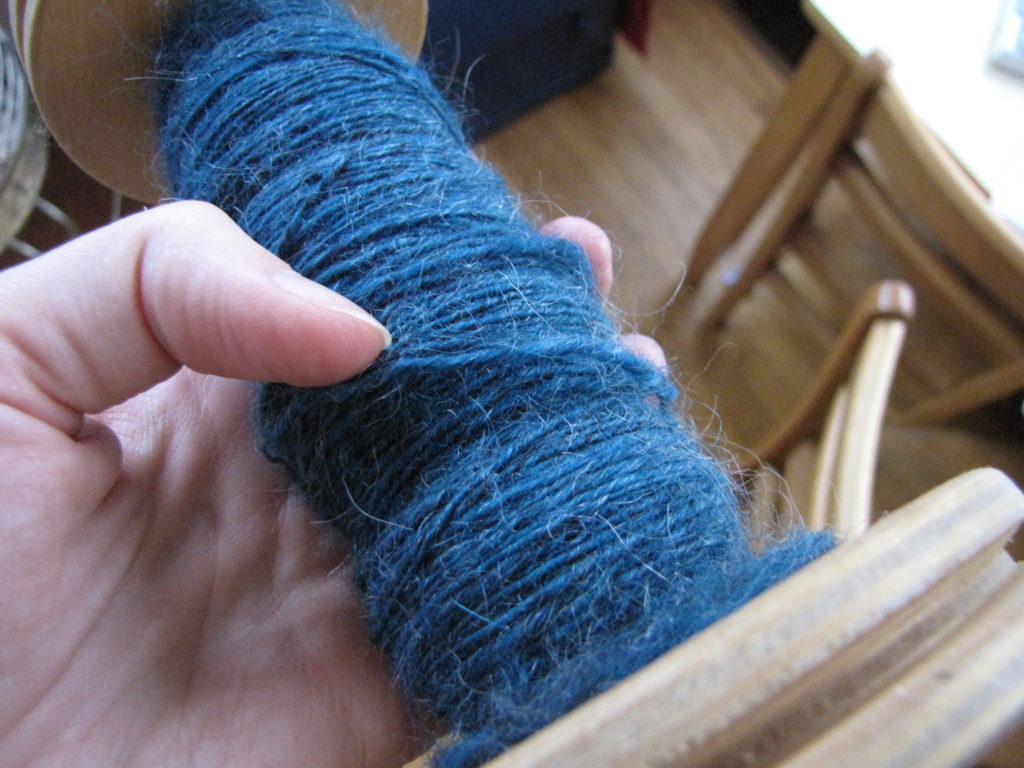
(Apologies for the fading light – it’s so hard to photograph in Oregon in January.  The color on the bobbin below is more true than above.)  Almost three years ago, I purchased a lot of mill-end Brown Sheep roving at a ridiculously cheap price (less than $8/lb).  I have worked through most of it on drop spindles, but this full pound of  teal with blue and black streaks (85% wool 15% mohair) is on the wheel.

IMG_8103

My beat-up Louet S10 came with only two bobbins (it was supposed to come with three…long story.  Buyer beware on Craigslist!), and both are currently holding this yarn.  Trying to fill this bobbin so I can hurry up and ply them.  My goal is to make matching vests for Harold and George (There should be ample yardage out of a full lb), which will be sized to fit them this coming fall (you have to really plan ahead when planning a project from a bag of roving!).

And now it’s back to school work with the kids:  Ruth is tackling addition and subtraction of mixed numbers with unlike denominators, and she needs me right there to work through the problems with her.  We are trying to wrap up school work early today, because Bea has an appointment to read to the therapy dog at the library this afternoon (such a great program for cautious and struggling readers!), and Ruth is desperate to pick up her book on hold (Harry Potter and the Order of the Phoenix).

I will catch up on the other Yarn-Alongers later tonight.  Happy knitting and happy reading!


Alpaca and Social Permaculture

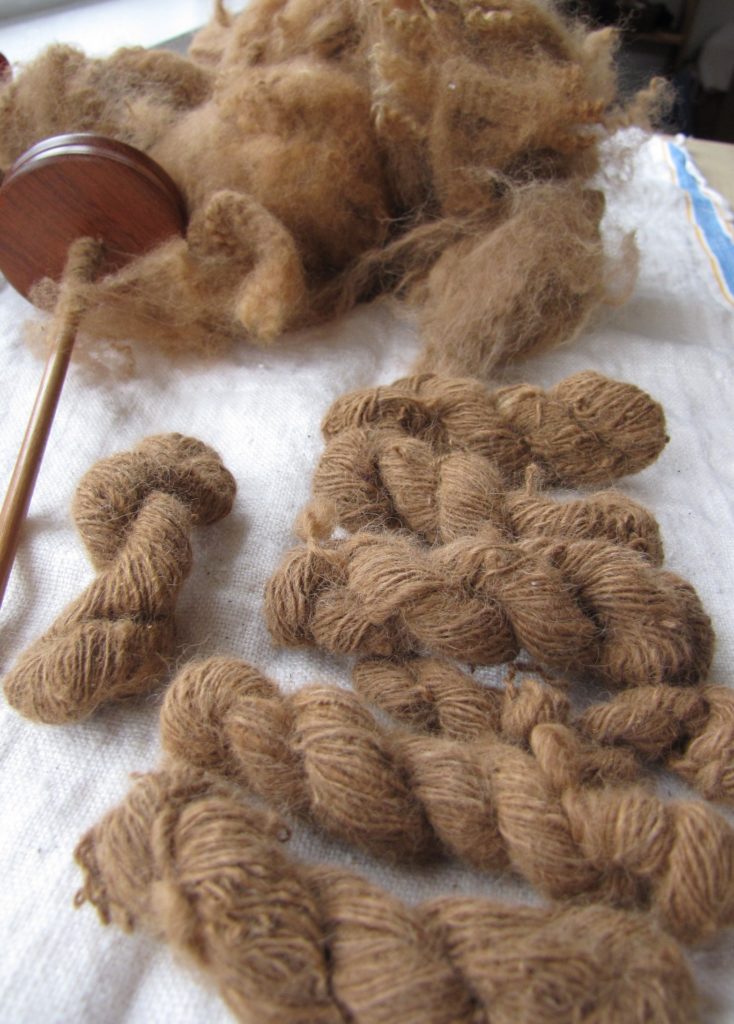
I’m tackling spinning for the Yarn Along this week.   Little by little, I am working my way through a 4 oz bag of first-shearing unwashed alpaca fiber (isn’t the coppery color lovely?).  This buttery soft fiber was a gift from my sister some years ago.  She picked it up from Foothills Fiber in Hood River, OR.

Originally, I was going to put this on the wheel, but both sets of bobbins are already full of other fibers, so I’ve been working on a drop spindle.  (I have 6 or so spindles going at any one time, so progress on any one fiber is fairly slow.)

This week, we have been thumbing through Discover Nature in Winter, as well as the classic primitive/survival skill book Participating in Nature.  The children and I are looking for winter activities out-of-doors that extend beyond the garden.

I have also just begun  The Sweet Spot: The Natural Entrepreneur’s Guide to Responsible, Sustainable, Joyful Work.  Lately, the Buddhist ideal of “right livelihood“  has really interested me.   It is similar to concepts of social and economic permaculture, in which the ideal is to take work that benefits the renewal of the land or the care of people and eschew jobs that damage the land, overuse resources, and exploit people.

Both my husband and I feel our careers (paid and unpaid) fall within this sphere.  I don’t think either of us could embrace a career that did not, and we love what we do.  I simply thought the book might be an educational read.

Okay, back to spinning while Bea does her read-aloud this morning.  Have a wonderful second half of your week!

Making Butter

I made a bit batch of beef stew for dinner this weekend – enough to last for two meals.  We rarely eat beef or pork (other than a small amount of ham or bacon to flavor veggie dishes), so it was a real treat for all of us.  All day long, the kitchen was full of the aroma of leeks, smoked paprika, merlot, allspice, and cinnamon.

Ruth suggested we make butter and loaf of bread to go with dinner.   I happened to have 2 cups of organic heavy cream in the fridge.  Okay, let’s make butter!

To make butter

take a 1 quart mason jar, and add:

2 cups of heavy cream

a pinch of ultra fine popcorn salt (optional!  I prefer mine without salt)

screw the lid on, and shake.  And shake and shake and shake.  For about thirty minutes.

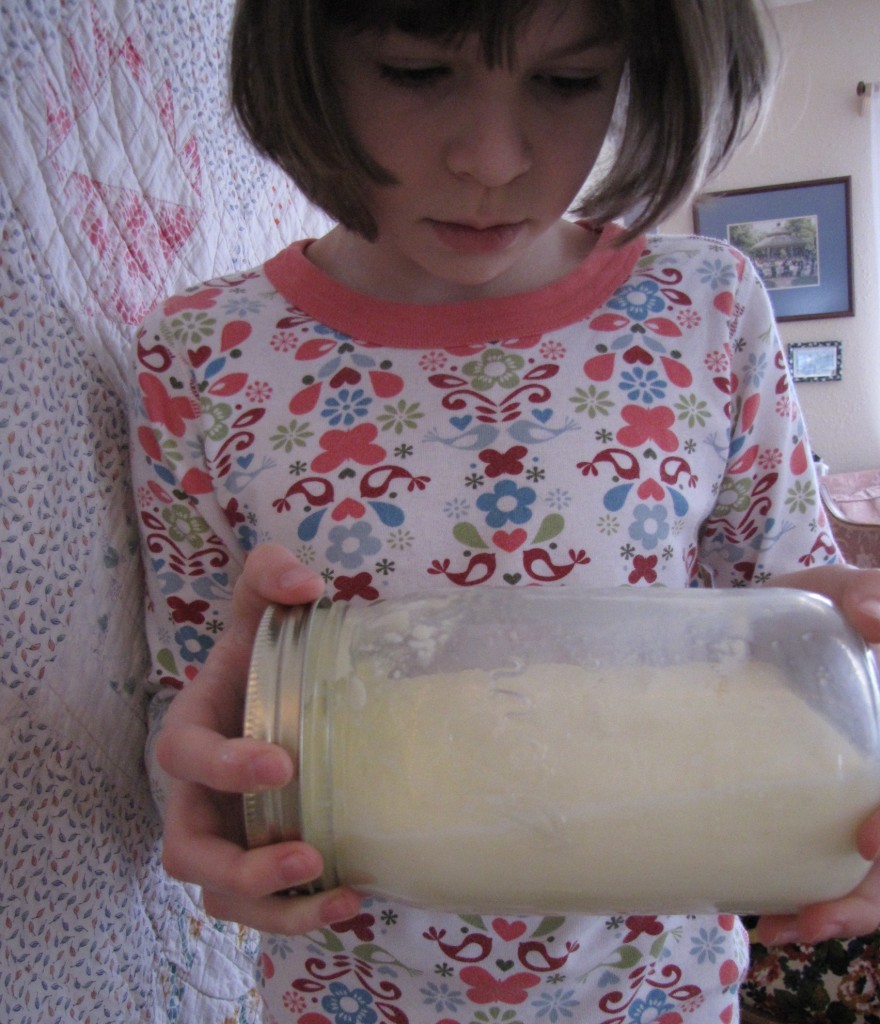
(Ruth, concentrating hard on the jar, willing the cream to separate!)

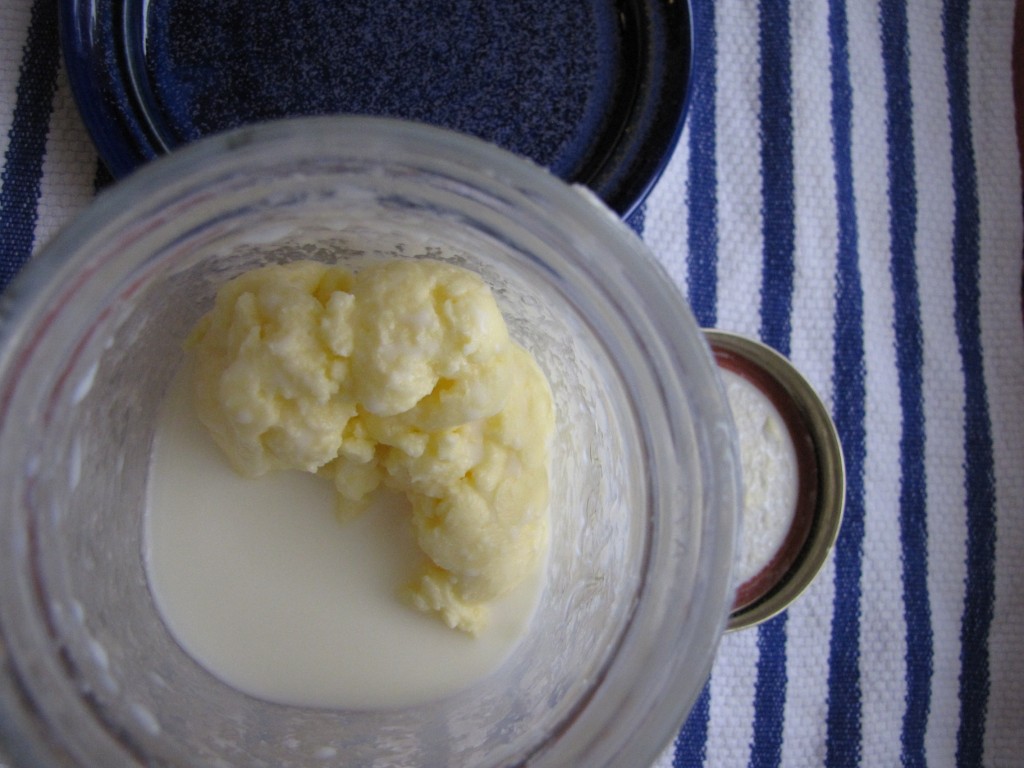
It was a weekend morning, and Casey was reading books to the kids, so we just passed the jar around, each person shaking and swishing until s/he got tired, then passing it to the next person.   After about 15 minutes, it was perfect whipped cream.  Then after about half an hour, suddenly there was a large chunk of bright yellow butter sitting in buttermilk (top photo).

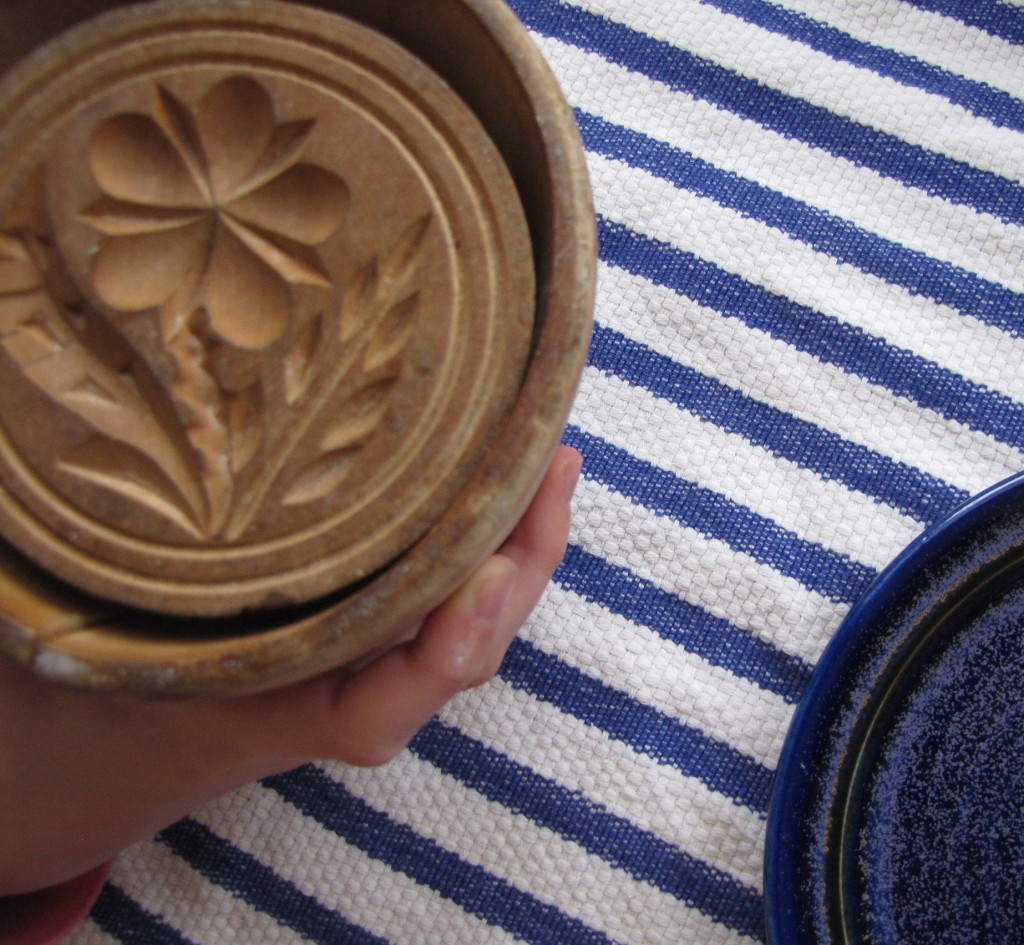
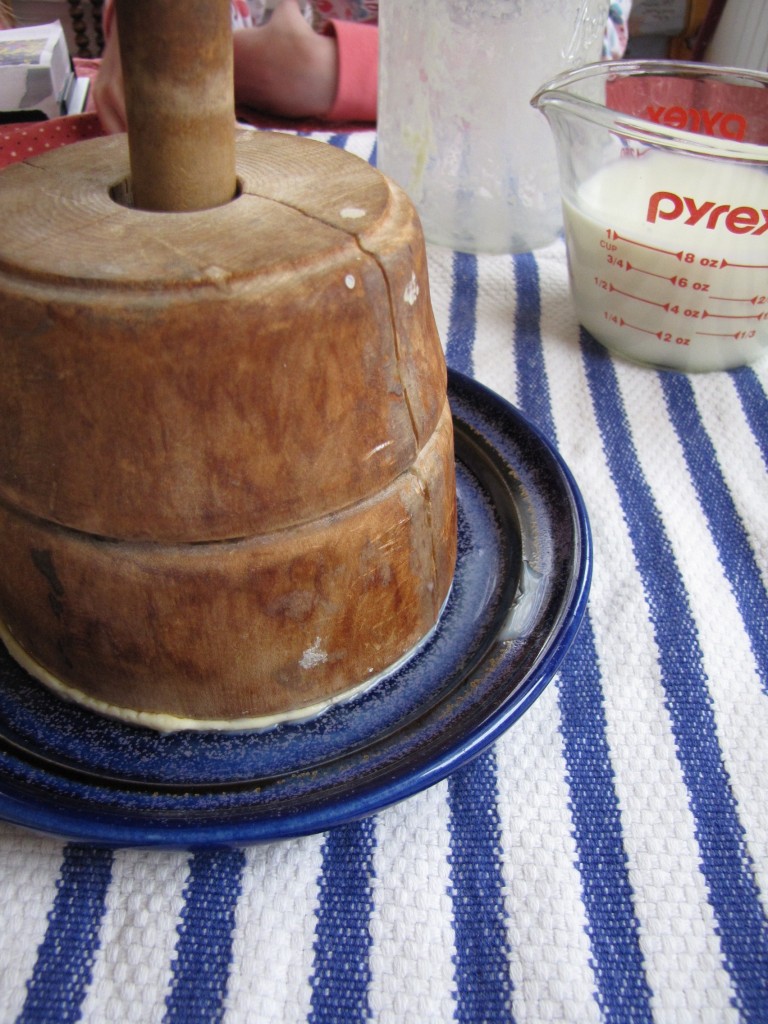
This was the perfect opportunity to get one of the antique butter molds Casey’s grandma, Ruth Young, had given me a few years back.  I believe they were her grandmother’s.  After we had squeezed all the buttermilk from the butter (exactly one cup of each), and chilled the very soft butter in the fridge for a while, we pressed it in the oiled mold.

(The cup of buttermilk was used to make the bread later in the afternoon.)

 The butter smelled buttery and looked so beautiful, and the kids couldn’t wait to eat it.  I never got a shot of the finished molded butter, because as soon as I turned to get some crackers (the bread wasn’t made yet), the children had already dug into it with spoons!  Ah, well.  Next time.  It was absolutely delicious, though.

Great choice, Ruth!  It was a fun activity, and went perfectly with the crusty bread and beef stew for dinner.  Now, if only we had a neighbor with a cow and steady supply of fresh cream…

Christmas Preparations

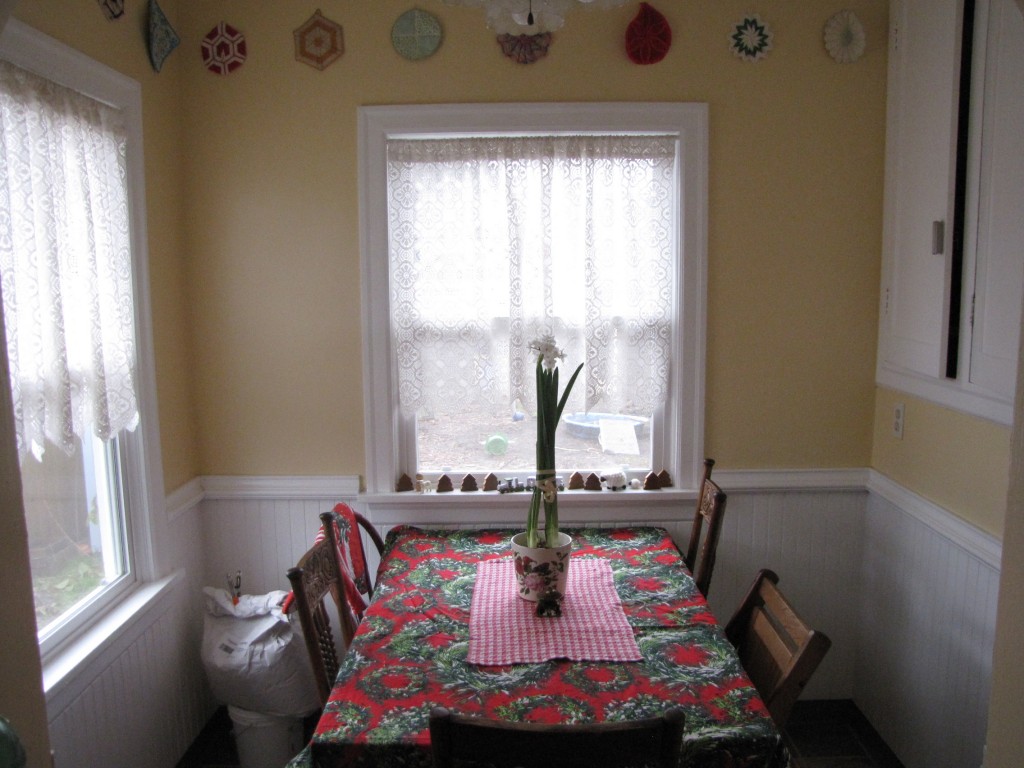
We’re finally getting the sewing cleared away and readying the dining nook for Christmas dinner. (That big bag of oats will shortly become granola for Christmas gifts. )

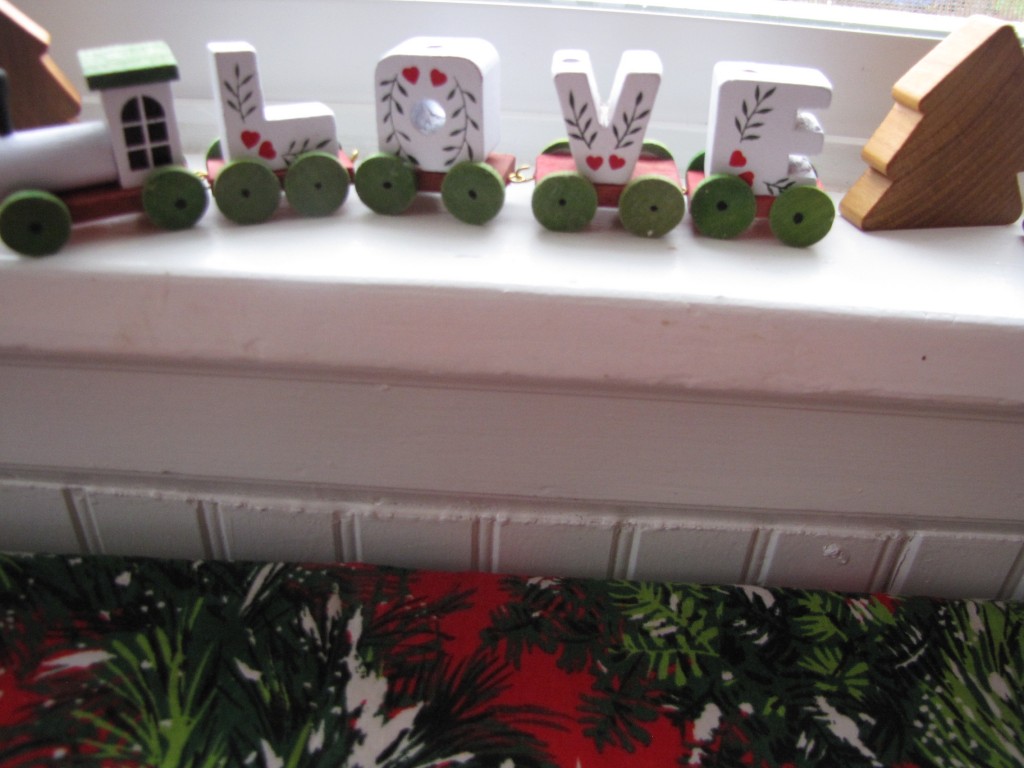
And putting out some last-minute decorations…

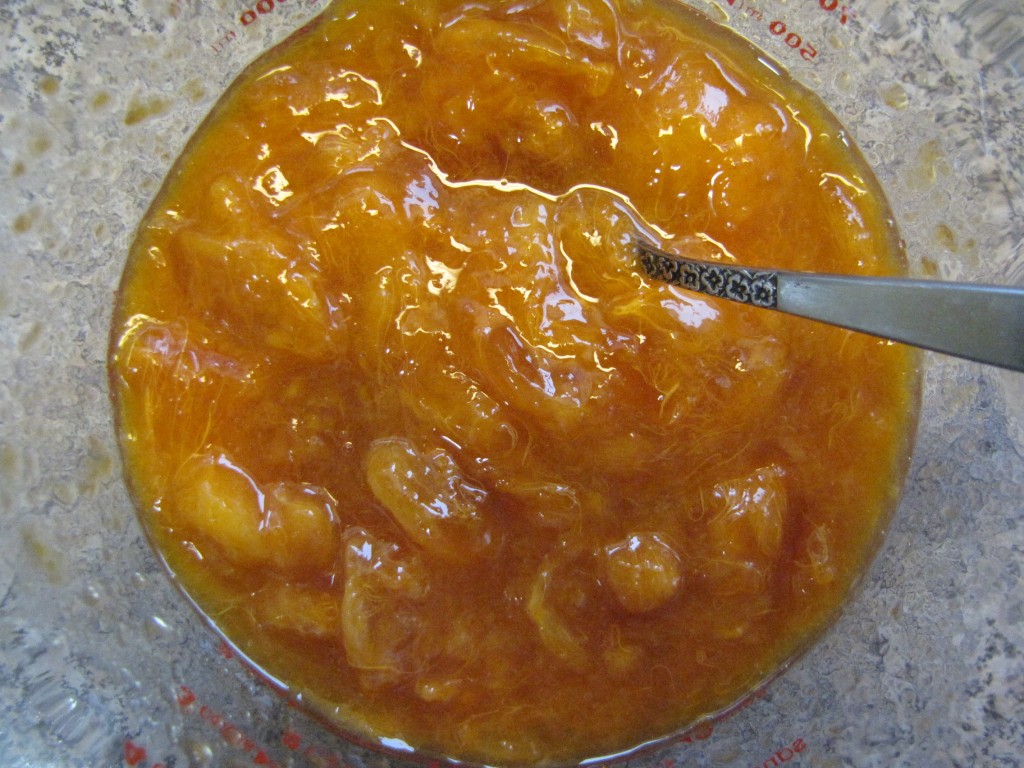
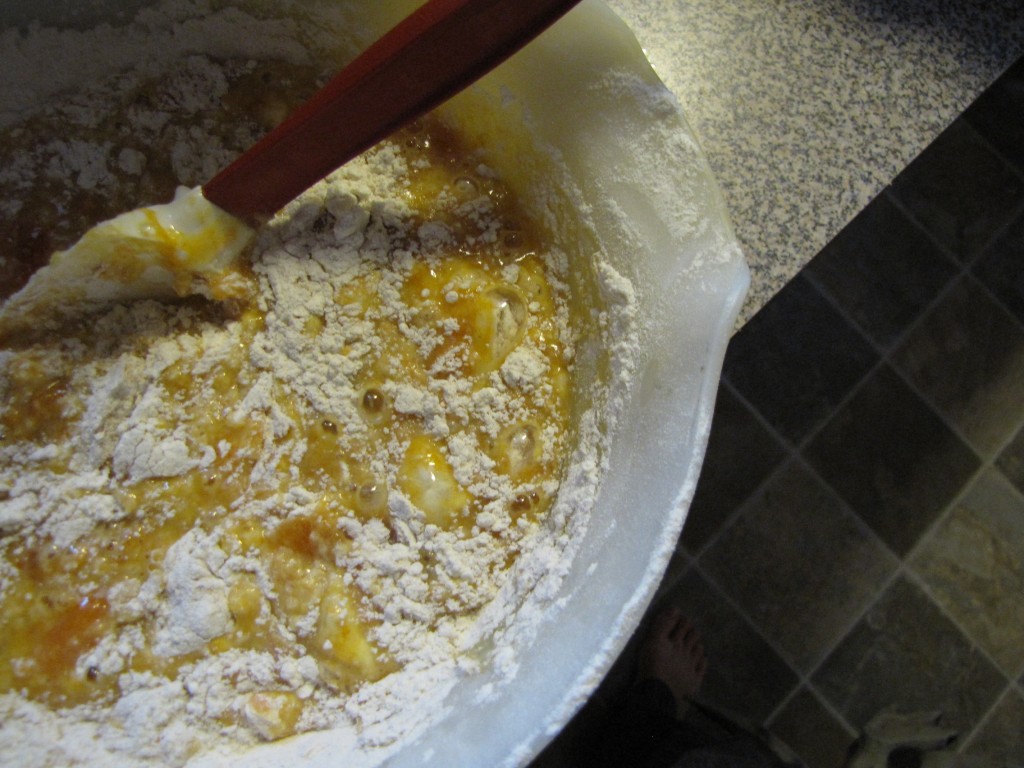
and making our traditional holiday persimmon bundt cake while the boys play with dinosaurs at my feet…

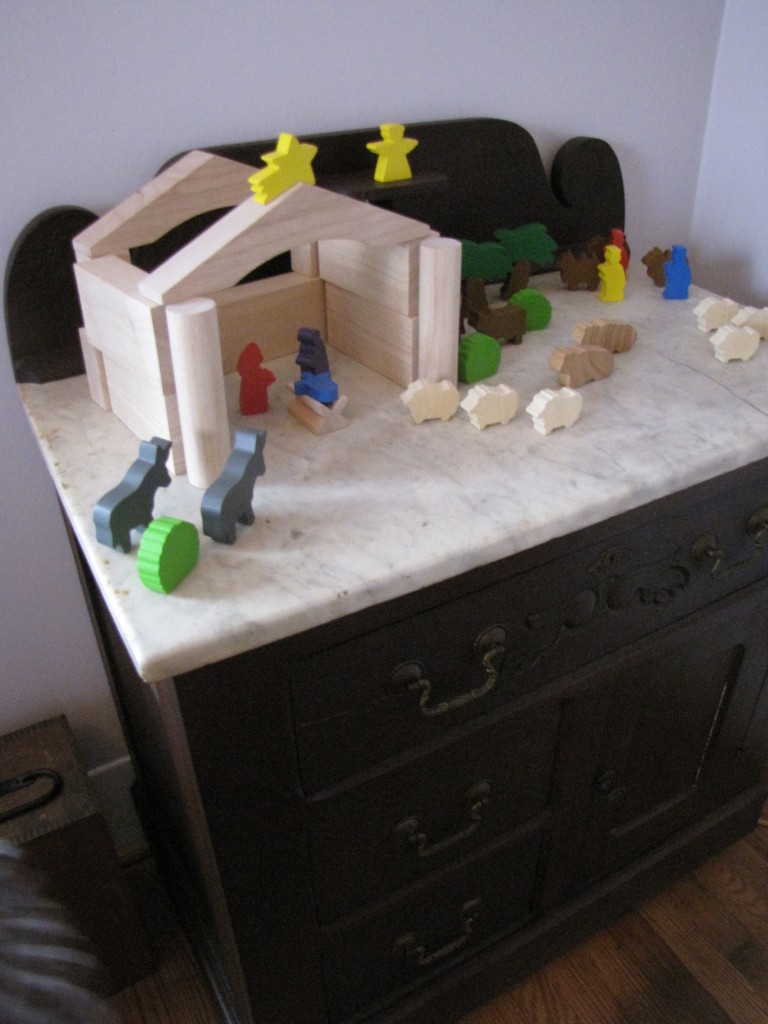
and putting out the last few pieces of the children’s new Nativity on my grandma’s marble-top washstand. (As much as I’d love to have a Nativity set like this one or this one, I am really enjoying this budget-friendly set – the children can play with it as much as they wish – and they do!  They check each morning to see if a new piece been placed out, and if one of the kids seems to have disappeared, I know he or she will be in the guest bedroom quietly playing at the Nativity.)

and running ribbons through the last batch of drawstring gift bags, so we can start wrapping up presents!

So many other projects and preparations before Christmas Eve!   I am trying to balance the pressure to complete everything with the need to slow down, connect with the kids, read to them, play with them, and enjoy time as a family.   Doing our best to keep the time sacred in the midst of so much activity.

Wishing you comfort and peace at this time of year.

Yarn Along with Tasha

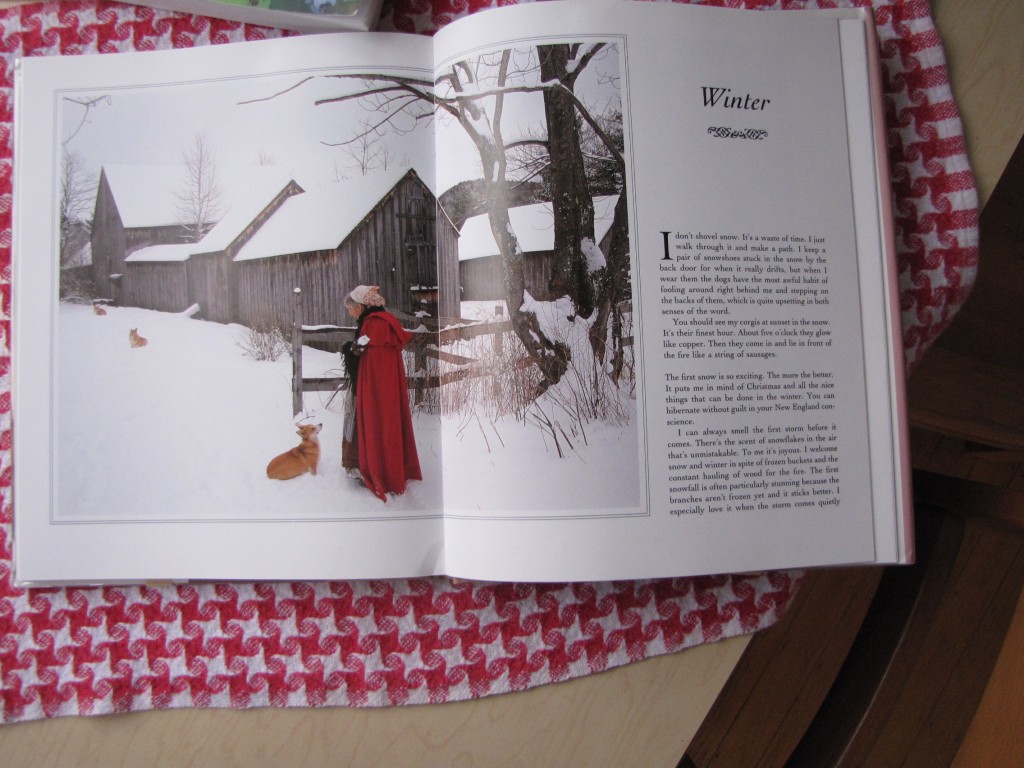
The past few mornings, I have been reading through one of my favorite books over coffee.  Like so many, I have been fascinated with Tasha Tudor since childhood.   Something about her homespun quality – her eccentricity – is comforting and always familiar.

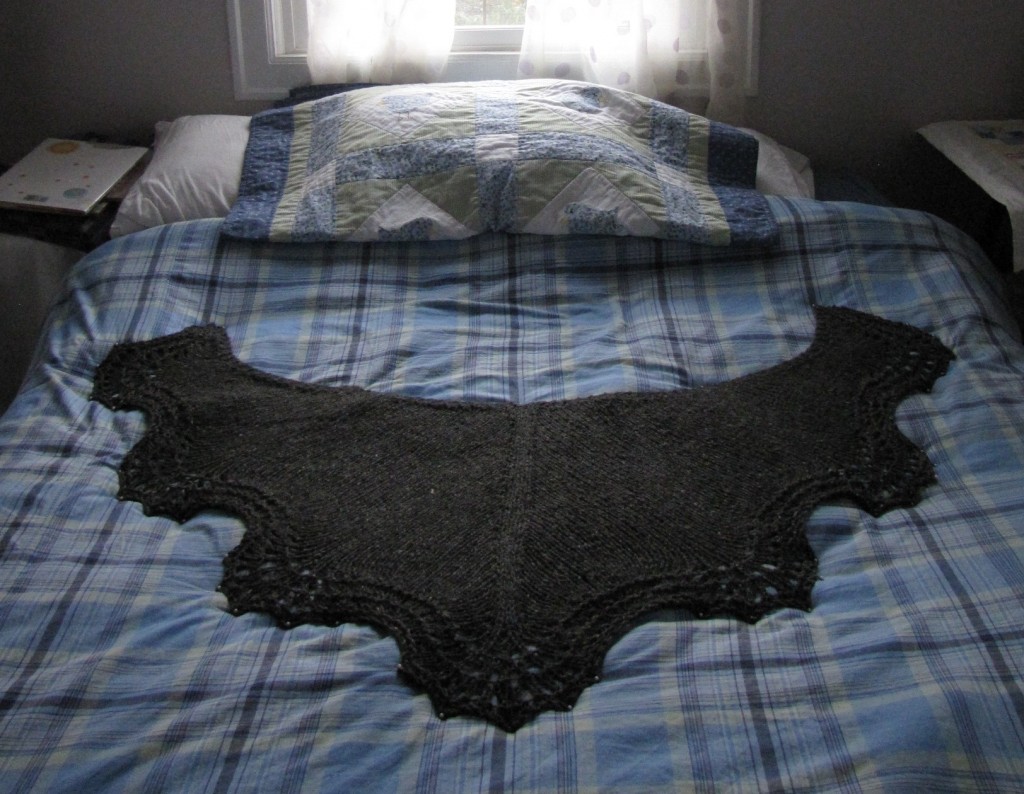
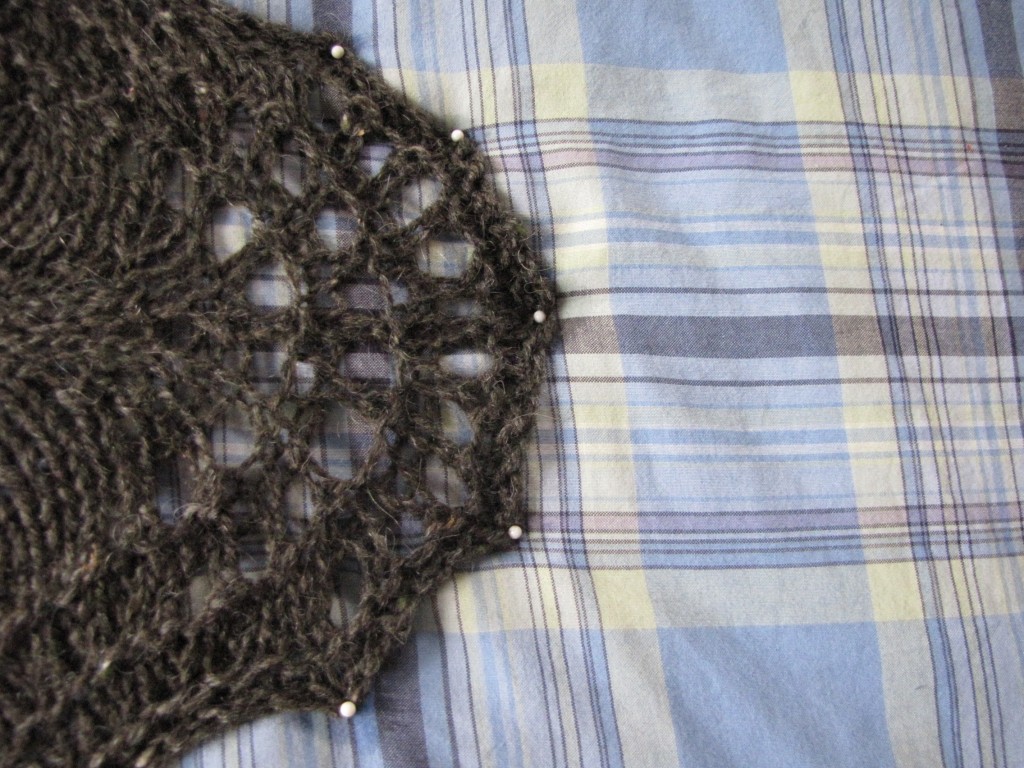
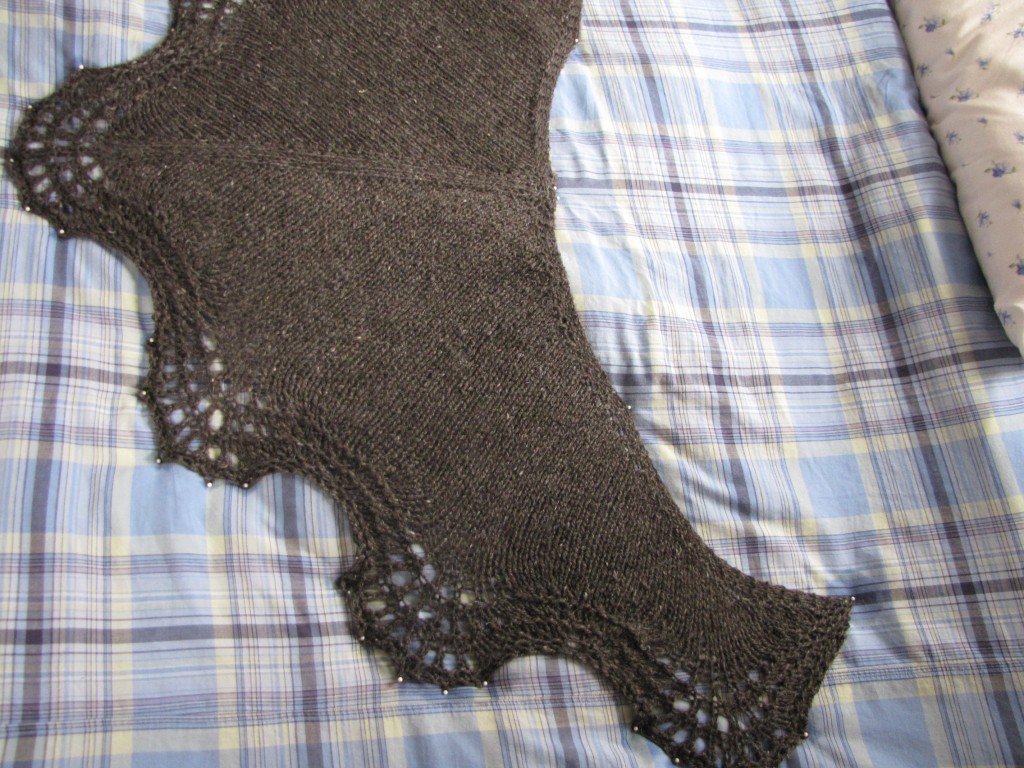
Continuing the theme from last week, this morning the shawlette is being blocked.  It was finished on Saturday, but I have been under the weather, and just now am pinning it out on the guest bed.

This pattern is exactly what I needed – simple, quick, well-designed and a relaxing knit (it would also make a good first shawl for a new knitter).

I am tall, with broad shoulders, so deciding to do the larger version (178 sts before beginning the lace section) was a wise choice.  The fit is perfect, and only a small ball is leftover from the two skeins of Peace Fleece worsted.

I am already a few inches into another Handspun Delight Shawlette.  Having gone through the “stash dresser” upstairs, I found three skeins of a heavenly alpaca I was sure had long been used up.  The joy of being unorganized is that when you rediscover something lost, it’s like a gift to yourself – a pleasant surprise.

This time, most KFBs in the pattern are replaced with YOs (along the spine, etc), and the lace section will be extended.  It will make a soft embrace of a shawl and a warm Christmas gift for a loved one.

And now to join up with Ginny’s Yarn Along, but first a wintry quote from Tasha:

Sometimes when I’ve been throwing hay around, it smells like summer in the barn, and the sun comes through the windows and the cracks in the boards and makes shafts of light in the dusty air.  But I never long for summer in the winter.  What is that lovely quote from Shakespeare – “At Christmas I no more desire a rose/ Than wish a snow in May’s newfangled mirth.” That’s the idea.  For everything there is a season.

KCCO – Christmas skirts

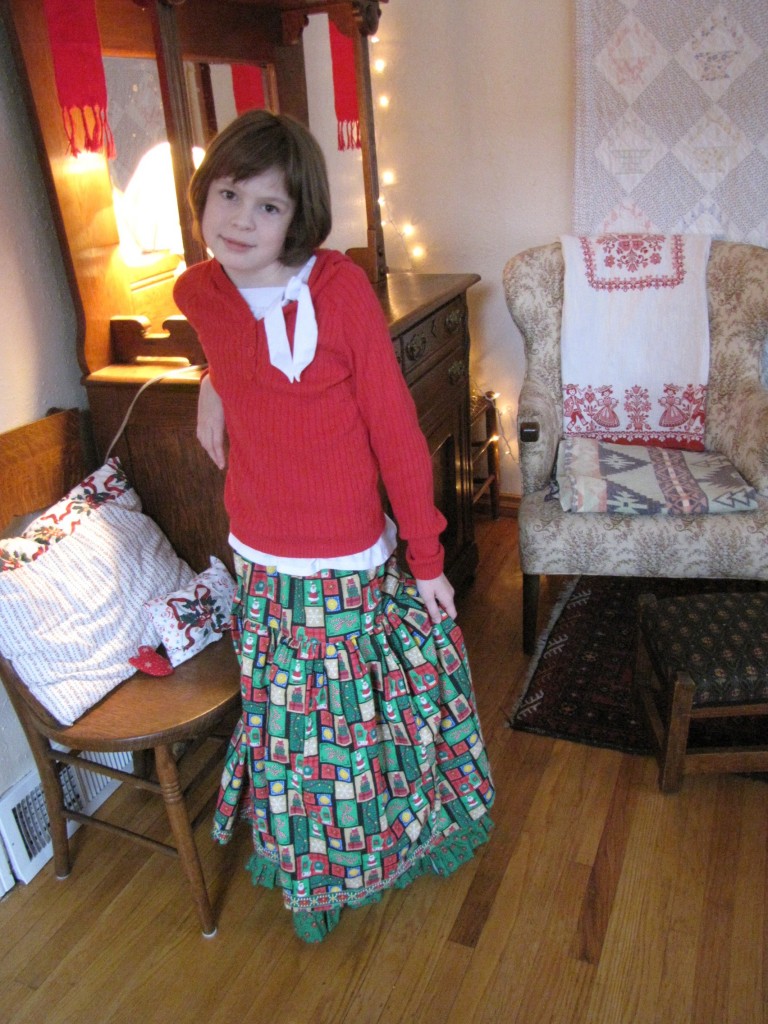
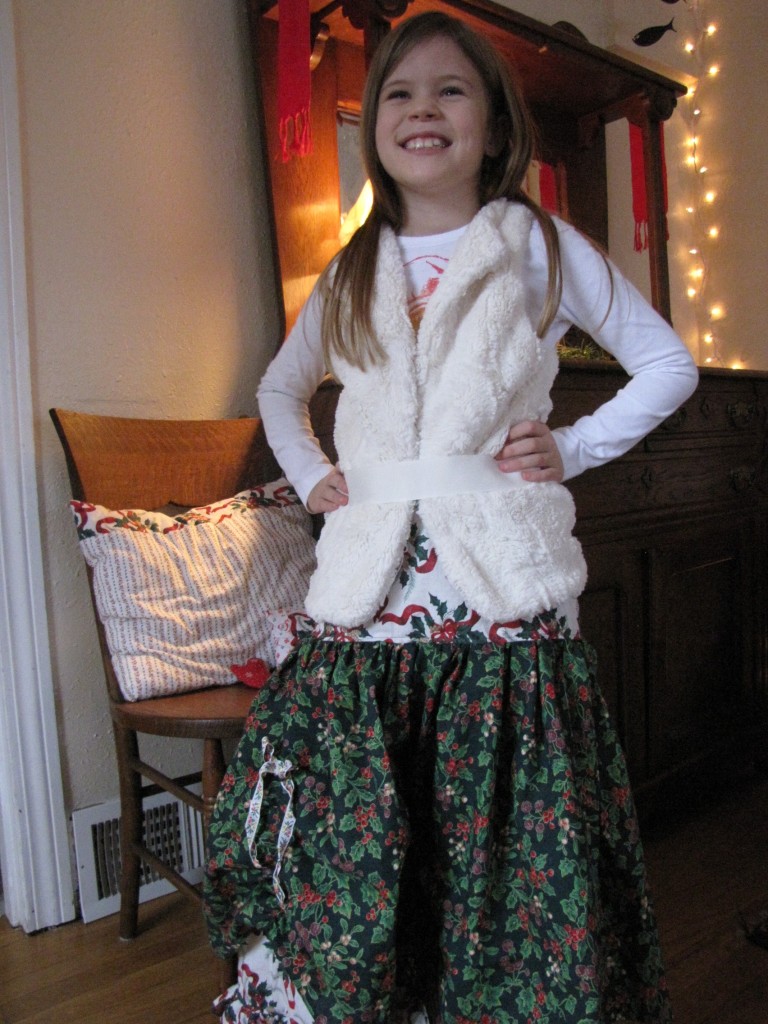
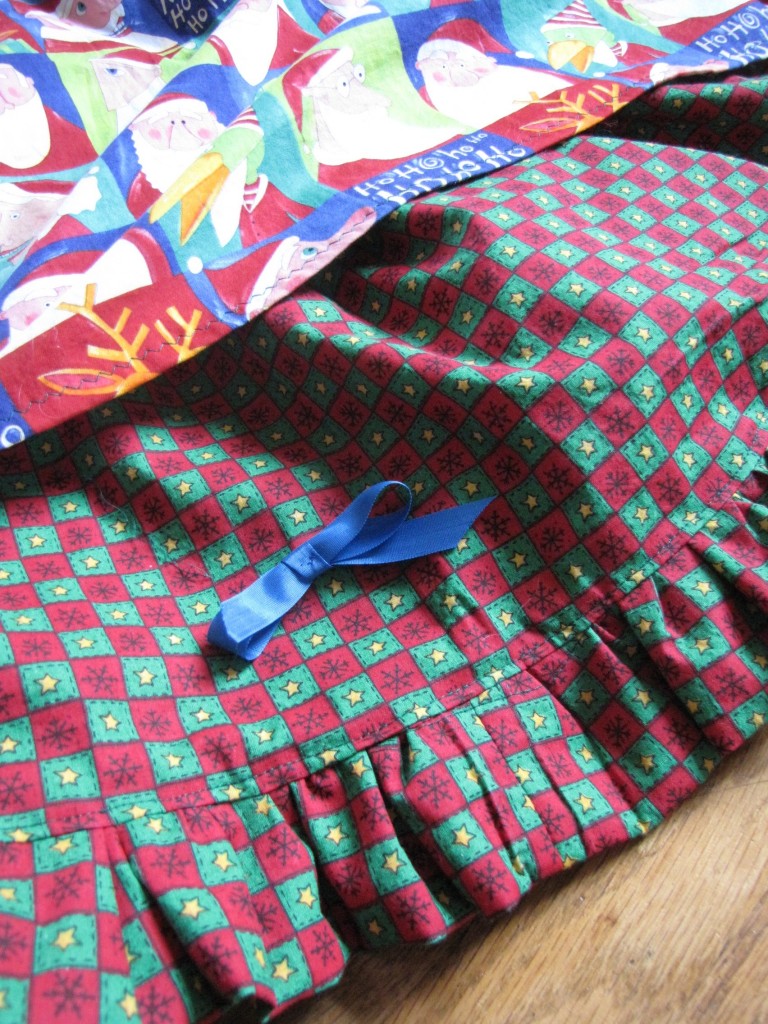
After what seemed like endless gathering and pinning, the Christmas skirts are finished.  Bea and Ruth are happy with how they came out, thank goodness!

The girls chose whatever fabric they wanted from a stack of thrifted Christmas prints my sister and I had accumulated over the past few years.  Ruth asked for them to be double layered for warmth and to feel old fashioned (like a petticoat).

And she wanted it long – nearly to the floor – with ruffles.  I tacked on some vintage woven ribbon along the hem for good measure.

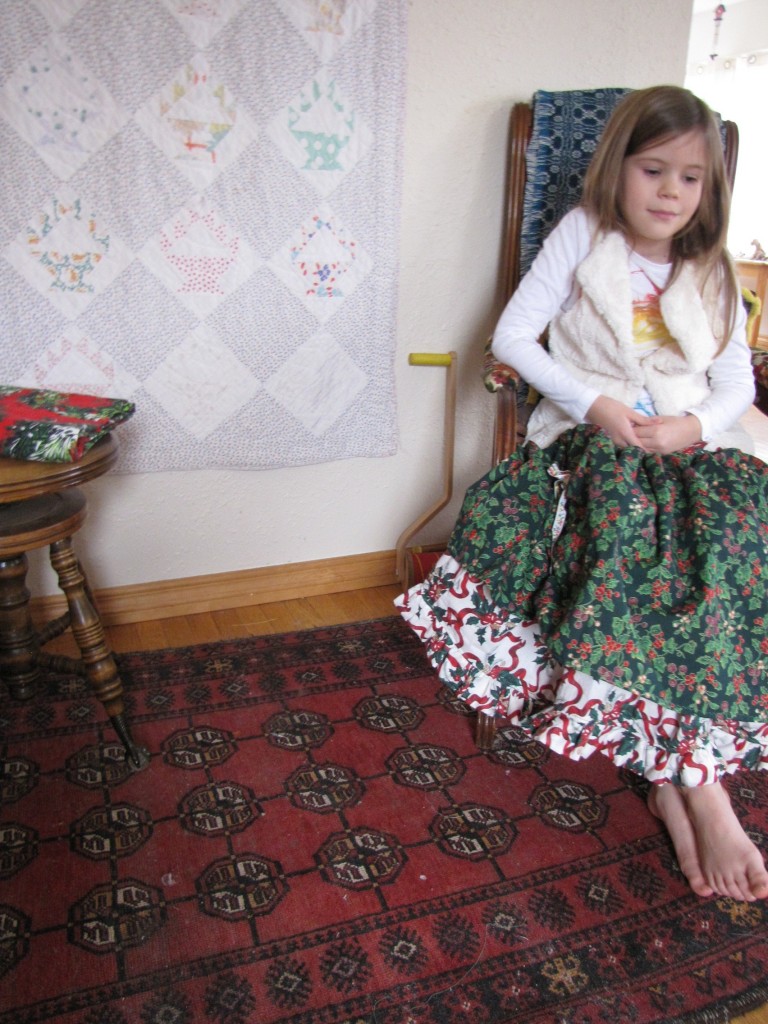
Bea wanted a drop waist and full-bodied skirt.

We also made a skirt for cousin Ruby:

Both girls helped choose and cut the fabric and even do some of the sewing.  Ruth added the bows as an afterthought.

I’m joining Nicole for her KCCO today, and then I’m packing up the sewing machine until after Christmas.

 I’m off to wrap presents and bake Christmas cookies with the children this afternoon.  Blessings on the rest of your week.

Holiday Sewing

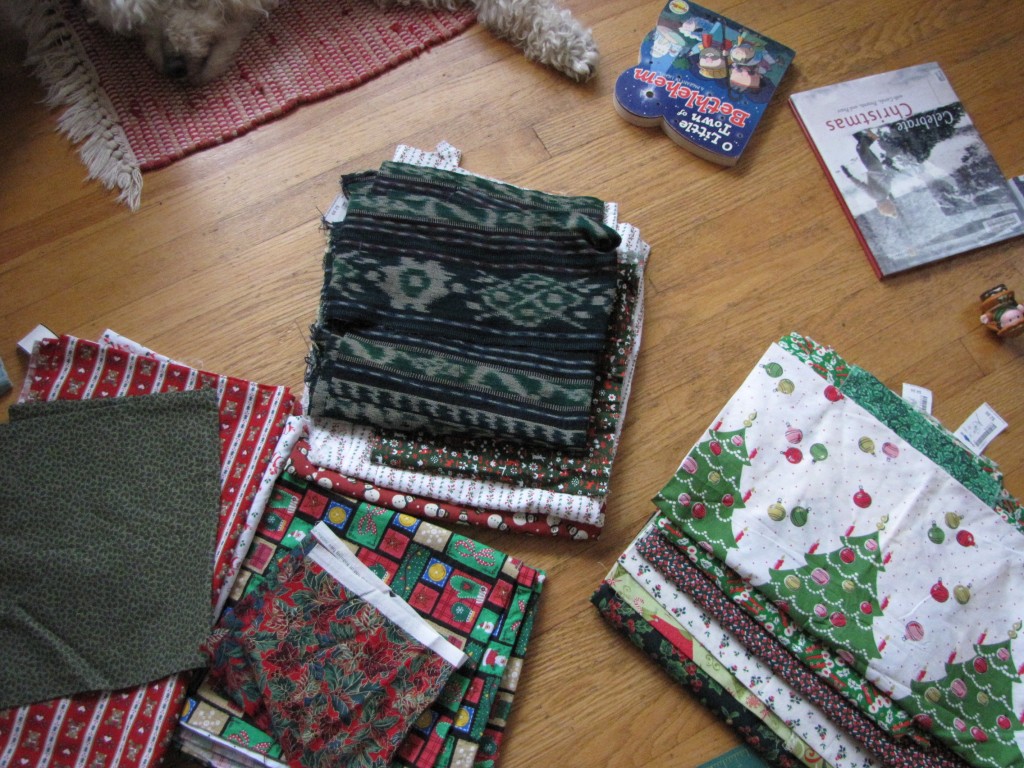
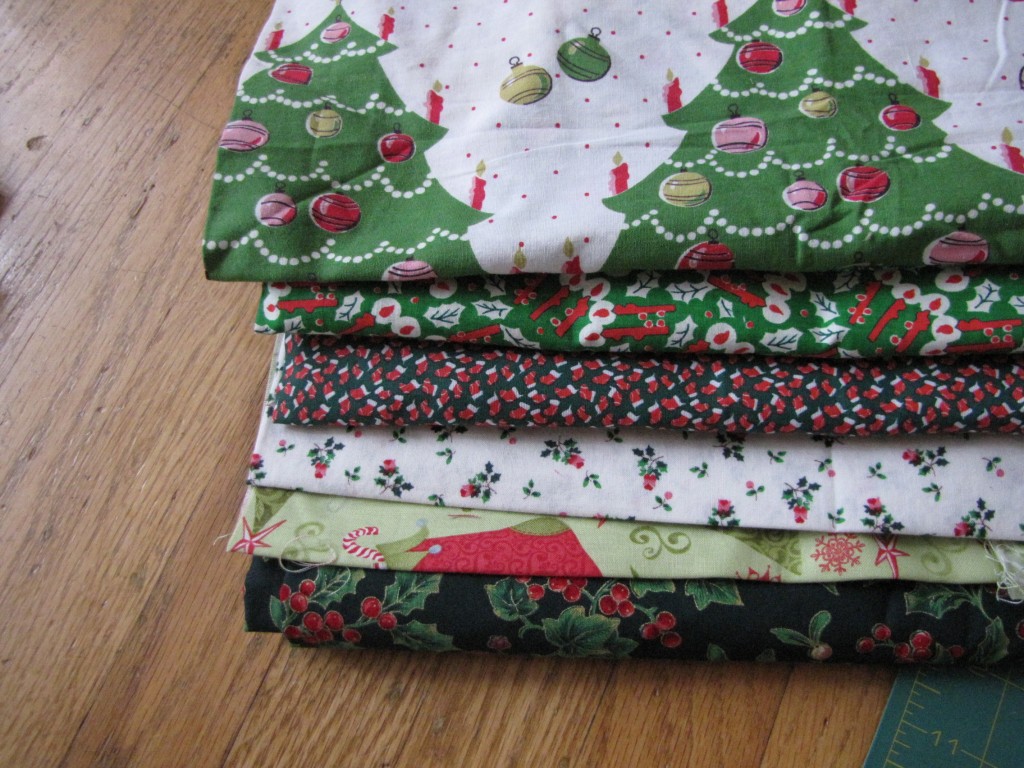
Today is dedicated to finishing up Christmas sewing projects.  A three year accumulation of thrifted holiday fabric was sitting in a box upstairs, and the time had finally come to do something with it all, or donate it back.  So, sewing marathon it is!

Some of the fabric is fairly ugly 1980s through mid-90s prints of teddy bears and snowmen, but works just fine for gift bags and such.  More than half the fabric is quite old – 1950s and 1960s cotton prints of holly, ribbons, candles, and I’m pretty excited about sewing with those.

We’ve already completed many, many drawstring gift bags. (The girls can make them with minimal help, because it is all simple straight seams), and Ruth made some small pillows for gifts (I wasn’t allowed to look!).

The girls selected their own fabrics to make Christmas skirts, and they contributed to the design as well. (The old fabric above was a challenge, as there was foxing around the edges and it was difficult to find enough “clean” yardage for Bea’s underskirt).  Today will be lots of gathering ruffles, pinning, sewing.  If I have time, I will make the boys each a vest, but that may be overly ambitious.

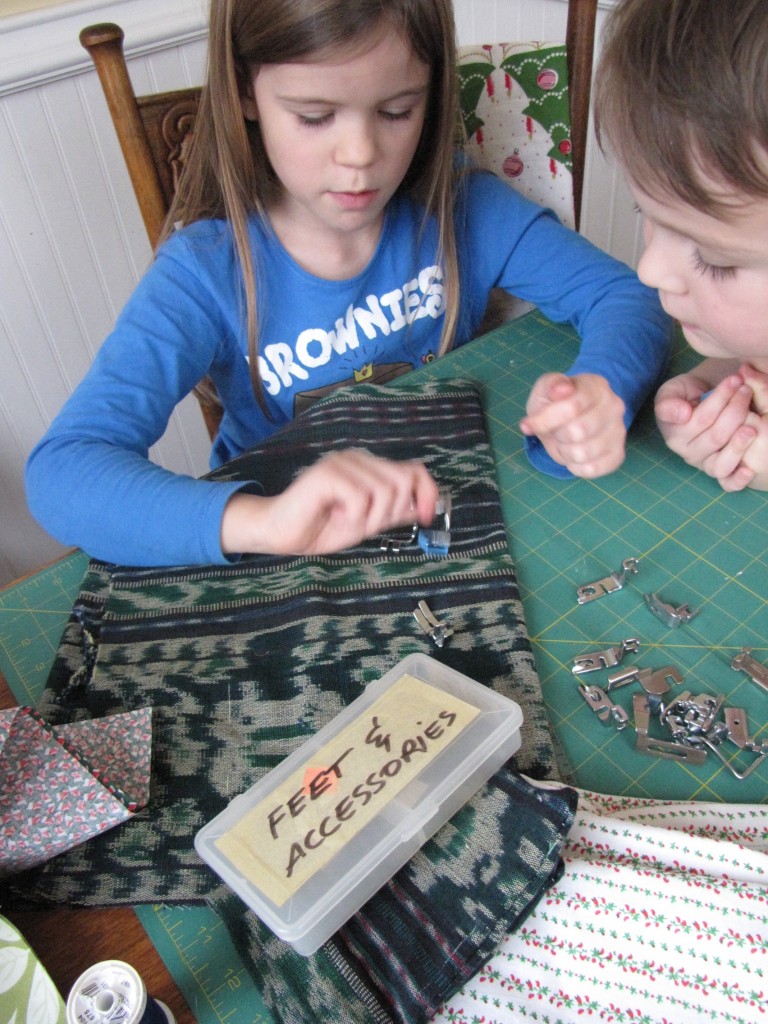
While I sew, the kids love playing with the sewing machine feet and scraps of fabric and thread.  Isn’t it wonderful how children can make imaginative play with just about anything?  Who knew snippets of fabric and presser feet could act out such elaborate stories?

Joining with Nicole’s KCCO today, and will post the skirts when we’re finished.

Blessings on your winter day.

Christmas Posey

Our first frost date is October 15, but we have yet to have a hard freeze this year.  Tender plants that are normally wrapped in burlap or provided with wind screens are thriving free in the mild weather.

While George was napping, and the big kids were playing quietly inside, I spent a little time working in the yard.  I am grateful for the mild weather, because I hadn’t finished planting garlic (usually completed in October), and the un-frozen ground allowed me to get several rows in and mulched right next to the driveway.

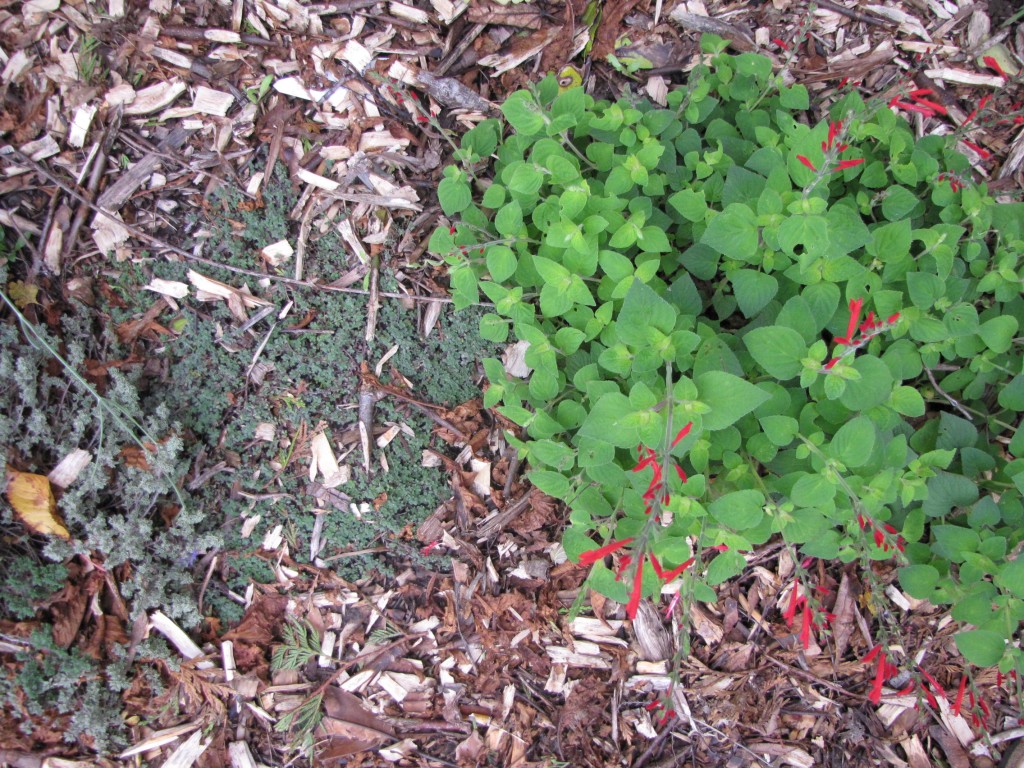
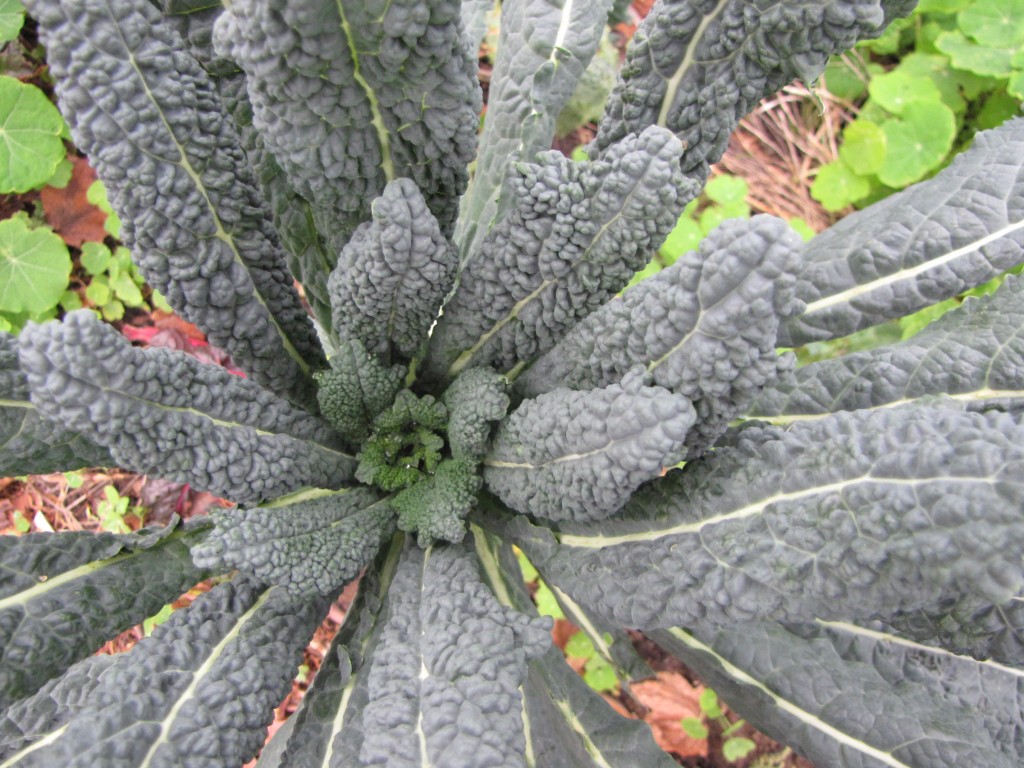
Afterward, while picking some Lacinato Kale (above) for dinner and poultry snacks, I noticed that the Tangerine Sage (Salvia elegans) was still blooming.  What a surprise!

Tangerine Sage (far right of top photo) is a tender perennial, and rarely survives the winter here.  I planted mine two summers ago in a sheltered area, and mulch it for the winter, and wrap it in burlap when temps dip below 25.  Even so, it struggled to make it through last winter.  Any yet, with temperatures in the 40s, it thrives and blooms beautiful red spires.

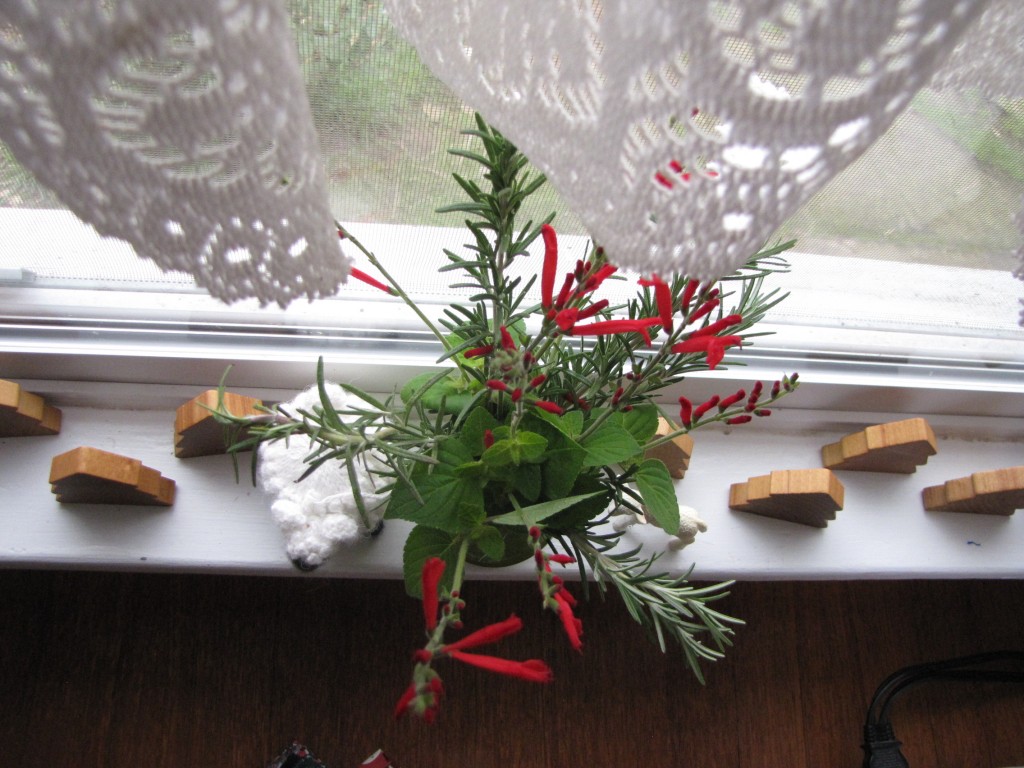
Some bright red sage blossoms and a few sprigs of rosemary seem like a fitting Christmas posey.

Time to get some sewing completed (finishing up Christmas skirts for the girls and their cousin).  So, we’ve put the holiday greenery in the windowsill next to the sewing machine.  I’ve always loved the particular combination of citrus and rosemary, and it fills the breakfast nook with an energizing aroma as the girls and I get ready to tackle a mountain of fabric.

.  Back tomorrow with pictures of our sewing (provided we actually finish this afternoon!)

Yarn Along – Upstairs

Every knitting project I have started in the last week has been an exercise in frustration.  Last week’s socks got frogged, so I started knitting a Christmas pebble vest for George, and then decided I hated the shade of green (from my stash), so it, too, got frogged.  A second pair of socks, in blue tweed and pale purple-grey handspun merino got frogged as well.

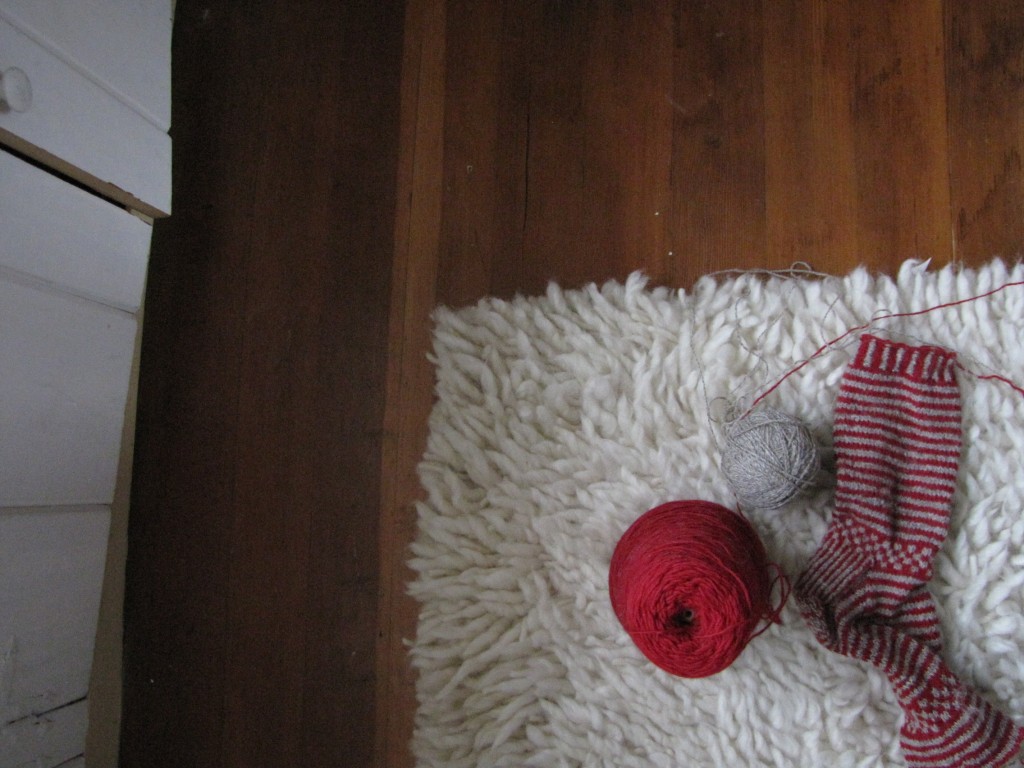
I eventually settled on two handspun stash yarns for stripey socks (above).  (This grey Jacob-sheep yarn looks very handsome paired with red.  I’ve made socks and baby garments with the combo before.  It is one of my favorite yarns with which to knit.)

I am doing my best to only knit and spin from my stash for a whole year and not purchase any yarn or fiber, even  from the thrift store.  There is a small oak dresser upstairs packed with yarn (most lovely handspun from an estate sale of a fiber artist in the rural community where we used to live).  Trying to “knit with what I have” is frequently vexing for a whole host of reasons, but at the same time, I love opening those drawers to varied colors and textures – all those hanks of possibility.

…it is pure potential. Every ball or skein of yarn holds something inside it, and the great mystery of what that might be can be almost spiritual.
― Stephanie Pearl-McPhee

Yarn Along – Rhythm of the Home

I have a piece in the new issue of Rhythm of the Home .  It just came out today!   Hope you get a chance to read and try out the recipe – it is a family favorite.

The entire issue is packed with beautiful, thoughtful and instructive articles from such talented women.  From felted sweater garlands to meditations on homeschooling in the winter months to Waldorf doll shoe instructions..Rhythm of the Home always puts out a great edition!

Obviously, for the reading portion of Ginny’s Yarn Along, this morning I’m reading through the new issue of Rhythm of the Home.  For the “yarny” portion, and for Nicole’s KCCO, I’m starting a pair of socks (yarn on the right), out of Brown sheep sock yarn seconds I purchased several years ago (still de-stashing!).

Also in the works is wrapping up some spindle spinning.  The fiber is Brown Sheep mill end bits and pieces, 85% wool, 15% mohair.  I am doing my best to spin worsted weight singles, but I find it very difficult, since I have been spinning for a number of years, and my hands want to spin fingering weight.  I am hoping to turn the yarn into a little knitted panda toy for George, although, part of me is tempted to make another vest

We have company coming this morning, and then the kids and I are in full Christmas-crafting mode today.  We’re hoping to finish up our lessons before lunch, so we can play with some needle felting (making ornaments!) before Girl Scouts this afternoon.

Blessings on your day!

Tutorial: How to Waterproof Wool Diaper Covers with Lanolin

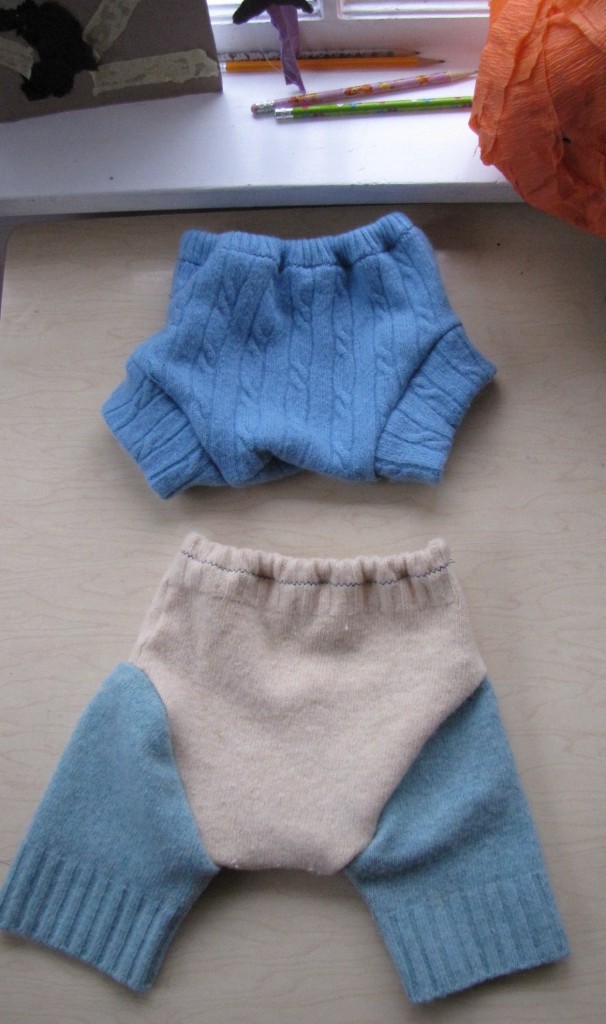
Over the weekend, I made a new batch of wool and wool/cashmere soakers from thrifted sweaters.  Some are for George, and some are for gifts, but all needed to be water-proofed, along with some knitted covers.

There are many methods of lanolizing wool soakers, and this is the one a friend taught me way back when Bea was a baby.  It works really well, and doesn’t leave spots on the covers, unlike some short-cut methods I’ve tried.

Why do you need to lanolize a wool cover?  On its own, wool diaper covers will be somewhat waterproof since wool naturally wicks moisture, and there is some lanolin left in the fiber, but over time, with lots of washing, you may notice that covers are less waterproof.

If water doesn’t bead on the top of the cover when you first put it into the sink to wash, it’s time to add that waterproofing lanolin back to into the wool (typically every 4 or 5 washes).

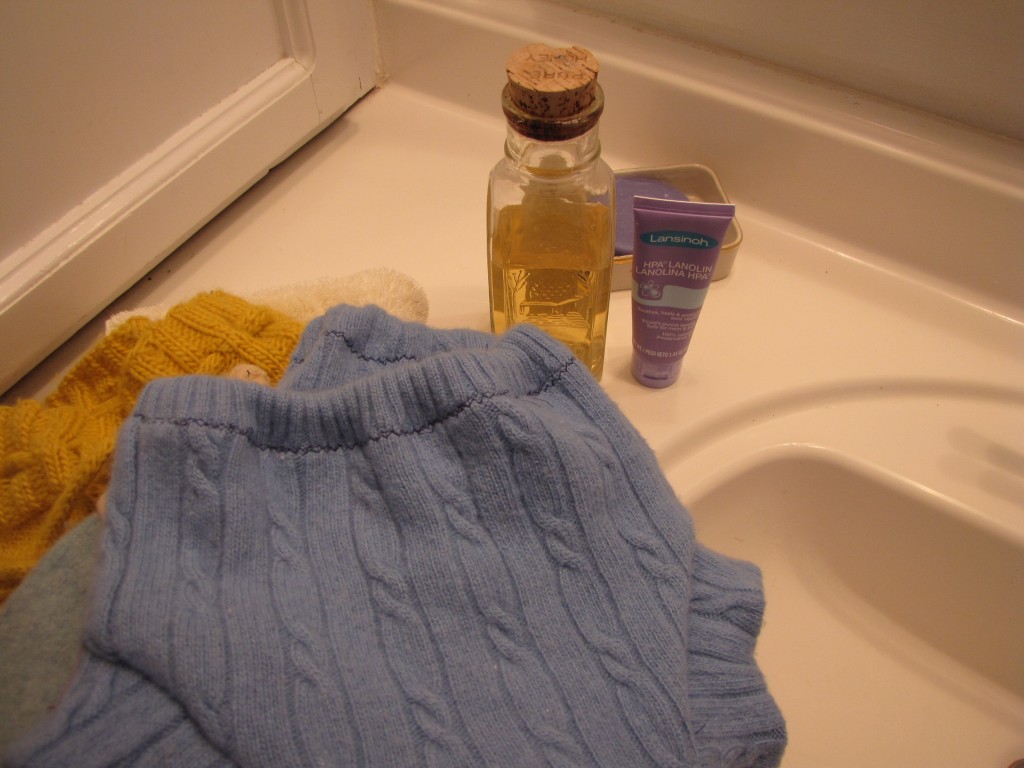
You only need two ingredients to do this:  A gentle wool wash – NOT Woolite (I prefer Eucalan, in the honey jar on the left) – and Lanolin (you can purchase this in quantity on the internet, or also pick it up at any store that carries breastfeeding supplies.  I got this tube at Target).

Your covers need to presoak in order to absorb the lanolin.  Add a 1/2 tsp of wool wash to the sink under running warm water.

If you need to need to wash a dirty soaker first, do that before you begin the waterproofing process.   I like to let them soak for 15 minutes, gently swishing now and then.  Then, I flip the cover inside out, and gently swish some more.  Another 15 minute soak, and then gently rinse out.  If any scrubbing is required, it is done carefully so as not to warp the cover or full/shrink an area too much.

Now add any clean covers to the water, an let them become thoroughly saturated with the lukewarm water.   Do not agitate or wring the fabric or you risk shrinking or deforming the covers.  (The fabric isn’t super delicate, just be careful.)

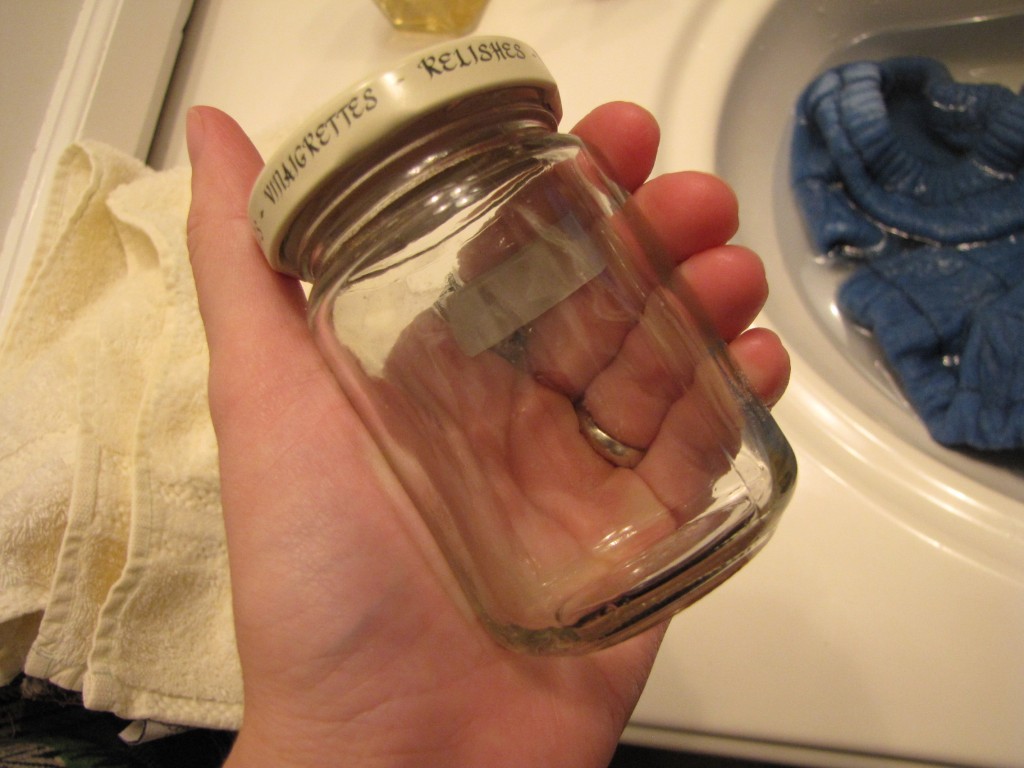
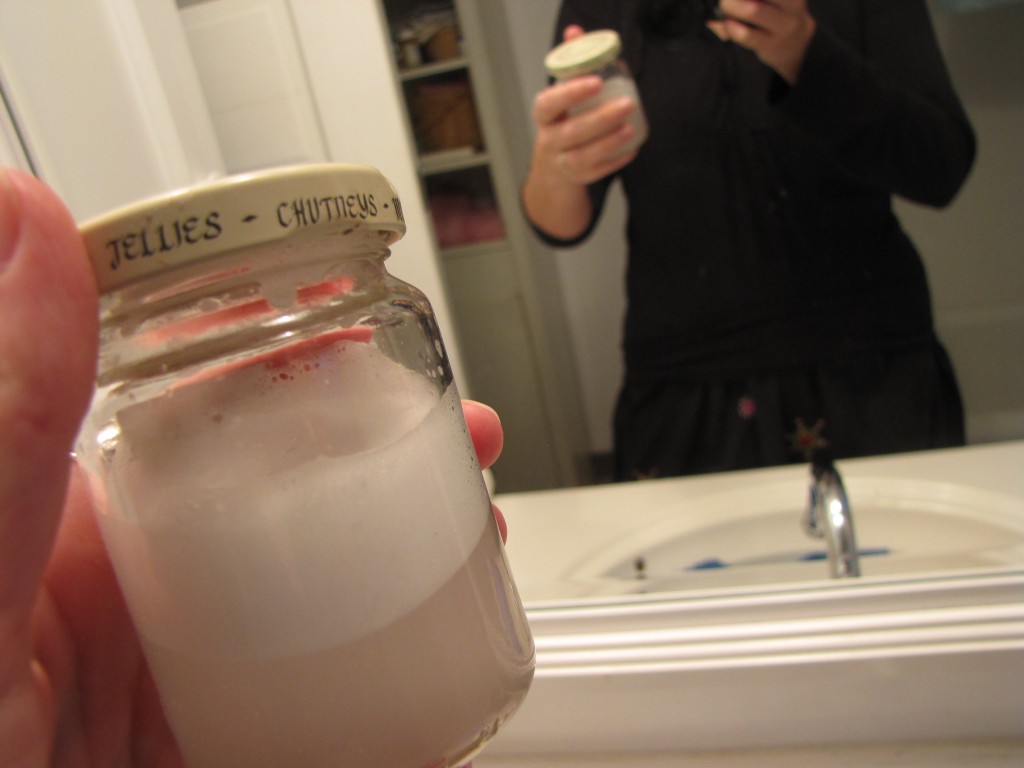
Now, find a smallish jar (I keep an old dijon jar with the laundry supplies for this express purpose).  You will use this to prepare the lanolin to be added to the wash.

If you were to simply squirt it from the tube into the water, it would sit there as a blob (obviously, since oil and water do not mix.)  So, how to you take a waterproofing (hydrophobic) substance and mix it in water so that it distributes evenly over the covers?  The jar is the key.

For each diaper cover or two, add a pea-sized amount of lanolin to the jar.

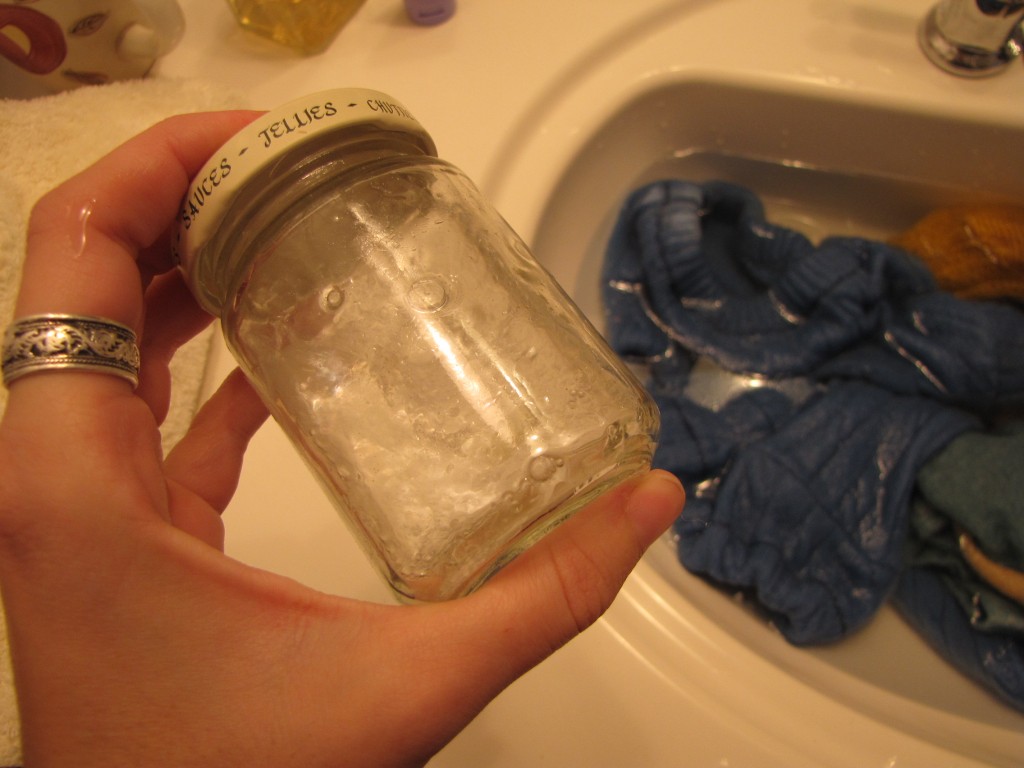
Also add several drops of wool wash, which will help break the oily lanolin up into tiny beads.  This is really important in evenly distributing the lanolin and preventing globby oil spots on your covers.

To further break up the lanolin, fill the jar about 1/3 full with very hot water, put the lid on, and shake vigorously.

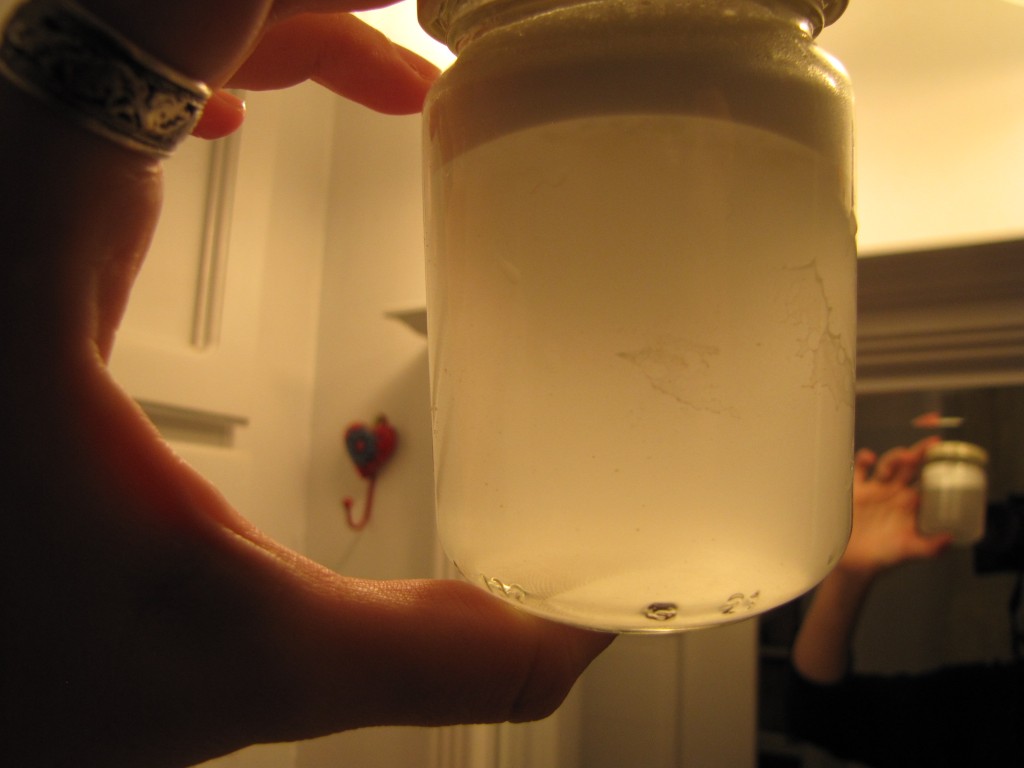
Continue shaking the jar until it is very sudsy, and the water is milky looking.  Then shake it a bit more.

Hold the jar up to the light.  There shouldn’t be any obvious globs of lanolin in the water.  If there are, continue shaking (if your water has cooled too much like mine did in our chilly bathroom, add some more hot water first).

Set your clean, soaked diapers aside.  As you refill the sink, add the jar’s contents, under running warm water, to the sink.  Be sure to rinse all the little beads of lanolin into the water.

Now place your covers in and gently submerge them.  Let them sit 30 minutes...or overnight if you tend to forget they’re there, like I do.

Now, let the water drain completely.  Do not wring out any soakers!  The goal is to expel as much water from the soaker without deforming its shape or fulling it.    Here’s the best way:

Lay the soaker flat, and arrange into its proper shape.

Fold soaker in half.

Fold in half again.

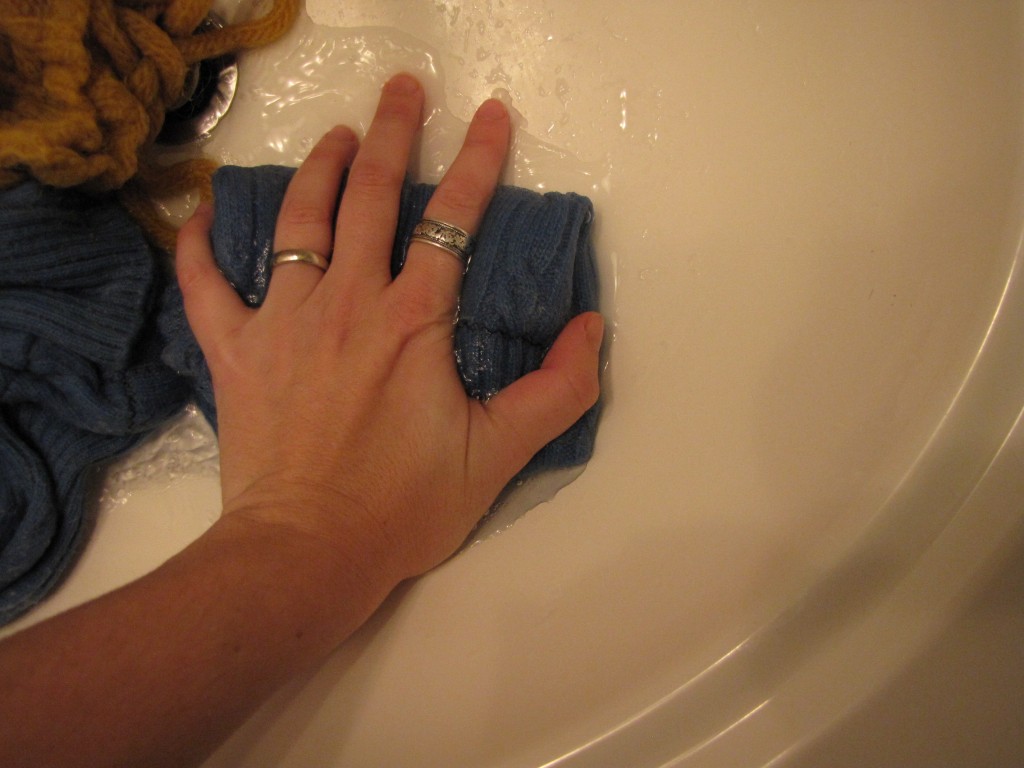
Now press the water out with the palm of your hand.  Flip over and repeat.

Here are the four soakers from this batch folded in fourths and pressed as dry as I can get them.  The will look a little fuzzy, but shouldn’t be fulled or twisted.

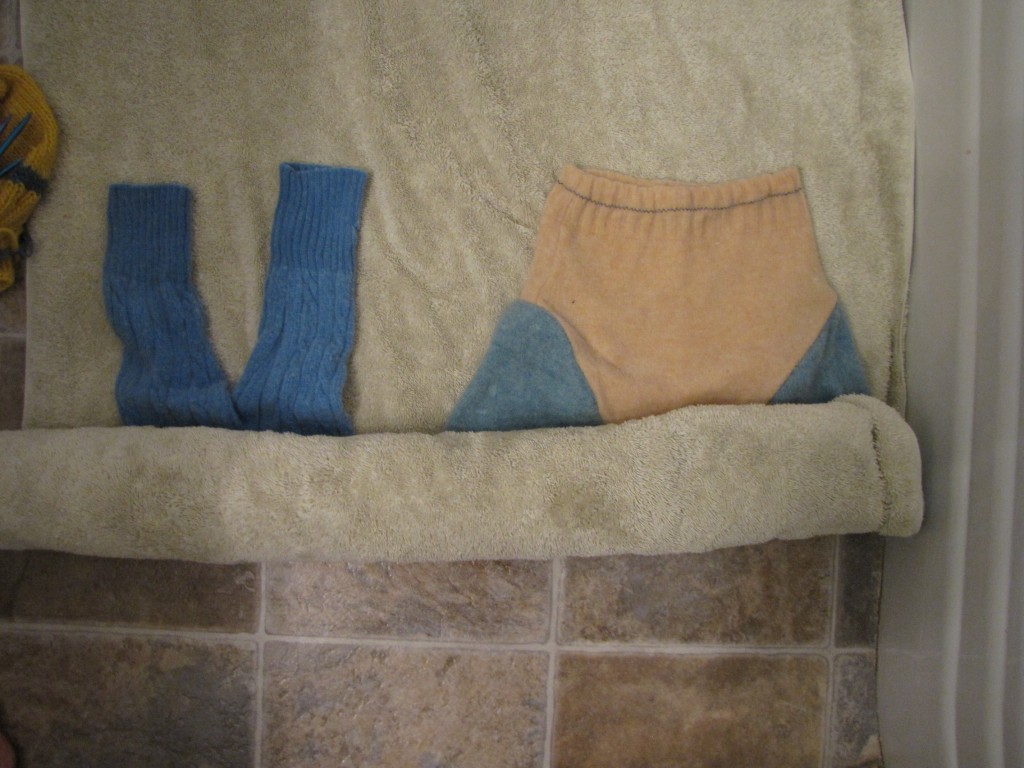
Now gently arrange the soakers on a dry towel.

Roll the towel up into a tube, and then step on it repeatedly to draw out any of the water let in the covers.  Again, do not wring or twist!

Now, hang your covers up to dry.  Ideally, you need to lay them flat.  You can place them on a towel, or if you’re busy and in a hurry like me, just spread them over a number of rungs on the drying rack.

Your lanolin-coating will last 3 or 4 washes, and then it is time to repeat the process.

If you have any questions or need any clarifications, please feel free to leave your thoughts in the comments and I will answer them as soon as I can.  Thank you!

L’Arche Christmas Tree

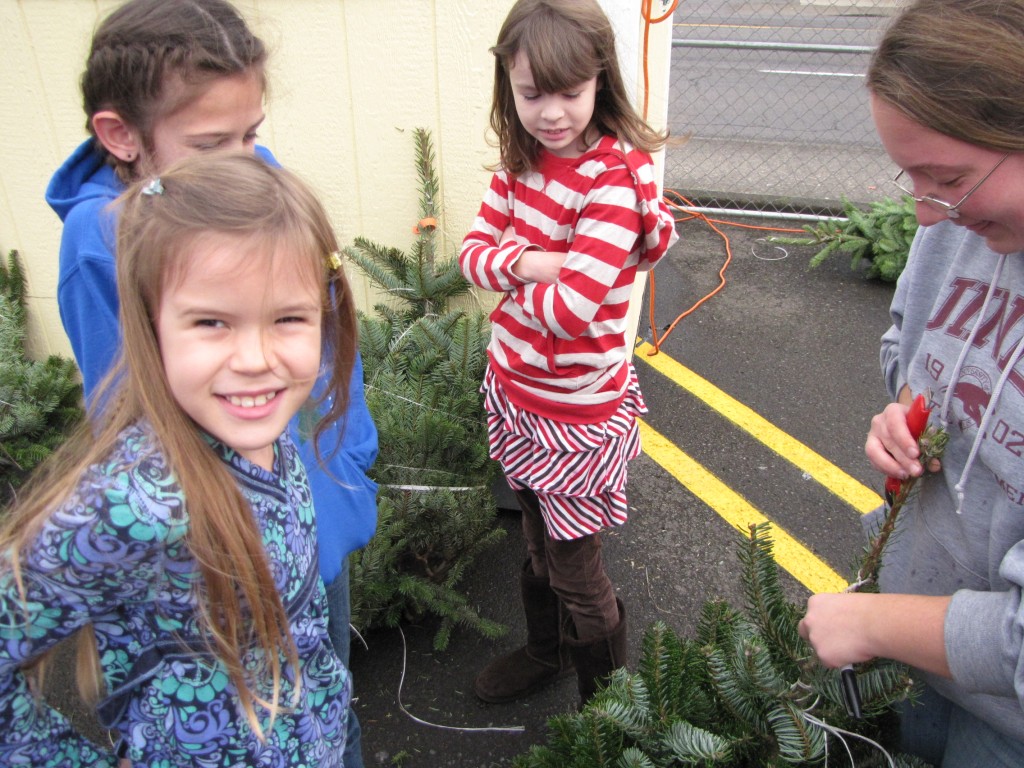
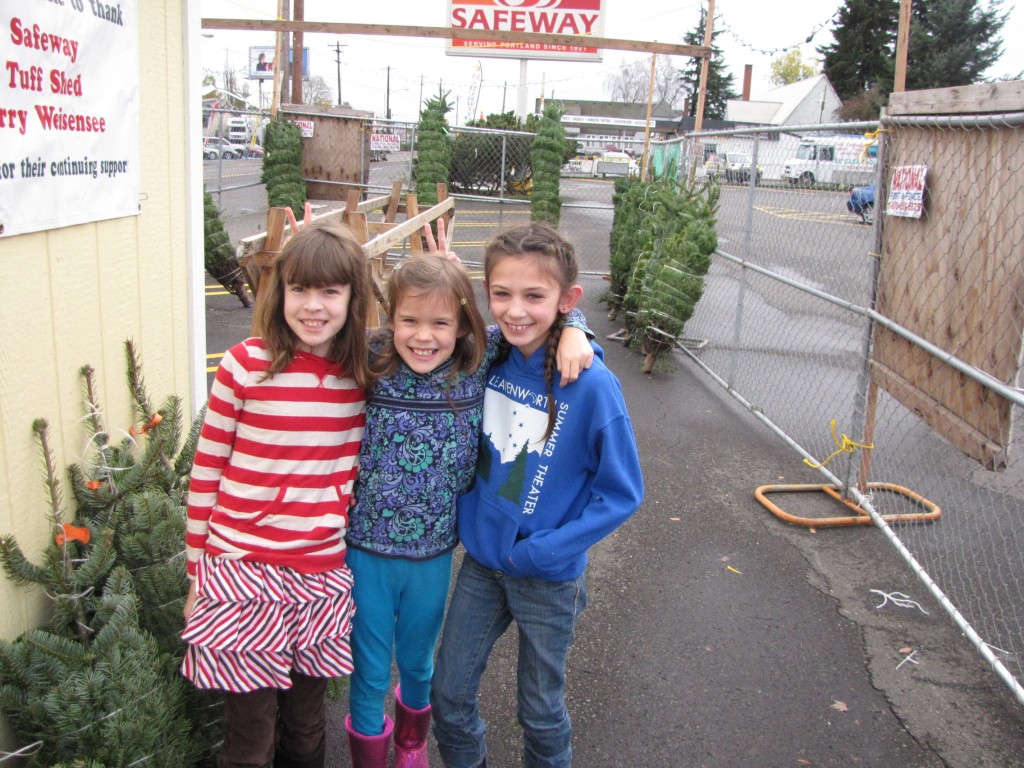
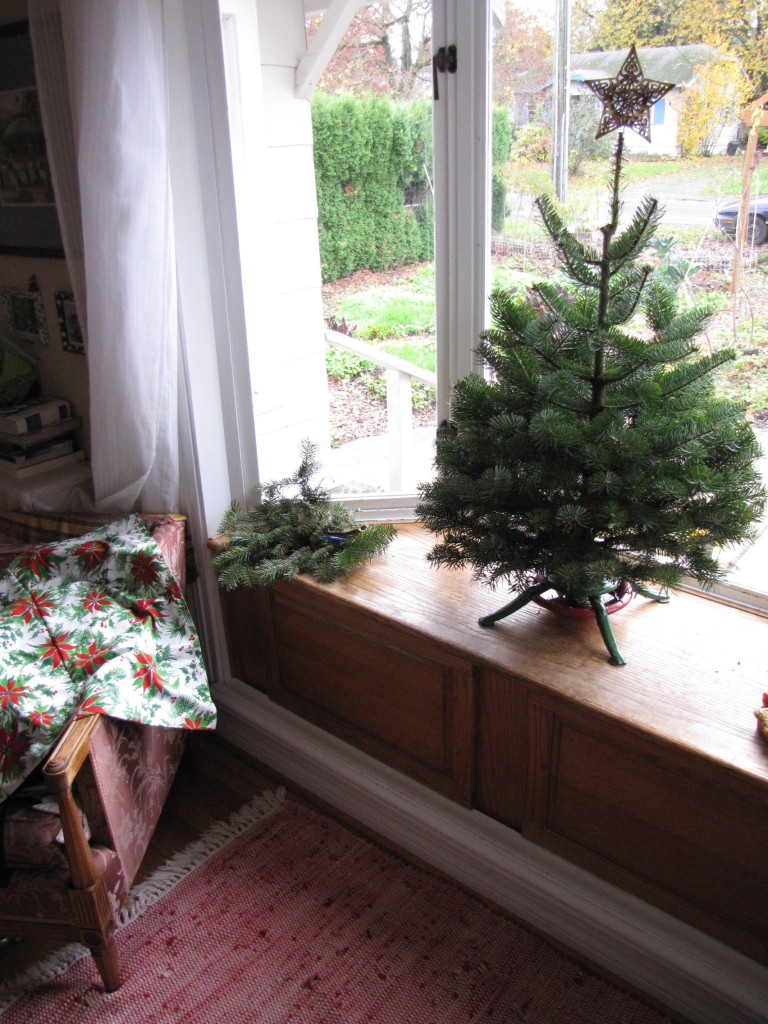
  Each year, we visit the same tree lot to pick up a little table-top Christmas tree which will sit in the window seat.  It is a tradition we really enjoy, and we’re thankful to be able to support L’Arche in our small way.

L’Arche, is a wonderful organization that serves adults with disabilities in many communities.  From the Portland chapter’s website:

At L’Arche Portland people with and without developmental disabilities work together to create home and build community. Those with developmental disabilities form the heart of our shared life and invite others into mutual relationships. We welcome each person’s unique gifts and challenges, and offer opportunities for personal transformation. We trust in God and live as a sign that love, respect and interdependence are the path to a peaceful and just world.

Look how big these girls are getting?  Very grateful that we had a dry day to go pick out our little tree, and that cousin Ruby could join us again this year.

Over the next week or two, we will slowly decorate.  First up is the star, followed sometime later by a string of lights, then a night popcorn and cranberries, and one more night for ornaments and mini candy canes.  The children like the undecorated tree for acting out all sorts of woodland play with their toys, so no one is in a hurry to get the ornaments up.

As we finish making up our Advent wreath, getting decorations out of storage, reading Christmas books aloud in the evening, we are anxious for the season of Advent.  As we enter this special time in which we anticipate the arrival of the Christ-child, a Light in the darkness.

Each year when we pick up our tree, I am reminded of L’Arche champion Henri Nouwen’s words on compassion, and how they ring so true at this time of year, when the God of the universe fully immersed Himself in the human condition in order to extend compassion to Humanity:

Compassion asks us to go where it hurts, to enter into the places of pain, to share in brokenness, fear, confusion, and anguish. Compassion challenges us to cry out with those in misery, to mourn with those who are lonely, to weep with those in tears. Compassion requires us to be weak with the weak, vulnerable with the vulnerable, and powerless with the powerless. Compassion means full immersion in the condition of being human.
― Henri J.M. Nouwen

Joining with Taryn for her Gratitude Sunday as we enter into Advent, and all the Hope therein.

Wool Along

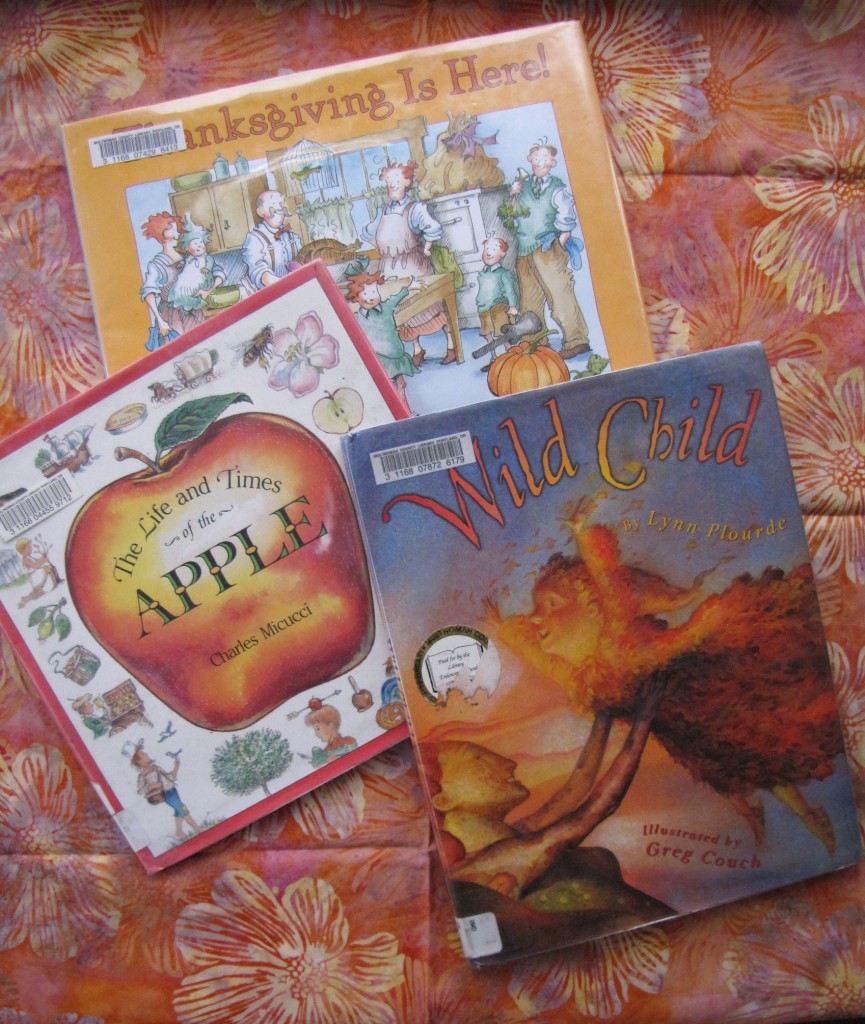
Joining with Nicole for KCCO and Ginny for the Yarn Along.  We’re finishing up some Thanksgiving and autumn-themed books this week before diving in to Advent books next week.  I think we’ve read and re-read Wild Child at least a dozen times in the past few days.  It’s always been a favorite in our home.

The children really enjoyed The Life and Times of the Apple. Harold is intensely interested in gardening (go figure) and he was fascinated with the section on fruit grafting.

Today there is no knitting or spinning to share, but I have been working on some wooly garments.  I have a few knitting projects going, but they were pushed to the back burner this weekend as I tried desperately to get a big stack of sewing finished. The weather has turned cold + George is growing rapidly = he is short on diaper covers.

For several months, I had been collecting wool sweaters at the thrift store and a few rummage sales, washing/fulling them, and storing them until time could be found to sew.  I managed to complete half of them while George napped, and got the other half cut and pinned.

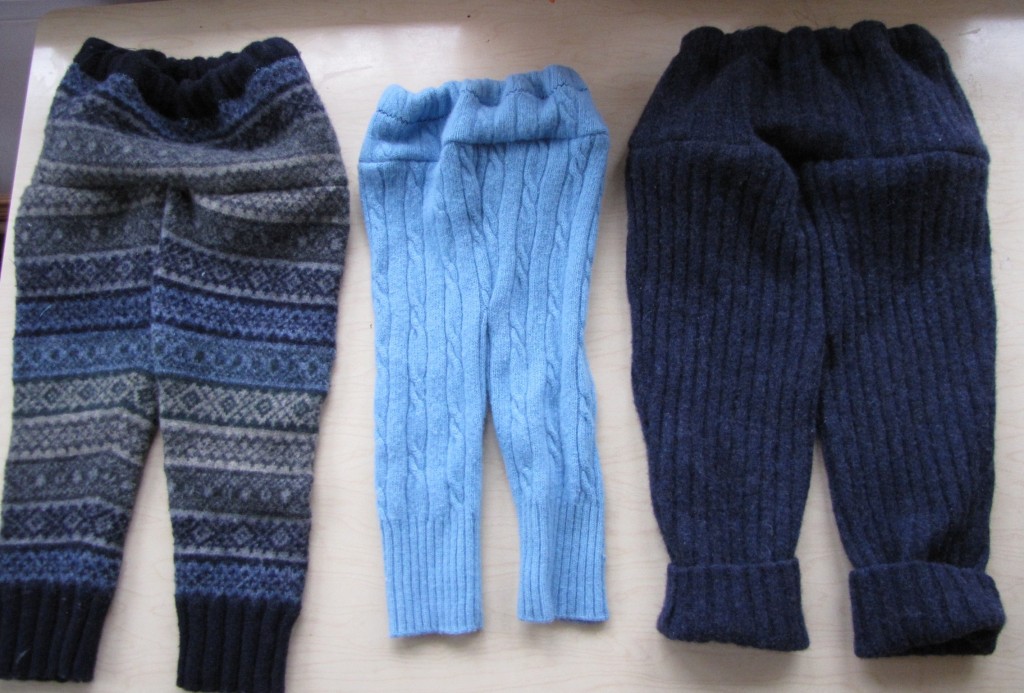
With the leftover sleeves, I whipped up some wool longies for overnight and extra chilly days.  They look a bit wonky here, but will lay flat once blocked.  The two larger ones are for George.  The sky blue one is for a baby-shower gift – in its former life it was a velvety-soft wool and cashmere J. Crew sweater (thank you, UU church rummage sale).

Total cost for enough wool and elastic to make 6 soakers and 4 longies = $3.25

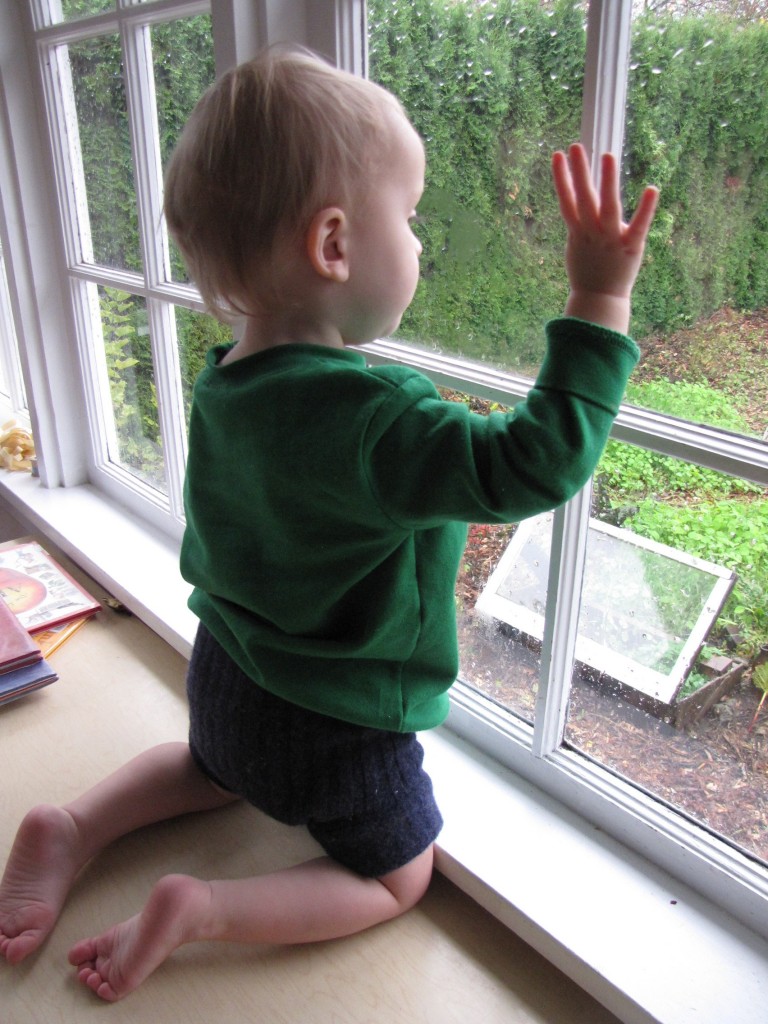
Here’s George in his new soakers after they were blocked and waterproofed.   Next week I will have a tutorial up on waterproofing wool soakers with lanolin.  I’ll walk you through the process so you, too, can have excellent results using wool covers with cloth diapers.

And now back to making pie crusts!

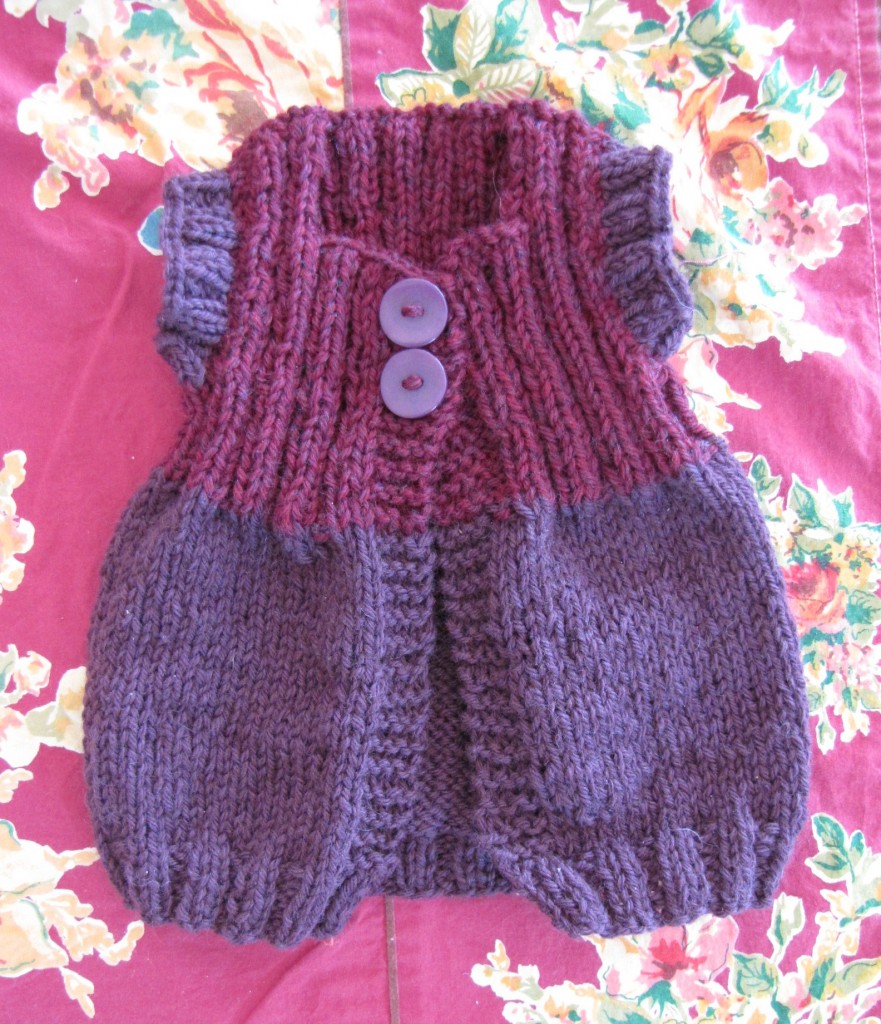
FREE Baby/Toddler Vest Pattern

There is something about babies in snuggly wooly vests

Last week’s project is finally finished, along with a smaller version (top photo).  I had originally worked up a 12-18 month sized pattern to fit tricky kiddo #4 (above), but thought a 3-6 month size would be great for baby shower gifts and such, too.

I’d love to share the pattern with you.  It’s free, a quick knit, fits great, and I hope to post larger sizes in the coming weeks.  If you use my pattern, please give me credit and link back to this page.   This pattern is intended for personal, charity and gift use only, not pieces sold for profit. Thank you!

The vest is worked from the bottom up on straights, then the front two panels and the back are worked individually.  The shoulders are worked on double-points at the very end.

The pattern is really conducive to using up leftover bits of worsted-weight yarn from other projects.  The 3-6 month size uses one color of Cascade 220 for the body and shoulders, and another for the ribbed chest.
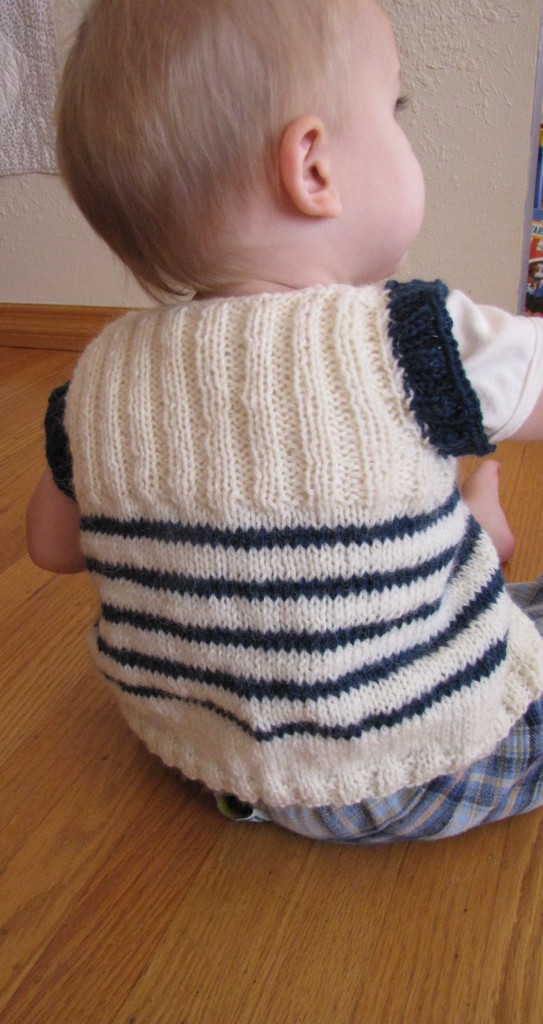
In the toddler size, I simply added stripes in the body up to, but not including, the ribbed chest.  Then the blue yarn is repeated in the shoulders.
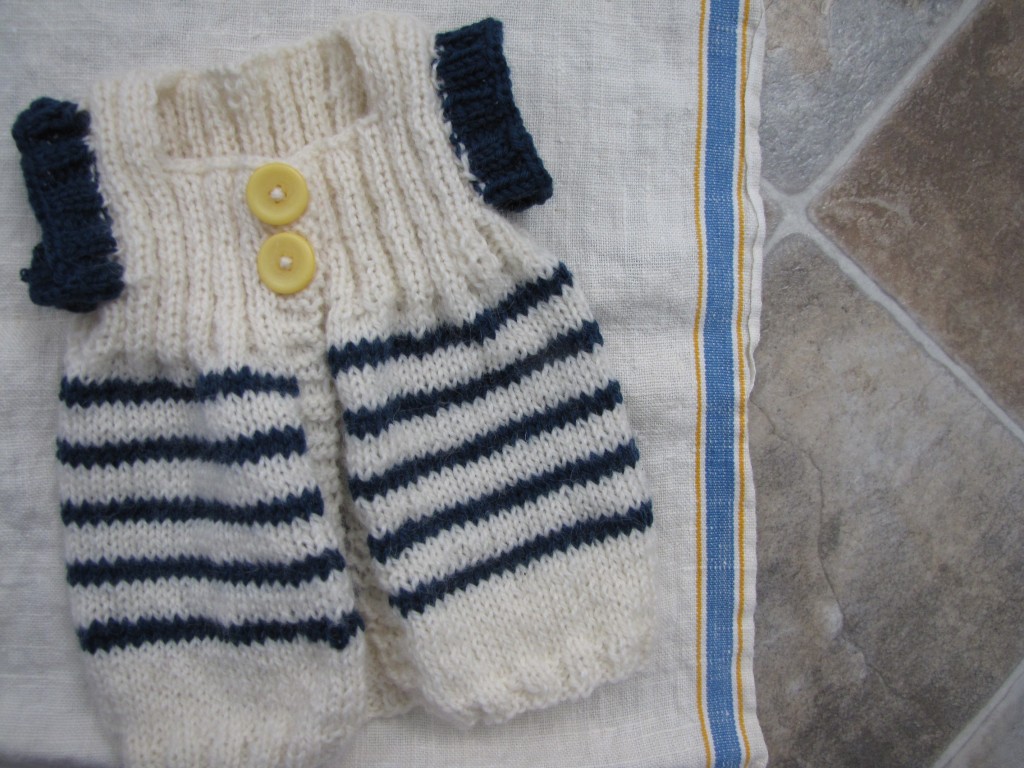
The pattern only uses two buttons for several reasons, which may sound alternately silly or practical:

1)I am chasing four kids, my life is crazy hectic, and I don’t want to corral a very squirmy toddler and attempt to get 6 or 8 buttons done.

2)Thrift-stores are great places to find just a few lovely old buttons, but rarely a large matched set.

3) If a pattern only requires two buttons, one might be more inclined to spring for a pair of beautiful handmade ones from some talented crafty mamas.

4) A swing sweater adds greater flexibility of movement for an active little one.

Hope you enjoy, and please please please, if you give my pattern a try, and have questions, comments, or want to share your project,  drop me a comment (with your URL).  Thank you, and many blessings on the little one warmed by your hand-knitted vest.

Georgie Vest

Copyright 2012, Angela Baker

Size: 3-6 months (12-18months)

Yarn: Cascade 220, or Lamb’s Pride Worsted, or other worsted weight wool:

less than one skein each color

Needles: Size 6 US straight, size 8 US straight, size 6 US dpns

Directions:

With Size 6 US needles, CO 90 (106) sts.  This will be 24 (28) for right front, 42 (50) for back, and 24(28) for left front.  You may place stitch markers at these points if desired, but it isn’t necessary.

Bottom edge: Rows 1-8: work (K2, P2) rib (last two stitches will be K2/ half a repeat)

Body (swing section): Change to size 8 US needles.  For remainder of garment, the first four and last four stitches will be worked in garter (K every row) stitch.  Maintaining this garter edge, work rest of piece in stockinette, until entire length (including bottom ribbed edge) equals 5 1/2 (7 1/2) inches in length.

(Note: if you choose to work in even rows of stripes in this section, use MC for first four garter sts, knit across with CC, and use a piece of scrap MC to knit the last four garter stitches.  Be sure to wrap the colors of yarn where they meet to avoid gaps.  This will give you a nice clean garter edge in the MC.  See white and blue sweater above for example).

Ribbed chest:  change back to US 6 needles.  If you wish to work ribbed chest in  CC, cut MC, and begin CC here.

Work 8 rows in (K2, P2) rib, maintaining the garter border on first and last four sts. You will now continue in this rib with garter border unless otherwise noted.

Work 20 (24) sts in pattern, BO 8 (8) sts, work 36 (42) in rib, BO 8 (8) sts, work 20 (24) sts in pattern (don’t forget to end with 4 sts of garter).

You will now work the front panel and back separately, still using size 6s. You can either work one section at a time, leaving the other two on the back end of one needle, or if you find this cumbersome, you can transfer two unworked sections to stitch holders.

Front left of cardigan: work 10 (12) rows in pattern (beginning with the garter border).  BO the 12 (14) sts on the inside of the garment (starting with the four garter stitches).  You will now have 8 (10) sts to work for the shoulder.  Knit remaining stitches in (K2, P2) rib for 8 rows (10).  BO.

Right cardigan panel: Attaching a new length of yarn, work as for left panel, but in reverse, binding off  at the garter edge again, and working the shoulder, but this time add two button holes as you go on rows 2 and 8 (10)  In the garter edge, K1, K2tog, YO, K1 to form the button hole.

Back: Reattach yarn, and work in (K2, P2) rib (no garter border!) until piece is same length as front panels (including shoulder.  BO.

Seam shoulder sts to back.

Shoulder bands:  Using size 6US dpns, evenly PU and K 40 (48) sts around arm hole.  Be sure to twist picked up stitches as you knit them to avoid gaps/holes around the edge.  Work 4 (6) additional rounds in (K2, P2) rib.  BO loosely. Repeat with other arm hole.

Block sweater and sew on buttons.  You’re finished!

(Oh, yes, joining with Small Things and Frontier Dreams and Tami’s Amis for this post.)