Homemaking

Mason Jar Cozy Giveaway!

Pictures09-10 886

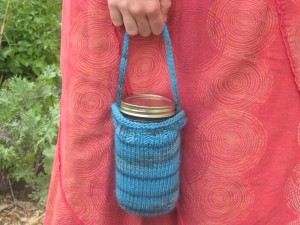
Well, somewhere I’m going to have to find some time to knit this, because I’m going to give one away via the Salt of the Earth Urban Farm Facebook page! When we hit 100 likes, I will randomly select one of those 100 folks to win a mason jar cozy in their choice of colors.  Only 7 spots left, so click on the sidebar link, and like us on FB for a chance to win!  Thanks!

(For those inclined to knit their own, here’s the free pattern!)

Coat Hooks

IMG_8329

When entering our home, there is no coat closet, or even much of an entryway to speak of.   Our kids tend to walk in the door and immediately dump their coats on the floor.  And, of course, the dog promptly makes a nest in them and takes a nap.  Even if they take their coats back to their room, they aren’t tall enough to hang them up in their closet, so they end up in a pile on the floor back there.  It drives me nuts.

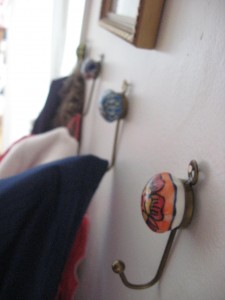
The other day, we were at Cost Plus/World Market, because it’s close to church, and I can’t resist going in when we drive by, especially at Christmas time.  (I love everything in that store!)  They had a big bin full of Indian ceramic dresser knobs and little hooks, and for $8 ($2 for each kid, including “Baby Tummy”), we had a solution to the coat problem!

IMG_8328

A very small change makes a big difference sometimes, and a little less chaos is very good thing.  🙂

IMG_8327

Homemade Laundry Powder

IMG_8288

My sister and I have talked about making homemade laundry soap for years – it’s so much more economical, and environmentally friendly, plus it’s so easy to make.  I’d shied away from it because, frankly, the laundry soap my friends were making looked like snot, and I wasn’t up for it.

Then, a friend told me that she had started making Amanda Soule’s recipe for powdered laundry soap. It was like a revelation!  I didn’t have to make snotty noodle soup soap!  I could make laundry powder!

I did some fishing around on the internet, and tried some recipes, and here’s the one I like best (a blending of several):

Larksong’s Laundry Powder

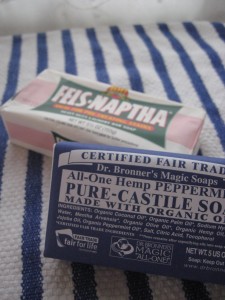
1 Bar Fels Naptha Soap

1 Bar Dr. Bronner’s Peppermint or Lavender Soap (it’s 3x as expensive as Fels Naptha and I found two bars is too strong of a scent for me) OR you can use 1 bar Ivory soap.

4 cups Washing Soda (soda ash)

4 cups Natural Borax

(you can also add 1 cup of Baking Soda if you need it – I sprinkle it on diapers in the pail,  so I didn’t add it)

Directions:

1.  Unwrap Fels Naptha soap, place on a paper towel, and microwave for 1 1/2 – 2 minutes.   (Caution!!  Soap will be very hot!!)

IMG_8289

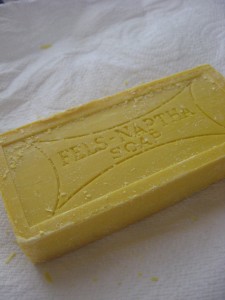
Here’s a bar of Fels Naptha laundry soap straight out of the paper.

IMG_8293

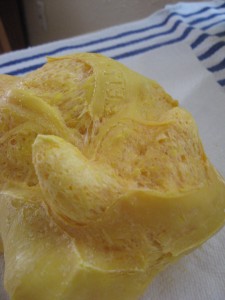
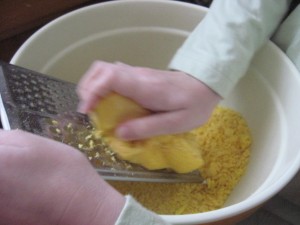
This is what it looks like after 2 min in the microwave – it puff up, and is very easy to quickly grate.

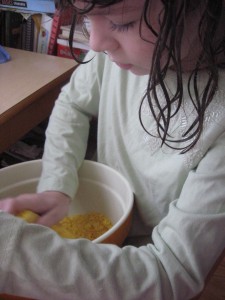
Repeat with Ivory soap.  Note: Dr. Bronner’s is a castile soap, and tends to melt in the microwave more than puff up, so I just grate it as-is.  It takes a little more elbow-grease, and the kids usually aren’t up for it – they much prefer to grate the “puffy soap”.

IMG_8295

Let soap cool thoroughly (about 10 min), and grate into a bowl.

IMG_8296

IMG_8292

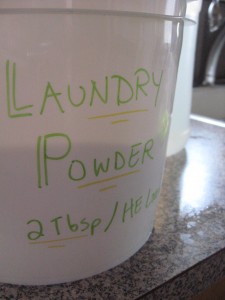
Measure and stir in borax, washing soda (and optional baking soda).    Stir thoroughly, and pour into a sealable bucket.   Makes 32-64 loads, depending on whether you have a conventional machine or an HE machine.

IMG_8298

Soap flakes have a tendency to settle to the bottom, so I invert the bucket a few times before measuring.

You may have to fiddle with the measurements a bit – depending on your machine, and how dirty your laundry is –

I use 2 Tbsp per load for our HE machine, and 3 Tbsp for diapers (since it’s low-sudsing, it’s perfect for HE machines), and I had read that folks with conventional machines use 3-4 Tbsp per load.

Next time I think I’ll use ivory instead of Dr. Bronner’s mint soap, and add a little orange or lemon essential oil – while the mint is nice, I think I prefer my laundry to smell like citrus.

I estimate my total cost per load is about $0.09!  Not too shabby!

Under the Sea

IMG_7966

The children went to a Storybook Costume Ball with their cousins last night.   We had a two-day scramble to throw together some costumes, but we pulled it off just in time!    Here’s a little bit on what we made:

IMG_7981

Little Hen wanted to be Amphitrite, the Queen of the Ocean, wife of Poseiden, in Greek Mythology.

Her costume:

$0.50 -A blue velvet skirt from the thrift store (with about 12 holes in it that we had to mend)

$0.00 – a tank top from her closet with a seahorse on it and a “seaweed” looking scarf from my closet

$0.50 – 1/4 yd of ocean print fabric, from which we made part of her crown and cut out sea creatures to tack to her “ocean” skirt

$0.00 – more ocean creatures to sew onto skirt, which she drew out of cardstock and decorated with glitter glue.

$0.00 – scraps of leftover fabric from her brother’s costume to make her crown

$0.00 -some body glitter leftover from Halloween

—————————————–

Total cost $1.00!!!

IMG_7985

She helped me cut the pieces and sew her crown out of scraps from her brother’s costume – the middle of the crown(to make it stand up) is 3-layers of very ugly flannel that came in a big bag of thrift store scraps.  We whipped it up in about 15 minutes (you can’t see the sea creatures she cut out and sewed to the sides and back from this shot…)

IMG_7979

Firecracker wanted to be a mermaid.  With no pattern, limited time and $, here’s what we came up with:  She didn’t want a tail-shaped skirt, because they are difficult to walk/run/play in since they are awfully narrow at the bottom.    We decided to sew her a skirt with blue fabric, which would be the sea she’s swimming in, and then make a two-piece apron “tail” that she could take on and off if she wanted.

IMG_7983We lucked out at the thrift store and found an adult size 4 skirt with blue fabric (yes, it’s butterflies, but Firecracker said it looked “oceany” to her!), so I didn’t have to make a skirt from scratch – I simply cut it up and resewed it in her size, with an elastic waistband.  Voila!  Sea skirt!

$3 – blue skirt, cut down and resewn to fit a 5 year-old

$0.10 -thrift store elastic

$2.00 – 1/2 yd of clearance fabric at Fabric Depot (turquoise with swirls, Firecracker thought it looked like scales)

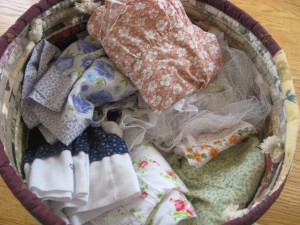
$0.00 – 1 yd very ugly flannel from a previously thrifted bag of fabric, for the double layer batting in the tail – to give it rigidity.

$0.00 – random snippets of green fabric for tail decoration plus a scarf from the dress up box for the tail, piece of blue tulle for her hair from dress up box

$0.00 – white leotard and blue bikini top from dress up bin

$0.10 – turquoise bias tape from the thrift store (for the apron-tail ties)

————————————————————–

Total cost – $5.20 (plus, some turquoise fabric leftover for doll quilts, etc, and it includes a perfectly good skirt for her and Little Hen to wear anytime)

IMG_7973

Since his big sister and cousin both wanted to be mermaids, guess what Tum Tum wanted to be?  MERBOY!!

IMG_7962

His daddy even made him a trident from coardboard and foam and duct tape (which was a bit of a dangerous idea, but he loved it!) (Please ignore the mountains of fabric in the background, as long as the sewing machine has to be out, I’m going to sew, sew, sew!  Wish I had a sewing room!)

$0.00 – Blue knit pants from Tum Tum’s closet plus blue leather moccasins

$0.50 – 1/4 yd ocean print fabric for his sash (mermen don’t wear shirts!)

$ 2.50 – 1/2 yd of blue “waves” fabric Firecracker found at Fabric Depot on clearance for the tail.  (Yay, kiddo! )

$0.10 – thrifted seam binding for the ties

$0.00 – 1 yd very ugly previously-thrifted flannel for the double-layer batting to add stiffness to the tail(s).

$0.00 – scraps from making Firecracker’s tail(s) used to make his fin and decoration on the front.

——————————————————————–

Total cost – $3.10!!

IMG_7974

IMG_7977

IMG_7982

We had a great time!!  Thanks for inviting us, Aunt Kristi and Cousin Ruby!!

Late June Garden Update

IMG_7721

It’s late June at Salt of the Earth Urban Farm (home of the BCS Teaching Garden)!  Finally, some warm weather (mid-upper 70’s) has settled in (the tomatoes,  summer squash and bush beans look much happier) and everything is flourishing. 

IMG_7614IMG_7613

The harvest is increasing – every week, we are taking a few dozen cartons of organic snow and sugar snap peas, as well as boxes and boxes of lettuce, chard, kale, bitter greens, and a few choice boxes of herbs and strawberries to Birch Community Services.  We are still looking forward to the coming months and being able to take in more and more food to share amongst the families at BCS (loads of organic bush beans, tomatoes, potatoes, and summer squash will be coming soon!).

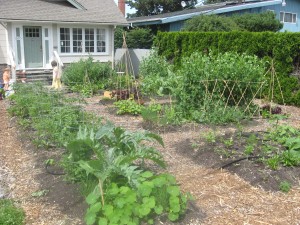
Here are a few shots from around the yard – mostly in the front yard –

IMG_7724

IMG_7726

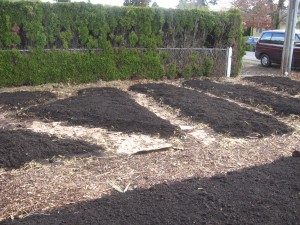
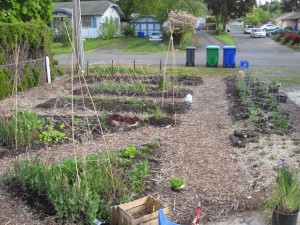
A few shots of the front yard, here.  Can you believe just a few short months ago, it looked like this? —>

IMG_7118

(And a day before this, it was just weeds and lawn!  Taken late-February 2010.)

IMG_7720

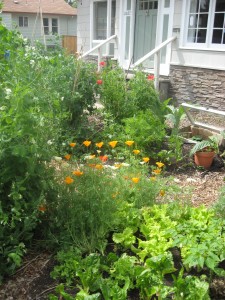
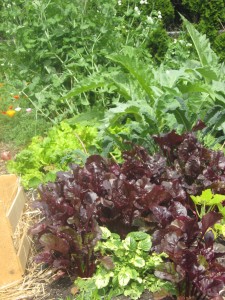
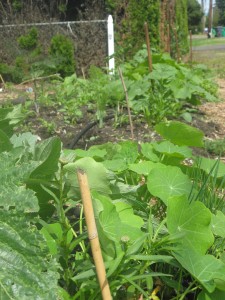
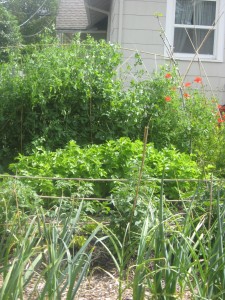
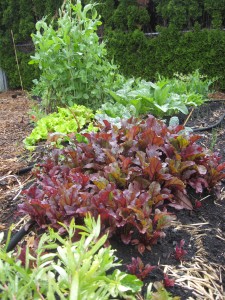
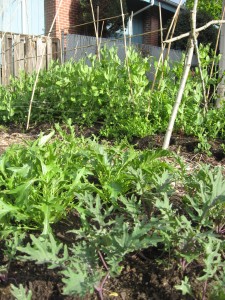
Front to back in this shot – variegated land cress, beets (with a few Butternut starts peeking thru on the right and a crate of potatoes to the left), Italian kale, cardoons, salad greens, Oregon Sugar Pod II peas, California poppies and De Milpa tomatillos.

IMG_7734

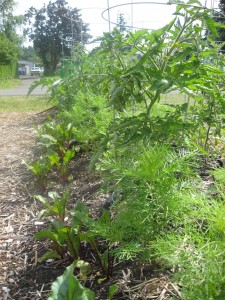
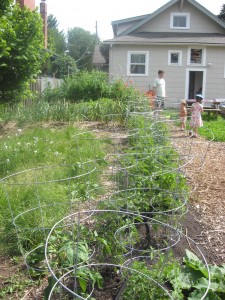
Tomatoes in the front are underplanted with beets and cosmos.  In the backyard, with nasturtiums and lettuce (the shade from the tomatoes will keep the lettuce from bolting in the July/Aug heat.).

IMG_7729Mature artichokes and cardoons take up a lot of space, but while they’re still growing, I’ve underplanted them with daisies, nasturtium and chives (winter squash, dahlias, sunflowers, fennel, and wildflowers are visible in the background.)

Not shown – I planted an herb bed in the front yard – three types of lavender (two culinary, one for sachets), three types of rosemary (I love rosemary!), tangerine sage, tricolor sage, lemon verbena,and curry plant from starts (when pinching pennies, get the 4-inch pots – they were $3 each, versus $9-10 for the next size up, and $30 for large rosemaries and lavenders in gallon pots.  They’ll grow big, too!  Be patient!)  I also transplanted in two types of thyme, oregano, Greek basil, Thai basil, and Genovese basil that I started from seed a while back (for a savings of about $15 over buying potted starts).

IMG_7741

Much of the back isn’t so pretty yet, but here’s a shot of the linear beds near the house  -front to back – garlic; parsnips, kale, chard, carrots; peas and poppies underplanted with kale.  I didn’t take any shots of the bush bean, asparagus, potato and squash beds, which make up about 60% of the backyard.

IMG_7743

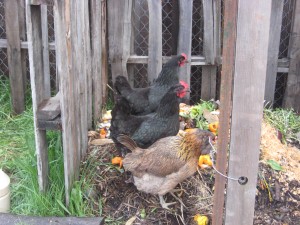
Out back, we’re still doing the fairly miserable work of ripping up bamboo (rhizomes and all) for a future raspberry patch (to the left in this picture) and quince and pear stand (where the current volunteer hazelnut currently resides.)  The far NW corner of the yard (not pictured), which will eventually be our Zone 3 fruit orchard,  is currently overrun with weeds.  I did manage to get three apple trees and a Desert King fig planted back there, and my husband expanded the chicken run (while protecting the young trees), so the hens could make short work of the weeds and give me room to underplant the trees with red clover and more lavender.  We are still hunting for a persimmon, a dwarf apricot, and black currants to put back in that area.

More shots from out back in the coming month – the rows of bush beans and summer squash are quite small, and the limas and runner beans are barely reaching up their poles).

IMG_7715

If you’re interested – we’re having a free hands-on workshop on  Saturday, July 17th here at the garden from 9:30-11:30 and follow up with a potluck luncheon from 11:30-12:30.  We will be doing a garden tour, discussing high-summer garden needs and prepping for a fall garden.  We will be starting seeds for fall crops (cabbage, broccoli, cauliflower, etc), possibly harvesting potatoes, and doing regular garden maintenance.   Bring your garden gloves, shovel, and a dish to share.  Children are welcome.

Contact the garden coordinator for Birch Community Services, Tiffany, at  tiffany.mach@yahoo.com to sign up.

Watermelon Salad

IMG_7697

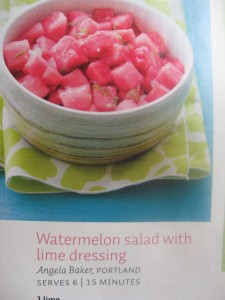
A while back, Sunset Magazine called for summer recipe submissions with 5 ingredients or less.  I sent in a recipe, and they published it in the July 2010 issue!

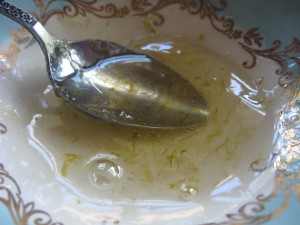
It’s a super easy fruit salad recipe based on a dish I make all the time in the summer.  (It’s a great dish to take to a potluck, btw.)  I basically use my homemade lime marmalade warmed up to make a dressing, and tossed with any cubed melon.  (Although, it’s also good with some fresh mint added, or using strawberries and oranges if melon isn’t available).

So, check out the current issue of Sunset for the recipe!

Surprise in the nest box

IMG_7582

While it’s by no means as big as this monster, we found quite a surprise in the nest box after church today.

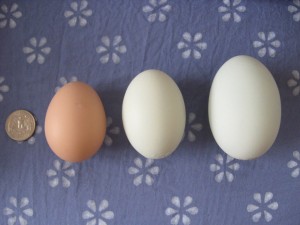
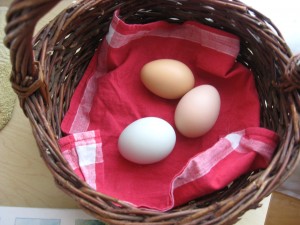
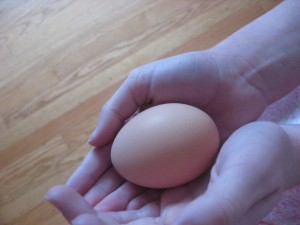
Nudge, our Auracana, usually lays a large to extra-large sized egg (the pale green one in the middle (it looks a bit washed out in this shot)),  compared to our Australorps that lay medium-large eggs.  However, today Little Hen found that she had left us one the size of a duck egg (far right)!

IMG_7584

And just because – to finish up, here are some photos of the chickens that Little Hen took yesterday (our first sunny day in a LONG time.)

IMG_7566

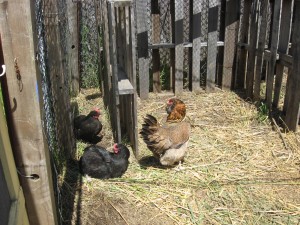
Plucky, Sara, and Nudge soaking up some sunshine

IMG_7576

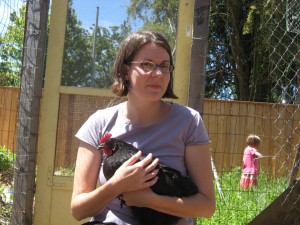
Me, holding Plucky.

IMG_7574

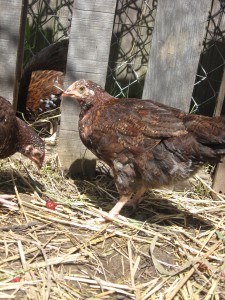
A rare shot of the Speckled Sussex chicks – they love to be held, but are difficult to photograph, because they are fast.  We finally named them this week (now that we can tell them apart) – Sugarplum (looking at the camera), Kate (eating a cherry), and Bolt (in the background, who, as her name suggests, is super fast).

And with that, we’re going to take it easy and get some real rest for the remainder of our Sunday.  After a crazy day crammed with hours and hours of yardwork yesterday, the rain today is almost welcome, because it’s forced us to stay in this afternoon.  I think my husband is doing to finish reading Skulduggery Pleasant aloud to us (while I get some knitting done for friends’ upcoming baby showers!), and then we’re going to make some homemade pizza for dinner.  And totally avoid all housework until tomorrow.

Wishing you peace and relaxation…

Late May Garden Update Part II

IMG_7489

And here’s the rest of the garden update:

There wasn’t time to get any side-yard shots before the rain started up again, but we now have 64 healthy strawberry plants growing there (many have set fruit already!) and the Christmas limas are germinating there as well.

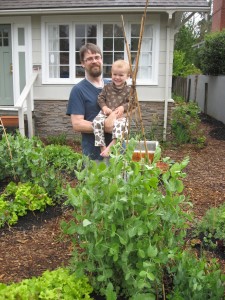
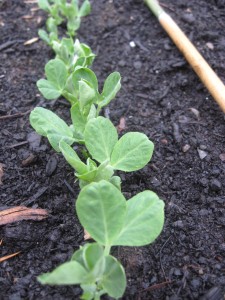
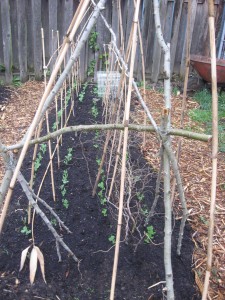
Out in the backyard – the peas (see above) are as tall as Firecracker!  Oregon Sugar Pod IIs, Alaska, Galena, and Alderman Tall Telephone peas are all going strong.  And yesterday Firecracker noticed that they’d begun to flower!  Soon we’ll have sugar snap peas, snow peas and shell peas by the bucketful!

IMG_7493

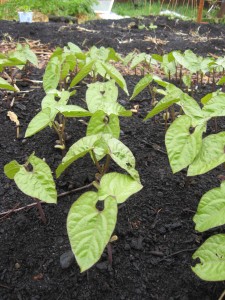
The first planting bush beans are up all over the backyard, and I expect the second planting to germinate later this week (for a longer continuous harvest).  These are Royal Burgundy.  This patch looks good, but unfortunately, most of the bush, runner, and lima beans are all taking a heavy hitting from…

IMG_7502

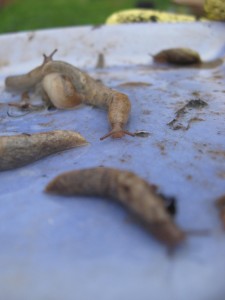
SLUGS!  Despite daily picking (and feeding them to the chickens), the garden is inundated with thousands of slugs.  Most mornings the girls and I pick anywhere between fifty and one-hundred fifty.  Beer traps have only managed to capture a few as well,  so today I finally resorted to buying some organic, “pet friendly” slug bait in order to save the bush beans.  Here’s hoping it works, because there is no way   chickens freely hunt for slugs in the beds without the baby plants being eaten as well.

IMG_7491

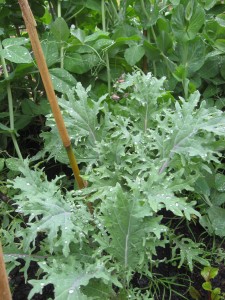
This is one little patch of the Red Russian kale, which we’ve planted all over the yard.  Thankfully, the slugs haven’t bothered it.  It’s our favorite kale – not only is it beautiful and doesn’t easily bolt, it’s full of vitamin K, vitamin C and iron, and has a mild flavor – we put it in everything from fruit smoothies to lentil curry.  A definite superfood bursting with nutrition.

IMG_7495

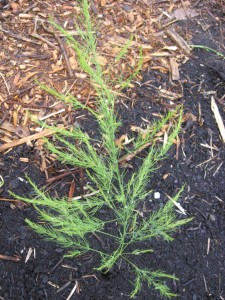
This is one of the 25 asparagus crowns in full frond – only two more years and we’ll have a nice crop of asparagus of the BCS volunteers!

IMG_7507

Our compost still isn’t cooking well once again (too wet and soggy, too many kitchen scraps (“greens”) and too little “brown” matter (leaves, dry plant matter, shredded paper).  So, in the drizzle yesterday morning, I got down to the stinky job of turning it and splitting the compost into two separate side-by-side bins, which will get lots of shredded newspaper turned into them this week.   Let’s hope that does the trick.

The hens and chicks were THRILLED to have the compost turned and were scratching about while I was working – finding germinating pumpkin seeds and worms and all sorts of  “delicious treats”.

IMG_7506

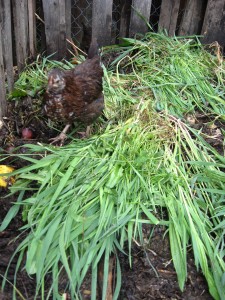
This is one of the as-of-yet-unnamed Speckled Sussex chicks (or, as Firecracker calls them “teenagers”) scratching in the compost (those three are so fast, it’s tough to get a photo of them!).  You should have seen the chickens happily clucking and scratching and snacking and clucking some more!

And thankfully, all of the adults are done molting, so those happy hens have started churning out –

IMG_7510

– 3 eggs per day!  Woo-hoo!

And that’s it for the garden at present – thanks for being patient with a long update -  Hopefully, the warm weather will come back soon and the tomatoes, summer squash, tomatillos, cilantro and basil will really get a chance to thrive.

Okay, I promise something other than a gardening post coming up soon (although, I don’t know what that will be, since we haven’t had time for much baking or knitting or reading or cleaning house since every spare moment has been spent gardening or researching gardening and chicken keeping!)

If you’ve got a garden going, or even a few tomatoes in pots on your balcony, the girls and I would love to hear about how things are going for you!

Late May Garden Update Part I

IMG_7484

The garden has really taken off  after a week of hot, sunny weather, followed by lots of rain. (although, the cold nights and wind the past few days haven’t done us any favors).  Volunteers have been able to start taking in a few baskets of organic produce to BCS, mostly radishes, mustard greens, lettuce, chives, tarragon and baby beets, bok choy, and kale.  The teeny harvests thus far just begin to hint at the bounty of the coming months.

IMG_7487

Between slug-picking and weeding and rain showers, we got a few pictures this morning – (above) The boys in the front yard behind Alderman Tall Telephone peas, mesclun mix lettuce, with more lettuce mix and Oregon Sugar Pod II peas in the background.

– the tomatoes are really taking a beating with the cold (40s and 50s) and hail and driving wind this week.  We wrapped about half in plastic (and then ran out of plastic!) but can’t see that it is helping them out much – the hail damage is the worst.   Surprisingly, the tomatillos don’t seem to mind the dreary weather as much and are growing nicely

IMG_7485

Despite a little slug damage, the cardoons we planted back in February are coming along nicely – the largest are nearly two feet across already.  (They were planted closely, because about 20% of the seed stock are infertile – they are smaller and weak and I keep thinning them out.  The hassle of starting them from seed is well worth it – I only used half a pack (@ $2.45/pack), and have 8 strong seedlings, versus paying $7.49 each for large starts from the garden center.)

IMG_7511

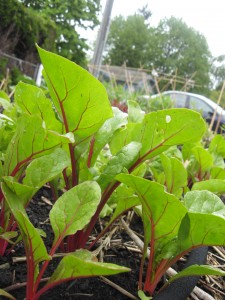
The Vulcan Red Chard is doing quite well – just a few more weeks until it will be able to be harvested in any quantity.

IMG_7494

The mustard greens and bok choy bolted in last week’s heat, but the bolted stalks were fed to some very happy chickens  and in the gaps I have planted summer squash (a total of 6 in the front yard, and 19 in the back – a mix of crooknecks, zucchinis, and patti-pans).  I may eventually need to thin them down, but a few are compact varieties, so we’re hoping they won’t get too crowded.

IMG_7513

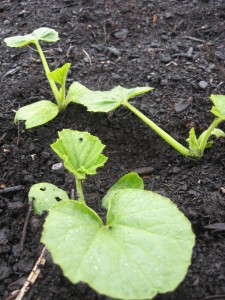
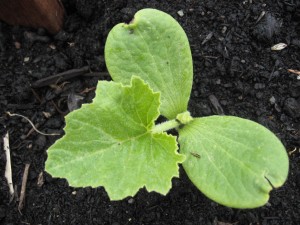
This is a Golden Hubbard seedling, coming up in the bed closest to the street.  Winter squash are such a treasure – beautiful rambling vines all season, tasty blossoms to stuff with ricotta and deep-fry, and finally, vitamin-packed, long-shelf-life squash in an amazing variety of shapes and sizes to eat throughout the winter.  (Since there is limited space, I have only put in my favorite eating squash – Buttercups, Butternuts, Hubbards, Delicata, except along one side-yard, near the house, where the gorgeous – if largely inedible – Rouge Vif D’Etampes has been planted for harvest decorations.)

For everything you could want to know about nearly every variety of winter and summer squash, I highly recommend Amy Goldman’s book, The Compleat Squash.

To keep the neighbors happy, I have planted misc. wildflowers, sunflowers, daisies, and about 50 dahlias in the front beds.  Add to that those dozen winter squash (to trail out of the beds and along the path), bronze fennel and artichokes, and for good measure, a whole jumbo packet of nasturtium!  If that doesn’t make for a pretty (but still mostly edible!) street-side bed, I don’t know what will!

(Eventually, the front bed will be mostly perennial flowers, currants, a dwarf plum, and a low fence with a grape arbor and a gate across the path, but it needed something to make it attractive this year, especially with so many folks in the neighborhood stopping by to ask what in the heck happened to our front yard!)

And with that, I’ll save the backyard and the chicken update for tomorrow!

Early May Garden Update

IMG_7457

Happenings in the garden this week so far:  Mustard greens, lettuce and kale are all getting big!  (Red Russian Kale in the foreground, with Mizuna mustard behind.)

IMG_7455

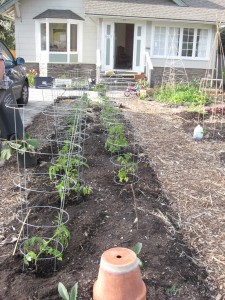
A volunteer and I got 20 tomatoes planted this afternoon – half in front, half in the back.  (I have room for another dozen or so, but am out of cages and will have to jury-rig some bamboo supports – the cages were donated, and I’m trying do as much free and homemade as possible.)

IMG_7464

I got 7 De Milpa tomatillos (they have beautiful purple fruit) in the ground, and am trying to find room for three more in some sunny corner.  While I planted them, I kept thinking about roasting tomatillos and making purple salsa verde with chips, or chicken enchiladas with tomatillo sauce  – can’t wait!

IMG_7465

Most of the front yard beds can be seen here (I still don’t have good pictures of all of the backyard, since it’s a mess) – beets and chard and peas are really coming along.  We are harvesting lettuce every day (despite the continuing slug issues).   Pole beans and pumpkins are just beginning to peek up through the soil, and the wildflowers are germinating as well.

IMG_7458

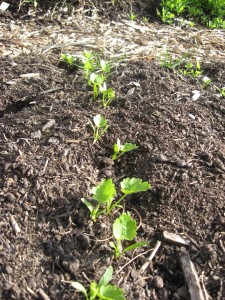
Baby parsnips in the backyard are putting out true leaves.  Only 90 more days or so, and they’ll be ready to eat!

IMG_7461

The summer squash in the backyard cold frame is coming along beautifully – looks like we’ll have lot of starts to give away to any volunteers that want them!

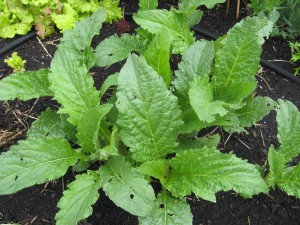
IMG_7463On the right is a new veggie I’ve never tried before (thank you, Patty!) – variegated garden cress.  Can’t wait to get it established and try some in a salad!

IMG_7460

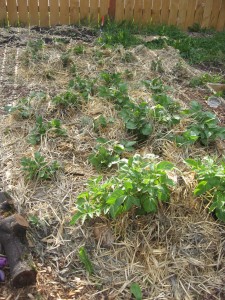
The first of three potato beds out back are really going gang-busters.  I have to mulch them almost every day (cutting tall grass from the yard and quickly using up our last bale of straw).  The second bed planted will soon catch up – the leaves are 6 inches high.  And the third bed potatoes are just barely peeking leaves up through the straw.   Looks like we’ll need to run to the feedstore for another couple of bales soon!

Not pictured – 3 types of mint planted in pots buried around the garden

-bronze fennel starts and lots of chives transplanted around the garden; cilantro and lemon balm starts planted out as well

– bulb fennel, Waltham butternut and Golden Hubbard squash germinating

-  Scarlet Runner and Kentucky Wonder pole and  4 types of bush beans planted in the back, along with Christmas limas on the side yard.

-3 dozen Fordhook Giant leeks were transplanted out  in the front and side yard and another 30-odd Walla Walla Sweet onions in the side and back (wish I had room for more!)

– And many, many flower starts inter-planted amongst the tomatoes.

And -just as importantly- many, many people have stopped by and talked to me this week about our gardening project – I’ve met a half dozen new neighbors, and am connecting more with many others – the garden is building community, not only amongst volunteers, but also in our neighborhood, and that’s really encouraging to me.

As my next-door neighbor said, “It’s starting to actually look like a garden!”

Preparing for the duck invasion

IMG_7442

After a flurry of chicken-planning activity this winter/early spring, we have our long-dreamed for chicken flock (the three hens, plus three new Speckled Sussex chicks, and three more chicks on order (2 Australorps and a Buff Orpington)).  And the chicken run is mostly complete (needs a little gussying up, and a grape trellis up the side).  Now, moving on to the next project, the Baker boys have gone into intense-planning-mode for …

DUCKS!

IMG_7446

The boys are a bit so-so on the chickens, but can’t wait for ducks!  We have room for 3 (and maybe sneak in a 4th?) next year, and all the talk from Daddy is, “Where do we put in a duck box and run? What style?”, and “should we get runners or Khaki Campbells?”   Tum Tum’s contribution is more along the lines of  “Duck goes QUACK QUACK!”, but he loves to look through the stack of duck-keeping books with his dad.

IMG_7447

Did you know that the better duck breeds are more efficient at removing slugs than chickens (a major problem in the NW)?  And lay larger eggs (sometimes more eggs -up to 300 per year for Khaki Campbells) than chickens?  And those eggs that produce more substantial whites, which makes for better meringue, souffles, etc!  And, ducks are darn cute!

So, if all goes as planned, by next year, our little urban farm will be complete when it comes to livestock.  Except, maybe for future additions of meat rabbits…or honeybees…If you could (or do!) have any livestock on your property, what would it be?

Snack of choice

IMG_7255

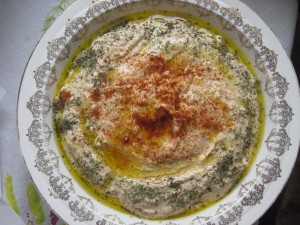
HUMMUS!  It’s my favorite, thrifty, last-minute dish when the kids need a savory snack, or we need to bring a side-dish to a get-together.  It’s always a hit and goes great with crudite, chips, falafel, bagels, you name it!

Homemade hummus is so easy and frugal and delicious, I can’t understand buying a teensy little tub of it at the store for $4 or whatever they charge.   I like a tahini-heavy hummus, and the addition of some smoked Spanish paprika, as well.   Here’s my recipe:

Larksong’s Easy Tahini-Lover’s Hummus

2 cans organic garbanzo beans drained (reserve liquid) and rinsed (Tip: for extra-creamy hummus,  remove the papery skins from all of the beans.  It does make a difference.)

1 cup roasted-sesame tahini (I much prefer roasted to raw, which can have a bitter or sharp taste to it)

juice of  one large lime

2 Tbsp extra-virgin olive-oil, plus more for garnish

4-6 cloves garlic, minced or crushed

1 tsp smoked Spanish paprika, plus more for garnish

chopped fresh parsley (or dried crushed) for garnish

Directions:

1.  In a food processor (which I actually don’t own – so I use a bowl and an immersion blender), combine chickpeas, tahini, garlic, lime juice, 2 Tbsp olive oil, 1 tsp paprika.  Drizzle in bean-liquid until desired consistency is reached (I like mine quite creamy (hence removing the chickpea skins if I have the time) and I will often add all of the bean-liquid and then a little water as well, so it’s thin enough to dip into easily).

2.  Transfer into a clean serving bowl, and sprinkle with more paprika and the parsley.  Drizzle with a bit more olive oil.  Enjoy!

Garden Snapshot

IMG_7254

A few quick pictures Firecracker and I took in the garden yesterday afternoon:

IMG_7262

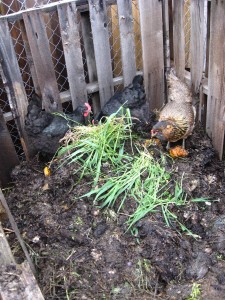
The chickens having a grand time in the compost bin.

IMG_7251

All sorts of things are germinating – peas, peas and more peas, chard, kale, mustard greens, beets, lettuce, poppies, sweet peas, calendula, artichokes, chives, parsley and basil.

IMG_7260

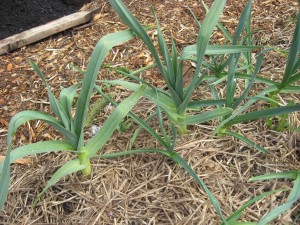
The garlic and shallots we planted last October are really taking off!

IMG_7265

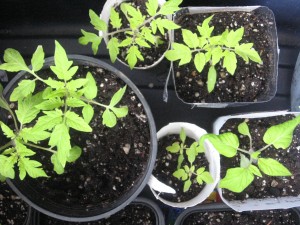
And, of course, our 75-odd tomatillo and tomato-lets are getting big – here (clockwise from far L) are “Black Krim, “Yellow Pear”, “Costoluto”, “Brandywine” and some little “Sweet 100” cherry toms that got a late start.

Today we’ll be planting “Hollow Crown” parnips and “Nantes” and “Cosmic Purple” carrots, and more basil, as well as starting cilantro in the cold frame.  Despite the chilly rain the past few days, it’s really feeling like spring as the garden comes to life.

Fresh Eggs

IMG_7242

We got chickens!!

After months of scouring Craigslist, pricing materials at the ReBuilding Center and researching plans (not to mention years of wishing, dreaming)… we finally found a used coop that met our super tight budget. (A coat of pretty paint, and the sturdy coop will look quite nice in the back corner of our yard.)   And a completely unexpected bonus- the large (6 nest boxes) coop came with enough fencing and fence posts for a very large run.

An even bigger bonus – the coop came with 3 organically-fed, heritage breed, 9 month-old hens – 2 Australorps (two big glossy-green/black girls that lay brown-eggs) and an Auracana (a rusty, stripey hen with big tufts of feathers on the sides of her head that lays blue-green eggs).

We can’t wait to expand out little flock, and I can’t wait to write some more about the beginning of our chicken-keeping adventure.   But, that’s all for now- yardwork calls.   After having friends and neighbors help us move the weighty coop into place yesterday, we need to get out and put the fencing up today, so Sarah, Plucky and Nudge can roam their patch of the yard safely (and also keep the tender baby veggies safe from them!).

More soon…

Seedlings

IMG_7211
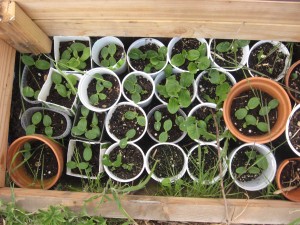
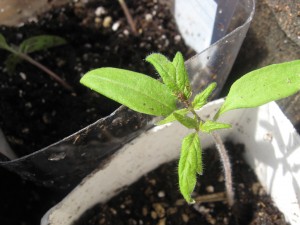
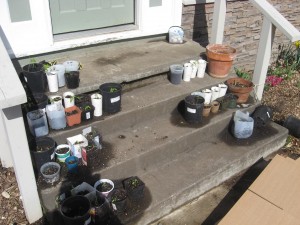
Yesterday afternoon, with my son on my back, the girls and I potted up the first of our tomato seedlings – all 51 of them.  (The one above is a “Black Krim”, a favorite of ours for salads.)  Another 26 little tomato-lets (started a week later) will be potted up this weekend, time allowing.
IMG_7209
(Above: Our eclectic collection of potted-up tomatoes – in sour cream and tapioca containers, large paper cups, milk jugs, juice bottles, hand-me-down pots.)
It felt wonderful to spend the afternoon in the warm sunshine, kneeling with my children on the front steps, tenderly moving each little seedling from a starting tray into its own pot.   It felt wonderful to be growing food with my children, and I am grateful for the many, many days  of gardening with them that are spread out in front of us.
One of the most important resources that a garden makes available for use, is the gardener’s own body. A garden gives the body the dignity of working in its own support. It is a way of rejoining the human race. – Wendell Berry

Spiced Cocoa Beef Stew

IMG_7192

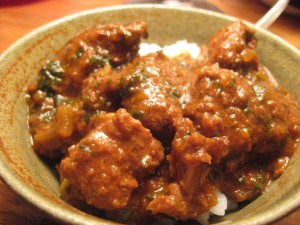
The girls and I made a special beef stew for  my birthday yesterday.  They especially enjoyed blending the spices at the beginning…and later standing by the stove, inhaling the amazing aroma of spice-dredged beef browning in butter (oh, and eating three big bowls of hot stew at dinner, too!).

We don’t eat much meat, but this is a nourishing, comforting meal that is worth the effort.  A little bit after lunch, we put on some bluegrass music, started a pot of hot tea and got cooking.  Once the dish gets going, this stew can simmer through the afternoon with no need of my assistance, so it’s a great choice for a day when we’re going to be home and want to work in the garden or read all afternoon right up to dinner time.   (I just remember to put the rice cooker on and add the greens to the stew about half an hour before we want to eat.)

This recipe is inspired by a beef-cooked-in-chocolate-and-mild-chilis dish that I had at a friend’s house years ago – I liked the flavor combination of the beef with the cocoa, oregano, and smokiness of the ancho chili powder.   It took me a few tries to come up with this version – just a basic beef stew with the typical tomatoes and wine to tenderize the meat, and spices we like in a typical combination – I end up changing it a little every time I make it – continuing to improve it, I hope.

Larksong’s Cocoa Braised Beef

Ingredients:

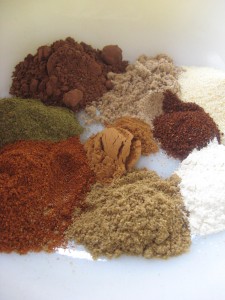
In a large bowl, combine

2 Tbsp dutch process cocoa

1 Tbsp ground coriander (I prefer Penzey’s Moroccan)

2 tsp smoked Spanish paprika

2  tsp ancho chili powder

2 tsp cumin

1 tsp ground cinnamon (again, I use Penzey’s Cassia, for a stronger cinnamon flavor)

2 tsp garlic powder

1 tsp onion powder

1 1/2 tsp dried leaf oregano, crushed between your fingers

1/2 tsp ground black pepper

1 tsp salt

1/2 cup unbleached flour

You will also need:

2 Tbsp butter and 3 Tbsp olive oil

about 2 1/2 lbs stew beef, cut into 1 1/2 inch cubes (don’t trim off all of the fat – it adds flavor!)

1 large onion, finely chopped

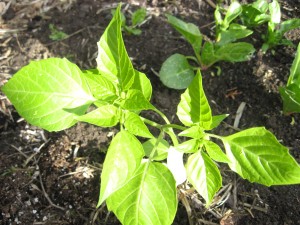
1 large red or yellow bell pepper, finely chopped (optional.  And when we have fresh pimentos from the garden, I use 3 or 4 of those)

2 cloves garlic, minced

1/2 cup good quality red wine

1 can crushed tomatoes (with basil, if you like), or part of a quart of home-canned tomatoes, crushed between your fingers, juice included

1 -2 chipotle peppers (from a can of chipotles in adobo), crushed in a mortar and pestle or minced (with gloves on!) (optional – 1 for some heat, 2 for a lot – these can have quite a kick.   I leave it out when making this for the kids)

1 3/4 cups beef broth (if I don’t have any in the freezer, I will use Penzey’s ham base, according to the directions and mix with 1 3/4 cups water – adds a sweetness and smokiness to the broth)

3 big handfuls spinach, kale, or chard, chopped (whatever is growing fresh in the garden, or half a pack of frozen spinach, if necessary).  If using kale, remove the ribs.  If using chard, remove and chop ribs, and add these to the stew 10 minutes before adding the chopped leaves.

fresh oregano, for garnish (I actually have some in the garden already, thanks to Teacher Linda!)

A pot of  white or brown rice, and a loaf of crusty bread

Directions –

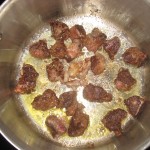
1.  In a large pot/ Dutch oven, heat 1 Tbsp butter and 1 Tbsp olive oil on med heat.  While oils are heating, toss the cubed beef in the bowl of spices, coating thoroughly.
IMG_7195

2. Brown spice-dredged meat in batches, being careful to avoid crowding meat, so that it can caramelize (instead of steaming, which is all it will do in a crowded pan). (There will be excess spice/flour mix in the bottom of the bowl – save this!).    This will take about 4 batches – halfway through, add additional 1 Tbsp olive oil.  Remove all browned beef to a separate plate.

3.  Add remaining Tbsp of butter, reserved flour/spice mix to the pot, stirring until fragrant and browning a bit.  Deglaze pan with 1/2 cup of red wine, and pour this back into the bowl and reserve.

4.  Add remaining Tbsp olive oil to the pan, and cook onions and bell pepper until softened, about 5 min, then add garlic and cook, stirring, for another 2-3 minutes.

5.  Add beef (and any drippings that accumulate on the plate) , wine/flour/spice mix, tomatoes, beef broth and crushed chipotles (optional) to the pot.  Bring to a boil, then reduce to a simmer.  Cover and cook about 2 hours, or until meat is falling-apart tender (the flour will thicken the broth as it cooks, but if it looks like it’s getting too thick, you can add another 1/4 to 1/2 cup broth or water).

6) Add greens, and cook for another 20-30 min.  Garnish with chopped fresh oregano and serve over rice.  Enjoy!
IMG_7198


Baking Day

IMG_7066

Monday is baking day.

IMG_7059

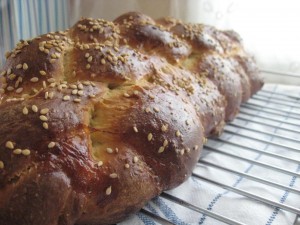
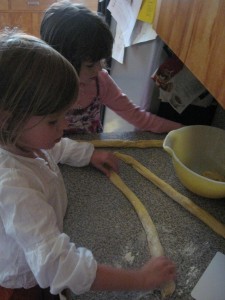
We’re enjoying the Monday tradition of baking homemade bread.  Our favorite “fancy” recipe is Challah – the dough is so kid-friendly, the results wow everybody, and nothing goes better with homemade jam.

It looks like the sun is starting to come out, so I think we’ll go plant some potatoes (along with the usual Yukon Gold and generic redskinned, we’re trying three heirlooms this year – German Butterball, All Blue, and a lovely pink-fleshed Red Thumb).

After some busy gardening, I think we’ll deserve some challah and strawberry-banana jam for afternoon snack.  🙂

Simplifying

IMG_6972

The past month has been an opportunity to re-evaluate what we value as a family – to really examine what we strive to be and to accomplish.  Although unintentional, the blogging break these past several weeks has been very therapeutic for our whole family.  (Actually, it was a break from all computer-related activities).

I realized how much time was being spent every week blogging, and reading other beautiful, but consuming, blogs.  I realized how much more time I spent reading, knitting, sewing, being still and quiet when I tuned out technology.  My stress level went down, and we were all less rushed and more at peace.  Most importantly, I spent so much more time  communicating and interacting with my children in a positive way.

I am going to continue blogging, still for the reason I began – to be an encouragement, and reminder of the value of being a mother, and a keeper of the home and a member of the greater community.  There is priceless value in the small, everyday moments of raising a family.   But, for the next few months, at least, I’ll be scaling back the frequency of  posting and dramatically pruning back the amount of time spent on the computer.

IMG_6975

So, that’s it for this week.  I’m not going to spend the next hour reading other mama’s blogs (as inspirational as they are) while the baby naps – getting neurotic and feeling completely inferior about this humble little blog and our domestic activities compared to what I see elsewhere.

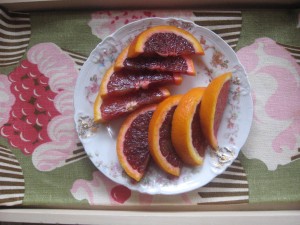
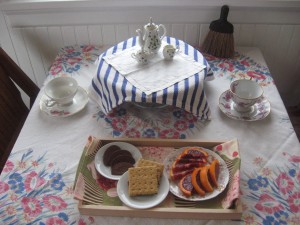
Instead,  I am going to put on some mint tea, and sit down with my girls and enjoy our tea with oranges, Nutella on graham crackers, lively conversation.

Blessings on you as you connect with your loved ones today.

I’ll be back next week.

Dainty Lime Marmalade Recipe

img_5484

I don’t usually make marmalade until the winter, when citrus is in season.  (Although citrus is so refreshing in the heat of summer.)   However, I happened to have an abundance of limes, so what else was there to do but make a batch of Dainty Lime Marmalade ( in the wee hours of the morning, before the house heated up)?

Homemade marmalade couldn’t be easier – it only has three ingredients – limes, water, and sugar.  and It is so refreshing – wonderful on poundcake, over sherbert, or thinned out with a little water and used as a dressing for fruit salad.

Larksong’s Dainty Lime Marmalade

(this recipe makes a double batch – half to cook up now, half to freeze)

img_5463

img_5466

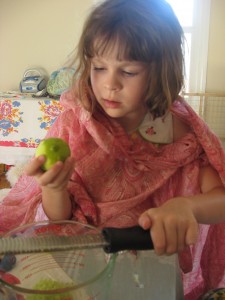
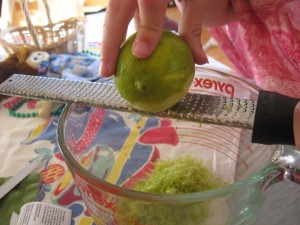
Scrub 20 limes and zest them with a microplane into a large measuring bowl (this marmalade was named by Little Hen – I used to just call it “Lime Marmalade”, but the children and I prefer something more delicate than the traditional, large bitter pieces of citrus rind in the marmalade, so I started making it with a microplane, which produces “dainty” zestings. )

img_5472

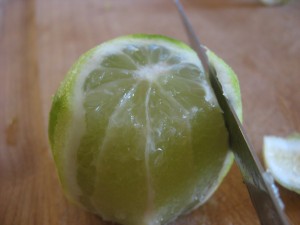
Remove the bitter white peel from the lime.

img_5470

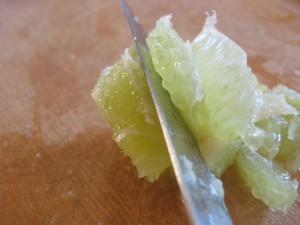
Section out the lime pulp from the tougher membrane.  (Squeeze the juice from the membrane into the measuring cup before discarding it – you’ll get a lot of extra juice this way.)

img_5474

Add the lime sections to the measuring cup and squish them up into smaller pieces (just wash your kids’ hands and let them squish the pieces between their fingers, if you like).  Add enough water to equal 8 cups of total pulp+water and pour into a heavy-bottomed pot.

Bring the lime pulp/zest/water mixture to a boil and reduce to a simmer for ten minutes.  Turn off the heat and let cool thoroughly.

img_5483

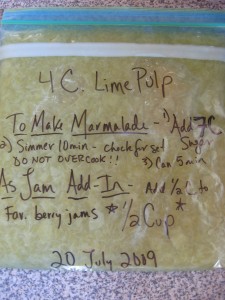
At this point, measure out and freeze half (that’s 4 cups) of the lime-pulp (before adding sugar) that could either be made into a second batch of marmalade down the road, or be used in 1/2 cup amounts in other berry jams.

Now, either let the remaining pulp can sit in the fridge up to 3 days or you can make the marmalade straight away.  When you’re ready to make the marmalade, get all canning equipment ready and going on the stove.

img_5476

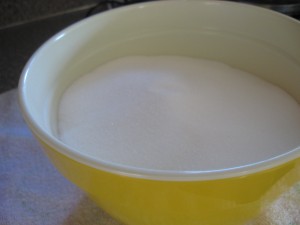
To the pot (which now contains 4 cups of cooked lime pulp), add 7 cups of granulated sugar.  Bring the mixture to a full rolling boil, stirring constantly.  Boil for approximately 20 minutes, or until jam is set (put some on a spoon in a dish, and set it in the fridge for a few minutes, to test the set).  Do not overcook – limes contain a LOT of natural pectin and you will end up tough sheets of pectin in your marmalade if it cooks too long.

Take the marmalade off the heat, and stir once every 30 seconds or so, for about 5 minutes, allowing the marmalade to cook and distribute the zest (this reduces floating zest in the finished product.)

img_5478

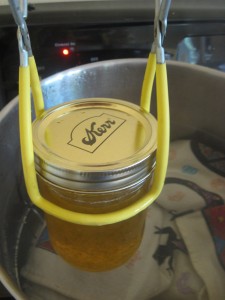
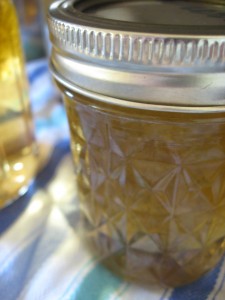
Pour into sterilized jelly jars, add hot lids and rings, and can in your hot water bath canner for 5 min (I like to put a dishtowel in the bottom of mine, to keep jars from clanging around as much).  Remove from bath and allow to cool fully.  The marmalade may be thin, but will continue to thicken over the next few days.

img_5488

Enjoy!

Oh, and check  out Cabbage Tree Farm’s Rangpur lime marmalade, and Christie’s Corner’s Scotch Marmalade.

Mending

img_5220

The mending has been piling up for some time now.  Buttons are missing, hems are coming loose, a few little tears and snags here and there.  Good thing it’s the kind of day where you want to stay inside, doing something quiet.

img_5221

The girls are playing with their PlayMobils on the living room floor, the baby is napping, so I think I’ll put on a little Ladysmith and get to work!