Locally grown

Late May Garden Update Part II
IMG_7489

And here’s the rest of the garden update:

There wasn’t time to get any side-yard shots before the rain started up again, but we now have 64 healthy strawberry plants growing there (many have set fruit already!) and the Christmas limas are germinating there as well.

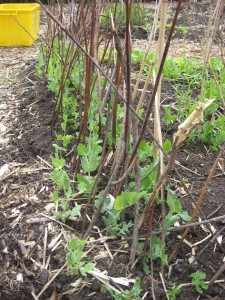
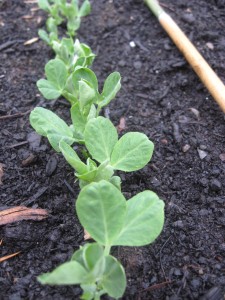
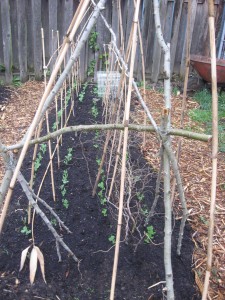
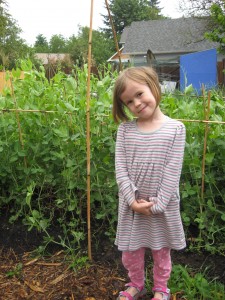
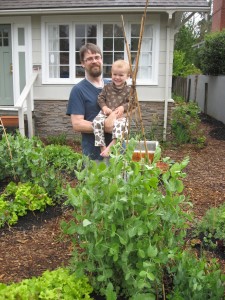
Out in the backyard – the peas (see above) are as tall as Firecracker!  Oregon Sugar Pod IIs, Alaska, Galena, and Alderman Tall Telephone peas are all going strong.  And yesterday Firecracker noticed that they’d begun to flower!  Soon we’ll have sugar snap peas, snow peas and shell peas by the bucketful!
IMG_7493

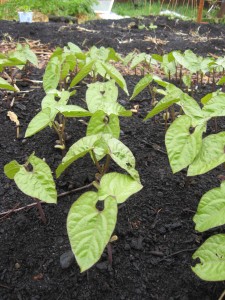
The first planting bush beans are up all over the backyard, and I expect the second planting to germinate later this week (for a longer continuous harvest).  These are Royal Burgundy.  This patch looks good, but unfortunately, most of the bush, runner, and lima beans are all taking a heavy hitting from…
IMG_7502

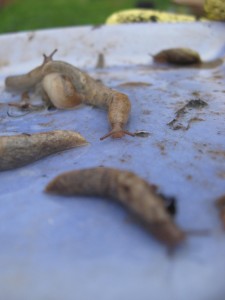
SLUGS!  Despite daily picking (and feeding them to the chickens), the garden is inundated with thousands of slugs.  Most mornings the girls and I pick anywhere between fifty and one-hundred fifty.  Beer traps have only managed to capture a few as well,  so today I finally resorted to buying some organic, “pet friendly” slug bait in order to save the bush beans.  Here’s hoping it works, because there is no way   chickens freely hunt for slugs in the beds without the baby plants being eaten as well.
IMG_7491

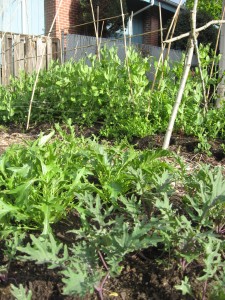
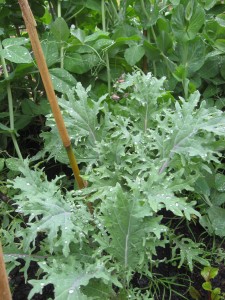
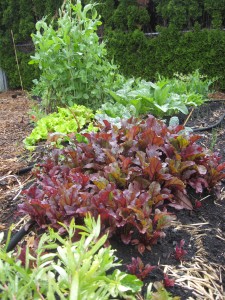
This is one little patch of the Red Russian kale, which we’ve planted all over the yard.  Thankfully, the slugs haven’t bothered it.  It’s our favorite kale – not only is it beautiful and doesn’t easily bolt, it’s full of vitamin K, vitamin C and iron, and has a mild flavor – we put it in everything from fruit smoothies to lentil curry.  A definite superfood bursting with nutrition.
IMG_7495

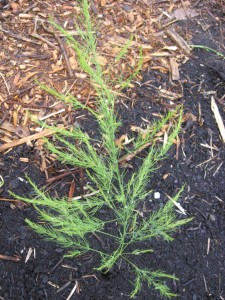
This is one of the 25 asparagus crowns in full frond – only two more years and we’ll have a nice crop of asparagus of the BCS volunteers!
IMG_7507

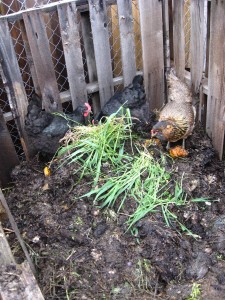
Our compost still isn’t cooking well once again (too wet and soggy, too many kitchen scraps (“greens”) and too little “brown” matter (leaves, dry plant matter, shredded paper).  So, in the drizzle yesterday morning, I got down to the stinky job of turning it and splitting the compost into two separate side-by-side bins, which will get lots of shredded newspaper turned into them this week.   Let’s hope that does the trick.

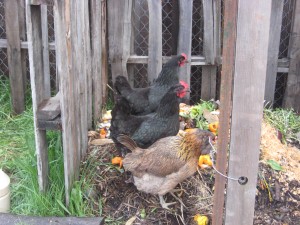
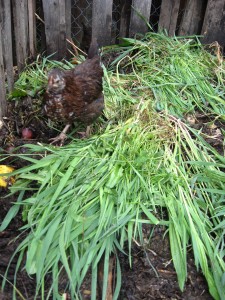
The hens and chicks were THRILLED to have the compost turned and were scratching about while I was working – finding germinating pumpkin seeds and worms and all sorts of  “delicious treats”.
IMG_7506

This is one of the as-of-yet-unnamed Speckled Sussex chicks (or, as Firecracker calls them “teenagers”) scratching in the compost (those three are so fast, it’s tough to get a photo of them!).  You should have seen the chickens happily clucking and scratching and snacking and clucking some more!

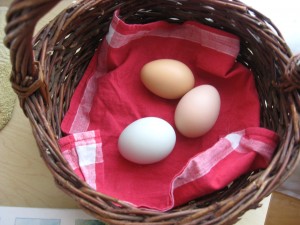
And thankfully, all of the adults are done molting, so those happy hens have started churning out –
IMG_7510

– 3 eggs per day!  Woo-hoo!

And that’s it for the garden at present – thanks for being patient with a long update -  Hopefully, the warm weather will come back soon and the tomatoes, summer squash, tomatillos, cilantro and basil will really get a chance to thrive.

Okay, I promise something other than a gardening post coming up soon (although, I don’t know what that will be, since we haven’t had time for much baking or knitting or reading or cleaning house since every spare moment has been spent gardening or researching gardening and chicken keeping!)

If you’ve got a garden going, or even a few tomatoes in pots on your balcony, the girls and I would love to hear about how things are going for you!
Late May Garden Update Part I

IMG_7484

The garden has really taken off  after a week of hot, sunny weather, followed by lots of rain. (although, the cold nights and wind the past few days haven’t done us any favors).  Volunteers have been able to start taking in a few baskets of organic produce to BCS, mostly radishes, mustard greens, lettuce, chives, tarragon and baby beets, bok choy, and kale.  The teeny harvests thus far just begin to hint at the bounty of the coming months.

IMG_7487

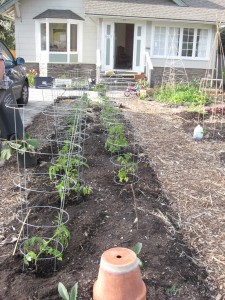
Between slug-picking and weeding and rain showers, we got a few pictures this morning – (above) The boys in the front yard behind Alderman Tall Telephone peas, mesclun mix lettuce, with more lettuce mix and Oregon Sugar Pod II peas in the background.

– the tomatoes are really taking a beating with the cold (40s and 50s) and hail and driving wind this week.  We wrapped about half in plastic (and then ran out of plastic!) but can’t see that it is helping them out much – the hail damage is the worst.   Surprisingly, the tomatillos don’t seem to mind the dreary weather as much and are growing nicely

IMG_7485

Despite a little slug damage, the cardoons we planted back in February are coming along nicely – the largest are nearly two feet across already.  (They were planted closely, because about 20% of the seed stock are infertile – they are smaller and weak and I keep thinning them out.  The hassle of starting them from seed is well worth it – I only used half a pack (@ $2.45/pack), and have 8 strong seedlings, versus paying $7.49 each for large starts from the garden center.)

IMG_7511

The Vulcan Red Chard is doing quite well – just a few more weeks until it will be able to be harvested in any quantity.

IMG_7494

The mustard greens and bok choy bolted in last week’s heat, but the bolted stalks were fed to some very happy chickens  and in the gaps I have planted summer squash (a total of 6 in the front yard, and 19 in the back – a mix of crooknecks, zucchinis, and patti-pans).  I may eventually need to thin them down, but a few are compact varieties, so we’re hoping they won’t get too crowded.

IMG_7513

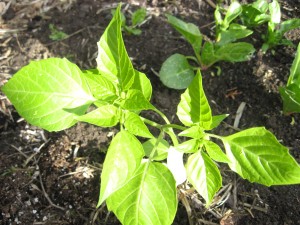
This is a Golden Hubbard seedling, coming up in the bed closest to the street.  Winter squash are such a treasure – beautiful rambling vines all season, tasty blossoms to stuff with ricotta and deep-fry, and finally, vitamin-packed, long-shelf-life squash in an amazing variety of shapes and sizes to eat throughout the winter.  (Since there is limited space, I have only put in my favorite eating squash – Buttercups, Butternuts, Hubbards, Delicata, except along one side-yard, near the house, where the gorgeous – if largely inedible – Rouge Vif D’Etampes has been planted for harvest decorations.)

For everything you could want to know about nearly every variety of winter and summer squash, I highly recommend Amy Goldman’s book, The Compleat Squash.

To keep the neighbors happy, I have planted misc. wildflowers, sunflowers, daisies, and about 50 dahlias in the front beds.  Add to that those dozen winter squash (to trail out of the beds and along the path), bronze fennel and artichokes, and for good measure, a whole jumbo packet of nasturtium!  If that doesn’t make for a pretty (but still mostly edible!) street-side bed, I don’t know what will!

(Eventually, the front bed will be mostly perennial flowers, currants, a dwarf plum, and a low fence with a grape arbor and a gate across the path, but it needed something to make it attractive this year, especially with so many folks in the neighborhood stopping by to ask what in the heck happened to our front yard!)

And with that, I’ll save the backyard and the chicken update for tomorrow!

Early May Garden Update

IMG_7457

Happenings in the garden this week so far:  Mustard greens, lettuce and kale are all getting big!  (Red Russian Kale in the foreground, with Mizuna mustard behind.)

IMG_7455

A volunteer and I got 20 tomatoes planted this afternoon – half in front, half in the back.  (I have room for another dozen or so, but am out of cages and will have to jury-rig some bamboo supports – the cages were donated, and I’m trying do as much free and homemade as possible.)

IMG_7464

I got 7 De Milpa tomatillos (they have beautiful purple fruit) in the ground, and am trying to find room for three more in some sunny corner.  While I planted them, I kept thinking about roasting tomatillos and making purple salsa verde with chips, or chicken enchiladas with tomatillo sauce  – can’t wait!

IMG_7465

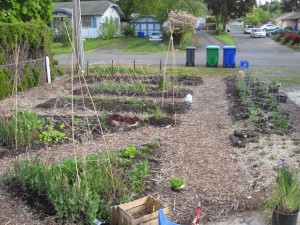
Most of the front yard beds can be seen here (I still don’t have good pictures of all of the backyard, since it’s a mess) – beets and chard and peas are really coming along.  We are harvesting lettuce every day (despite the continuing slug issues).   Pole beans and pumpkins are just beginning to peek up through the soil, and the wildflowers are germinating as well.

IMG_7458

Baby parsnips in the backyard are putting out true leaves.  Only 90 more days or so, and they’ll be ready to eat!

IMG_7461

The summer squash in the backyard cold frame is coming along beautifully – looks like we’ll have lot of starts to give away to any volunteers that want them!

IMG_7463On the right is a new veggie I’ve never tried before (thank you, Patty!) – variegated garden cress.  Can’t wait to get it established and try some in a salad!
IMG_7460

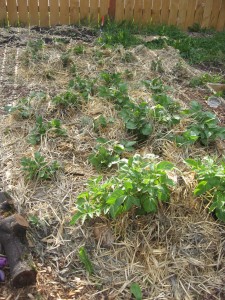
The first of three potato beds out back are really going gang-busters.  I have to mulch them almost every day (cutting tall grass from the yard and quickly using up our last bale of straw).  The second bed planted will soon catch up – the leaves are 6 inches high.  And the third bed potatoes are just barely peeking leaves up through the straw.   Looks like we’ll need to run to the feedstore for another couple of bales soon!

Not pictured – 3 types of mint planted in pots buried around the garden

-bronze fennel starts and lots of chives transplanted around the garden; cilantro and lemon balm starts planted out as well

– bulb fennel, Waltham butternut and Golden Hubbard squash germinating

-  Scarlet Runner and Kentucky Wonder pole and  4 types of bush beans planted in the back, along with Christmas limas on the side yard.

-3 dozen Fordhook Giant leeks were transplanted out  in the front and side yard and another 30-odd Walla Walla Sweet onions in the side and back (wish I had room for more!)

– And many, many flower starts inter-planted amongst the tomatoes.

And -just as importantly- many, many people have stopped by and talked to me this week about our gardening project – I’ve met a half dozen new neighbors, and am connecting more with many others – the garden is building community, not only amongst volunteers, but also in our neighborhood, and that’s really encouraging to me.

As my next-door neighbor said, “It’s starting to actually look like a garden!”

Preparing for the duck invasion

IMG_7442

After a flurry of chicken-planning activity this winter/early spring, we have our long-dreamed for chicken flock (the three hens, plus three new Speckled Sussex chicks, and three more chicks on order (2 Australorps and a Buff Orpington)).  And the chicken run is mostly complete (needs a little gussying up, and a grape trellis up the side).  Now, moving on to the next project, the Baker boys have gone into intense-planning-mode for …

DUCKS!

IMG_7446

The boys are a bit so-so on the chickens, but can’t wait for ducks!  We have room for 3 (and maybe sneak in a 4th?) next year, and all the talk from Daddy is, “Where do we put in a duck box and run? What style?”, and “should we get runners or Khaki Campbells?”   Tum Tum’s contribution is more along the lines of  “Duck goes QUACK QUACK!”, but he loves to look through the stack of duck-keeping books with his dad.

IMG_7447

Did you know that the better duck breeds are more efficient at removing slugs than chickens (a major problem in the NW)?  And lay larger eggs (sometimes more eggs -up to 300 per year for Khaki Campbells) than chickens?  And those eggs that produce more substantial whites, which makes for better meringue, souffles, etc!  And, ducks are darn cute!

So, if all goes as planned, by next year, our little urban farm will be complete when it comes to livestock.  Except, maybe for future additions of meat rabbits…or honeybees…If you could (or do!) have any livestock on your property, what would it be?

Garden update

IMG_7349

Slowly, slowly, things are taking shape in the garden.  Last Saturday, 9 volunteers came to help pot up summer squash, plant potatoes, carrots, parsnips, and continue dig up bamboo for the future raspberry bed.   And earlier, I was able to get 25 donated asparagus crowns planted.

Baby leeks, onions, basil, cilantro, parsley and thyme are all happily growing in their pots, and I put in rosemary, lavender and tarragon plants in the front yard.   I still have to figure out where to put some mint (in pots!) and add several more herbs, but it’s a good start.

More and more the yard is looking less like a disaster zone and more like a garden.   The front yard (stage one) is complete, and over the coming year, we will move on to stage two, adding grape arbors, perennial fruit bushes/vines/trees and herbs and perennial flowers.

Two large swaths of the backyard have become (for the time being) annual veggie beds, with the section sloping downhill designed with swales the catch and conserve water.  Much of the back still requires major work, however,  including finishing the chicken coop (running grapes up the side), building a shed (with trellised plants – hops and roses, most likely), finishing the small “lawn”, building a bread oven, removing the remaining bamboo to plant berry canes, and planting more fruit trees (persimmon, fig, apricot, plum), blueberry and currant bushes and maybe even some cranberries.

One side yard is 90% complete, but the other is barely begun (where the shady natives garden will grow thimbleberries, huckleberries, Oregon grape, etc).  But there has been so much progress, and we are going to be able to produce an amazing amount of food for BCS this year, I am sure.

IMG_7353

I’ve given away twenty or so, but the remaining 50-plus tomato-lets and little tomatillos are outgrowing their pots, anxious for the frost-free weather, so they can go in the ground, and out of my living room at night.

IMG_7350

The tulips are fading, but the peas are slowly reaching up and grabbing their supports (and the Tall Telephone peas in the backyard are twice as tall as these Oregon Sugar Pod II‘s).

IMG_7354

IMG_7355

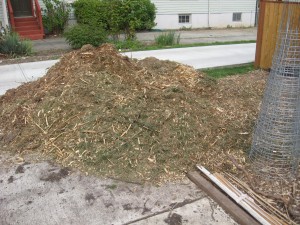
A third load of mulch, and 20-odd tomato cages were delivered (we still need 15 or so more).

IMG_7352

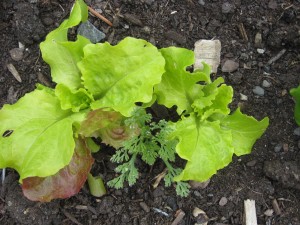
Baby poppies are taking hold between the lettuces and mustard greens.

IMG_7351

IMG_7359

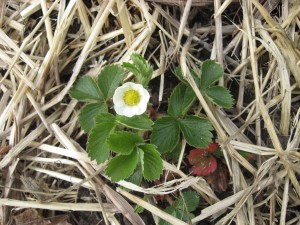
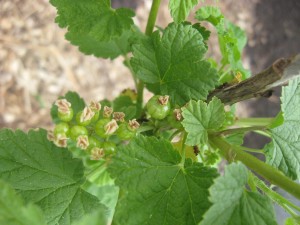
And most exciting to the children – the first signs that there will be fruit this summer (Quinalt strawberries in flower, as are the other varieties and our early blueberries, and our red currant has set fruit already.)

What plans/hopes/dreams do you have for your garden this year?  If you’re in Portland, we’re always willing to help out with garden work,  just let us know (many hands make light work)!

A little comparison

IMG_7281

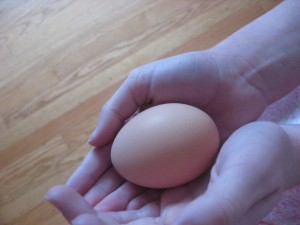
On the upper left, a “cage-free organic” egg from the grocery store.  On the lower right, an egg from Plucky, one of our hens.  (I’d hate to add in a factory farmed egg – it couldn’t hold a candle.)

Now, which one do you think is the way a chicken egg is supposed to look?  Which one is shown to be more nutritious?

We love our three hens and can’t wait to add three more, so all of our eggs can be real food – just as beautiful and healthy as the one above.

Garden Snapshot

IMG_7254

A few quick pictures Firecracker and I took in the garden yesterday afternoon:

IMG_7262

The chickens having a grand time in the compost bin.

IMG_7251

All sorts of things are germinating – peas, peas and more peas, chard, kale, mustard greens, beets, lettuce, poppies, sweet peas, calendula, artichokes, chives, parsley and basil.

IMG_7260

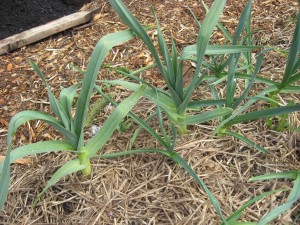
The garlic and shallots we planted last October are really taking off!

IMG_7265

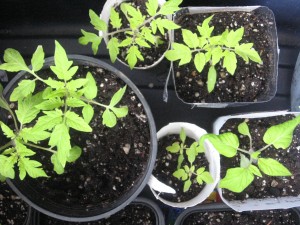
And, of course, our 75-odd tomatillo and tomato-lets are getting big – here (clockwise from far L) are “Black Krim, “Yellow Pear”, “Costoluto”, “Brandywine” and some little “Sweet 100” cherry toms that got a late start.

Today we’ll be planting “Hollow Crown” parnips and “Nantes” and “Cosmic Purple” carrots, and more basil, as well as starting cilantro in the cold frame.  Despite the chilly rain the past few days, it’s really feeling like spring as the garden comes to life.

Fresh Eggs

IMG_7242

We got chickens!!

After months of scouring Craigslist, pricing materials at the ReBuilding Center and researching plans (not to mention years of wishing, dreaming)… we finally found a used coop that met our super tight budget. (A coat of pretty paint, and the sturdy coop will look quite nice in the back corner of our yard.)   And a completely unexpected bonus- the large (6 nest boxes) coop came with enough fencing and fence posts for a very large run.

An even bigger bonus – the coop came with 3 organically-fed, heritage breed, 9 month-old hens – 2 Australorps (two big glossy-green/black girls that lay brown-eggs) and an Auracana (a rusty, stripey hen with big tufts of feathers on the sides of her head that lays blue-green eggs).

We can’t wait to expand out little flock, and I can’t wait to write some more about the beginning of our chicken-keeping adventure.   But, that’s all for now- yardwork calls.   After having friends and neighbors help us move the weighty coop into place yesterday, we need to get out and put the fencing up today, so Sarah, Plucky and Nudge can roam their patch of the yard safely (and also keep the tender baby veggies safe from them!).

More soon…

Seedlings

IMG_7211
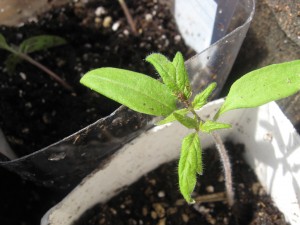
Yesterday afternoon, with my son on my back, the girls and I potted up the first of our tomato seedlings – all 51 of them.  (The one above is a “Black Krim”, a favorite of ours for salads.)  Another 26 little tomato-lets (started a week later) will be potted up this weekend, time allowing.
IMG_7209
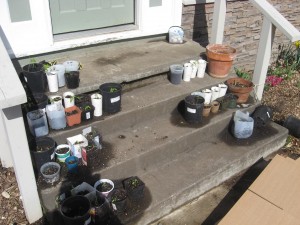
(Above: Our eclectic collection of potted-up tomatoes – in sour cream and tapioca containers, large paper cups, milk jugs, juice bottles, hand-me-down pots.)
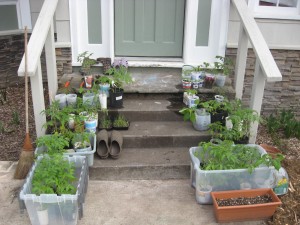
It felt wonderful to spend the afternoon in the warm sunshine, kneeling with my children on the front steps, tenderly moving each little seedling from a starting tray into its own pot.   It felt wonderful to be growing food with my children, and I am grateful for the many, many days  of gardening with them that are spread out in front of us.
One of the most important resources that a garden makes available for use, is the gardener’s own body. A garden gives the body the dignity of working in its own support. It is a way of rejoining the human race. – Wendell Berry

Real Food

IMG_7214

Today we finished Michael Pollan‘s In Defense of Food.   The girls and I listened to it on unabridged book CD over the course of several afternoons of making dinner.  I had really enjoyed The Omnivore’s Dilemma and The Botany of Desire, but somehow missed this one until now.

Much of what he writes really melds with our family’s thoughts on what we eat, how we eat, and where our food comes from, and we found the book affirming and encouraging.

In honor of Pollan’s call to simply “eat food”, instead of “food-like substances”, here’s the food we made for tonight’s dinner while listening to the final chapters of the book:

sliced mangoes and oranges

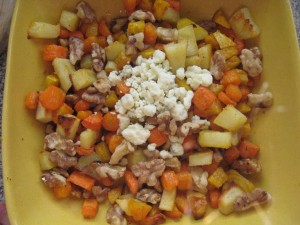
roasted carrots, golden beets and potatoes tossed with toasted walnuts and bleu cheese (above)

Cabernet-braised beef with dried apricots

brown rice

mint tea

whole-wheat oatmeal-marionberry bars

Pollan quotes Wendell Berry throughout the book, greatly esteeming Berry’s writings on humanity’s relationship to food, agriculture and nature.  (By the way, thanks to Pollan – and even more so to Kortney at One Deep Drawer – I’ve got a whole stack of Berry’s writings on order from the library). Particularly moving for me was Pollan adoption of Berry’s words as a sort of grace at the beginning of the dinner meal: 

Eating with the fullest pleasure – pleasure, that is, that does not depend on ignorance – is perhaps the profoundest enactment of our connection with the world. In this pleasure we experience our dependence and our gratitude, for we are living in a mystery, from creatures we did not make and powers we cannot comprehend.

Spiced Cocoa Beef Stew

IMG_7192

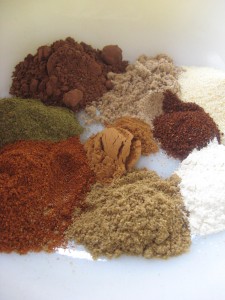
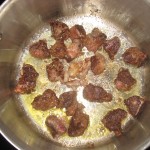
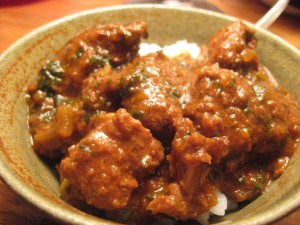
The girls and I made a special beef stew for  my birthday yesterday.  They especially enjoyed blending the spices at the beginning…and later standing by the stove, inhaling the amazing aroma of spice-dredged beef browning in butter (oh, and eating three big bowls of hot stew at dinner, too!).

We don’t eat much meat, but this is a nourishing, comforting meal that is worth the effort.  A little bit after lunch, we put on some bluegrass music, started a pot of hot tea and got cooking.  Once the dish gets going, this stew can simmer through the afternoon with no need of my assistance, so it’s a great choice for a day when we’re going to be home and want to work in the garden or read all afternoon right up to dinner time.   (I just remember to put the rice cooker on and add the greens to the stew about half an hour before we want to eat.)

This recipe is inspired by a beef-cooked-in-chocolate-and-mild-chilis dish that I had at a friend’s house years ago – I liked the flavor combination of the beef with the cocoa, oregano, and smokiness of the ancho chili powder.   It took me a few tries to come up with this version – just a basic beef stew with the typical tomatoes and wine to tenderize the meat, and spices we like in a typical combination – I end up changing it a little every time I make it – continuing to improve it, I hope.

Larksong’s Cocoa Braised Beef

Ingredients:

In a large bowl, combine

2 Tbsp dutch process cocoa

1 Tbsp ground coriander (I prefer Penzey’s Moroccan)

2 tsp smoked Spanish paprika

2  tsp ancho chili powder

2 tsp cumin

1 tsp ground cinnamon (again, I use Penzey’s Cassia, for a stronger cinnamon flavor)

2 tsp garlic powder

1 tsp onion powder

1 1/2 tsp dried leaf oregano, crushed between your fingers

1/2 tsp ground black pepper

1 tsp salt

1/2 cup unbleached flour

You will also need:

2 Tbsp butter and 3 Tbsp olive oil

about 2 1/2 lbs stew beef, cut into 1 1/2 inch cubes (don’t trim off all of the fat – it adds flavor!)

1 large onion, finely chopped

1 large red or yellow bell pepper, finely chopped (optional.  And when we have fresh pimentos from the garden, I use 3 or 4 of those)

2 cloves garlic, minced

1/2 cup good quality red wine

1 can crushed tomatoes (with basil, if you like), or part of a quart of home-canned tomatoes, crushed between your fingers, juice included

1 -2 chipotle peppers (from a can of chipotles in adobo), crushed in a mortar and pestle or minced (with gloves on!) (optional – 1 for some heat, 2 for a lot – these can have quite a kick.   I leave it out when making this for the kids)

1 3/4 cups beef broth (if I don’t have any in the freezer, I will use Penzey’s ham base, according to the directions and mix with 1 3/4 cups water – adds a sweetness and smokiness to the broth)

3 big handfuls spinach, kale, or chard, chopped (whatever is growing fresh in the garden, or half a pack of frozen spinach, if necessary).  If using kale, remove the ribs.  If using chard, remove and chop ribs, and add these to the stew 10 minutes before adding the chopped leaves.

fresh oregano, for garnish (I actually have some in the garden already, thanks to Teacher Linda!)

A pot of  white or brown rice, and a loaf of crusty bread

Directions –

1.  In a large pot/ Dutch oven, heat 1 Tbsp butter and 1 Tbsp olive oil on med heat.  While oils are heating, toss the cubed beef in the bowl of spices, coating thoroughly.

IMG_7195

2. Brown spice-dredged meat in batches, being careful to avoid crowding meat, so that it can caramelize (instead of steaming, which is all it will do in a crowded pan). (There will be excess spice/flour mix in the bottom of the bowl – save this!).    This will take about 4 batches – halfway through, add additional 1 Tbsp olive oil.  Remove all browned beef to a separate plate.

3.  Add remaining Tbsp of butter, reserved flour/spice mix to the pot, stirring until fragrant and browning a bit.  Deglaze pan with 1/2 cup of red wine, and pour this back into the bowl and reserve.

4.  Add remaining Tbsp olive oil to the pan, and cook onions and bell pepper until softened, about 5 min, then add garlic and cook, stirring, for another 2-3 minutes.

5.  Add beef (and any drippings that accumulate on the plate) , wine/flour/spice mix, tomatoes, beef broth and crushed chipotles (optional) to the pot.  Bring to a boil, then reduce to a simmer.  Cover and cook about 2 hours, or until meat is falling-apart tender (the flour will thicken the broth as it cooks, but if it looks like it’s getting too thick, you can add another 1/4 to 1/2 cup broth or water).

6) Add greens, and cook for another 20-30 min.  Garnish with chopped fresh oregano and serve over rice.  Enjoy!

IMG_7198


Got our wellies on!

IMG_7127

Seems like we’ve been living in our wellies this week as we spent most of our time planting in the garden.  This week we’ve started:

IMG_7080

IMG_7085

IMG_7075

Peas, round two, this time in the front yard – Little Marvel, Tall Telephone, and Oregon Sugar Pod II.

IMG_7156

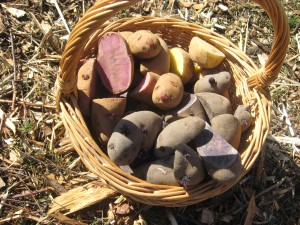
Potatoes, in three beds in the backyard, near the larger coldframe – German Butterball, All Blue, and a rare heirloom, Red Thumb, an oblong potato with thin red skin and rosey pink flesh.

Leafy and misc. Veggies – Fordhook , Magenta Lights, and Bright Lights Swiss Chard; Russian Red, Dwarf White, and Nero Tuscana Kale, chives, an heirloom lettuce blend, mustard greens, and a brave early attempt at carrots.

Sprinkled around the edges of the beds we seeded calendula and mixed-color California poppies.  At the ends of the pea rows, we put in Wedding Blush tall sweet peas.

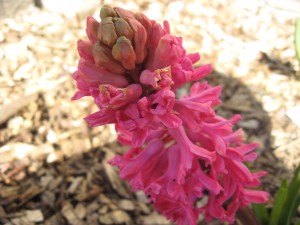
IMG_7158(Hyacinth picture by Firecracker)
When I got too tired to do any more yardwork, and the kids were tired of scooter and bike riding around the driveway, we sat on the front steps (smelling the fragrant hyacinths that have just begun to open), and potted up some seeds:

Tomato and tomatillo – third round of tomato planting, so all of these are repeats – Green Zebra, red and yellow Brandywine, Persimmon,  Black Krim, Yellow Pear, Sweet  Million, Tigerella, Cherokee Purple, Crnkovic  Yugoslav (from Seed Savers), Marvel Striped tomatoes, and Purple de Milpa tomatillos.

Other veggies – we started Musselborough Leeks and a second round of globe artichokes (Tum Tum the Destroyer did in my first pot of 7).

What veggies are you starting in your garden?  What are you most looking forward to starting?


Tomato seeds

IMG_7072

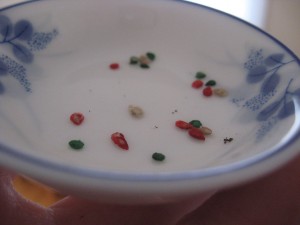
You know what they say – “Good things comes in small packages.”  I think tomato seeds are just about the best small package around -they contain the promise of wonderful meals to come.

IMG_7068

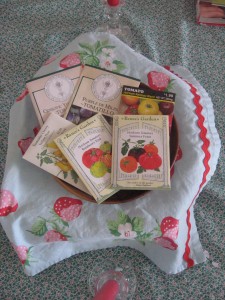
I know our garden is going to be growing food for more than our nuclear family, and therefore we’ll be starting more tomato plants than the average garden.  However, we want to grow a wide variety, and I could never use up all of the seeds from the dozen or so types of tomatoes we’ll be growing if I purchased a separate packet of each type.  Thank goodness for mix packs that contain 3 or 4 varieties to a pack – each dyed a different color, so you can still tell what seed will produce what tomato.

My favorite salad tomatoes – Black Krim and Green Zebra…I can’t wait for August!

What are you favorite tomato varieties?

IMG_7074

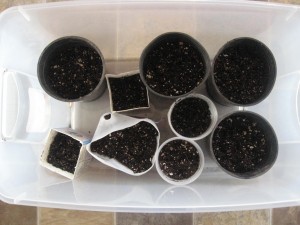
(One of the two tubs with tomato and tomatillo pots – each with 4-6 seeds.  I can’t help but peek at them over and over, hoping to see someone germinating.  Patience, patience!)

Cranberry-Pear Pie

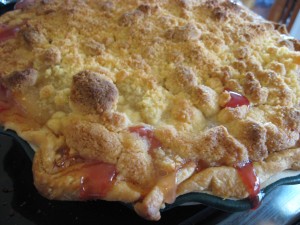
IMG_6751

It’s no secret that pie is our dessert of choice here at the Baker house.  At the holidays I try to bake a pie at least a 3 or 4 times a week, rotating between nut and custard and fruit pies.  And, in my opinion, at the holidays, no fruit pie is complete without the fruit of the season – cranberries.

I love the layer of complexity (and nutrition) that cranberries add to a fruit pie – especially how their tartness marries with the sweet flavor of barlett pears.  I made this pie for Thanksgiving and twice since (we’ve even had it for breakfast, and I’m sneaking a late-night slice at this very moment).  The girls love it served warm, with whipped cream on top.

When adding cranberries straight to a pie, the result is uneven (who likes a large, sour, unexpected bite of whole cranberry?) and often runny (due to the moisture cranberries release while cooking).    This recipe remedies those issues and makes a really special holiday pie.

Larksong’s Cranberry-Pear Pie

IMG_6741

Ingredients for a 10 inch-deep dish pie:

For the cranberry layer:

12 ounces fresh cranberries (one bag), picked through and washed

zest of one orange

1/2 cup light brown sugar

2 -3 tbsp unsalted butter

For the rest of the pie:

2 pints home-canned sliced pears, syrup drained off, and tossed with 2 Tbsp tapioca starch and 4 Tbsp granulated sugar

one pie crust (I prefer a lard crust), well chilled (I usually make a half dozen at once, freeze them, and just take them down to the fridge the night before I want to make a pie)

approx 2 cups butter streusel (also freezes well) or second pie crust

Directions:

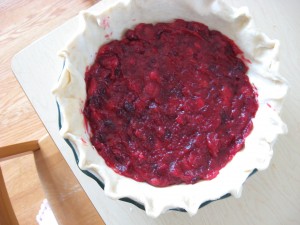
1.  Preheat oven to 425 F.  In a medium skillet on medium heat, combine 2 Tbsp butter and brown sugar, stirring until sugar dissolves.  Add the cranberries and orange zest, and cook, stirring occasionally until cranberries have popped and cooked down (if it begins to stick, add additional Tbsp butter).  Remove from heat and let mixture cool slightly.

2.  While cranberries are cooking, roll out pastry.  When cranberries have cooled slightly, spread them evenly across the bottom of the pie crust (see below.)

IMG_6748

3.  Layer the pear/tapioca/sugar mixture over the cranberry layer.  Add streusel over the pears, pressing down slightly to prevent streusel from rolling off the top (the pie should be mounded up quite a bit, but will sink down some as it cooks.).  If you choose to use  a second crust, roll out the pastry, and add it to the top, decorating as you desire.

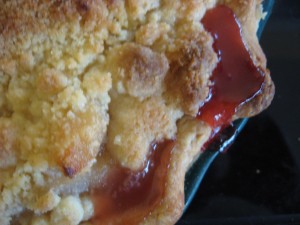
4.  Cover with foil and place in preheated oven (I use a pie moat underneath, since it may bubble over some).  Bake for 30 minutes, then remove foil and bake an additional 15-25 minutes, or until pie is bubbly and golden brown (being careful not to overbrown the streusel).

IMG_6759

5.  Let cool for a bit, and enjoy with whipped cream or ice cream (and a glass of mulled wine).

If you have a favorite rustic holiday dessert you’ve written about, I would love to share the link here.  Thanks!

Cider Pressing

img_6460

img_6469

img_6492

Some pictures from the cider pressing party last weekend.  It was also my husband’s birthday – I’m so glad he had a great time! (We all did!)

img_6475

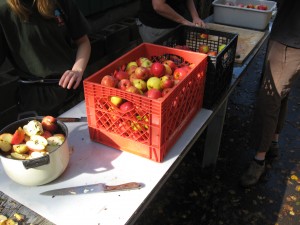
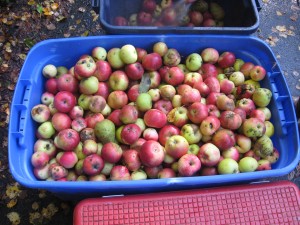
Most folks brought apples from their own trees and also gleaned many from abandoned orchards along country roads.

img_6476

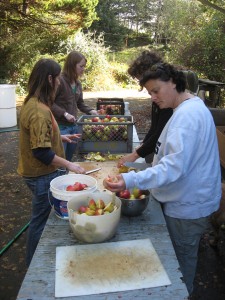
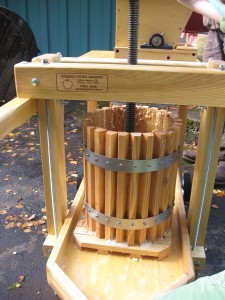
Apples were washed, wormy parts and bruises removed, and then cut in half or quarters to fit into the grinder.

img_6477

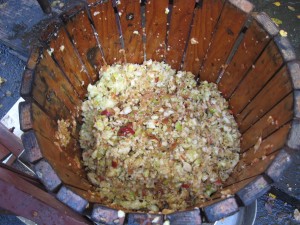
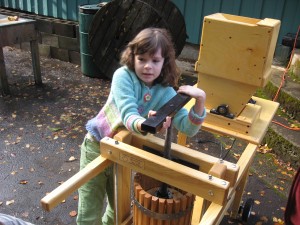
Ground apples in one of the two presses on site.

img_6458img_6457

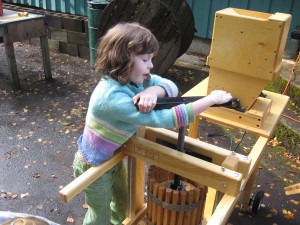
Little Hen was strong enough to crank the smaller press. (The electric grinder is the wooden box behind her on the back end of the press – SO much quicker than the hand-grinding we did in the past!)

img_6461

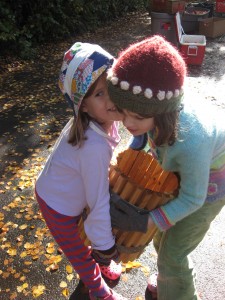
The girls carrying the pressings to the wheelbarrow (they’re heavy!).  The pressings will eventually to be buried back in the orchard, although while we were there, the deer kept snacking on them.

img_6493

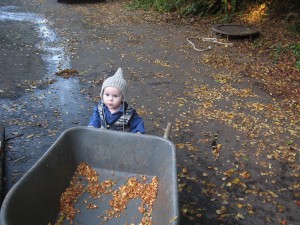
Tum Tum liked to hang out by the wheelbarrow.

img_6473

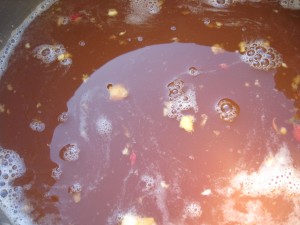
Pressed cider, waiting to be strained through cheesecloth and bottled.

img_6480

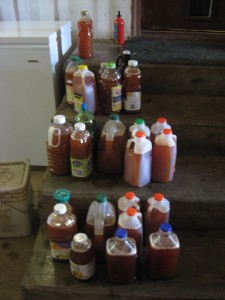
A small fraction of the finished cider – most folks froze theirs, but I canned mine, since our freezer is pretty well full.

img_6487

img_6482

The girls even got a chance to ride the zip line (thank you, Jody!!), which they have been talking about nonstop since. ( I’ve been informed by Firecracker that I need to plant some really fast growing trees, so that we, too, can have a zip line in our yard. )

img_6497

Thank you for a wonderful time, Teacher Linda!

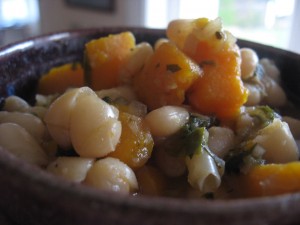
Cannelini and Butternut Stew

img_65291

I’m feeling so much better – and very grateful that none of the rest of the family became ill.   In an effort to get back into the kitchen and make something nourishing and comforting, Firecracker and I started with something easy but wholesome and cooked up a big pot of  bean stew.  Here’s my recipe –

Larksong’s Cannelini Bean and Butternut Squash Stew

2 cups (approx 1 lb) dried cannelini or lima beans

6 cups of water

1 large onion, finely diced

2 ribs of celery, finely diced

2 cloves garlic, minced

1 medium butternut squash, peeled, seeded, and cut into 3/4 inch cubes

large handful of kale or spinach, chopped

6 cups veggie or chicken stock

salt and pepper to taste

Directions -  1.  Approx. 1 – 2 hours before you want to begin the stew, quick soak the beans in the 6 cups of water.

2.  In a large pot on med heat, sautee the onions and celery in olive oil or butter until translucent and caramelizing slightly.  Add the garlic and cook 5 more min.   Add the squash, increase the heat to med-high, and cook, stirring every few minutes, until the onion  and squash are nice and caramelized on the outside.

3). Drain and rinse the beans, and add them to the pot, cover with the stock, cover the pot and allow to simmer until beans are nearly fully cooked, being careful not to stir too often (so as not to break up the squash too much) (approx 1 hr).  Add the kale, salt and pepper, and let simmer 10 min more.  Serve with a loaf of rustic bread – I like rye.

Enjoy!

Paper crafting – freestyle

img_6341

The past month has left me feeling stretched pretty thin because of obligations and responsibilities to my family and others.     Tackling domestic duties and  “home schooling” the girls while my non-stop motion toddler “explores” the house into a distaster zone has also been a challenge.  Crafting has been particularly tricky – Tum Tum either attempt to eat or destroy anything the girls are working on – and he’s especially good at climbing up on the kitchen table and flinging art supplies across the room in a lightning flash.

img_6340

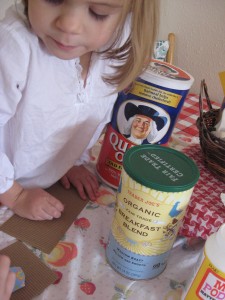
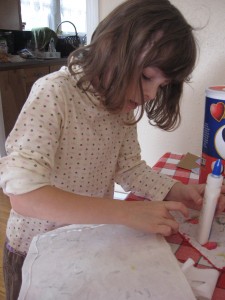
This day, he took a nice long nap after lunch, so as soon as he was sleeping,  I quickly whisked out some craft supplies for the girls to do a little fall paper crafting.  We didn’t have anything in mind  – I put out some supplies with a vaguely autumnal theme and let the girls’ creativity lead them.

img_6342

img_6343

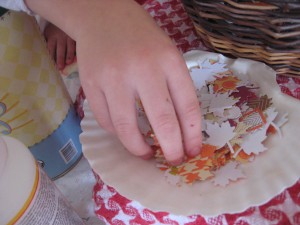
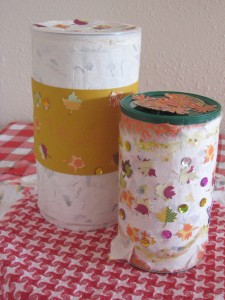
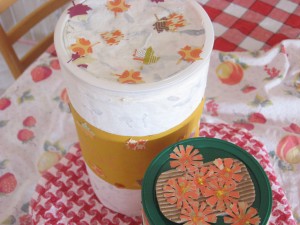
We had a huge pad of fall-colored  scrap book paper (on clearance for $3 this past summer at Michaels),  paper scraps, some oatmeal and coffee tins, glitter glue, sequins, etc, chrysanthemum and maple leaf punches (I am addicted to the Martha Stewart craft punches – whenever they have one of those 50% off the sale price ” coupons and the Martha Stewart items are on sale, I snatch one up.).  After punching out some maple leaves for them, I went into the kitchen to make brownies, and let the girls explore on their own.

img_6345

img_6348

img_6349

I love what they came up with – Little Hen’s (left) is a “treasure box” (it’s hard to see in this shot, but she wrote “treasures” on it) and Firecracker’s is a bank for “collecting coins for Heifer”.

img_6344

img_6346

We saved the last canister for Tum Tum, who was happy to turn it into a drum after he woke from his nap.  🙂

Note : I hope to get back to some more regular posting by the end of the week.  Life has been a bit overscheduled I just haven’t found the time to sit down at the computer much the past few weeks.  We have some family birthdays, out of town company, and a trip coming up, so I hope to squeeze in some blogging late at night!!

Perry, Sauce, and Butter

img_6224

Final count from the Barlett harvest:

20 – 1/2 pints of Caramel-Spice Pear Butter (sorry, secret recipe!)

18 quarts of pears in light syrup (some spiced, some with lavender, some vanilla)

12 quarts of pear sauce (which we all discovered we prefer to applesauce – it has a wonderful buttery quality)

oodles of pear crisp and pear upsidedown-gingerbread cake

about 40 lbs eaten fresh

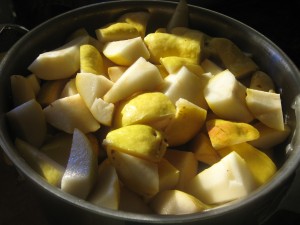
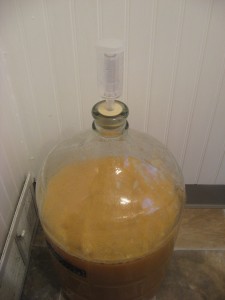
and 4 1/2 gallons of pear cider, for our first ever attempt at perry.  (Although, there’s quite a bit of sediment, so I’m sure it will yield much less after racking once or twice…or three times, we’ll see how it goes.)

img_6233

After far too many hours on my feet, late at night and very early in the morning, processing all of the pears, it feels wonderful to be done.  We all look forward to enjoying the fruits of our labors throughout the fall and winter.

Thanks for being patient while I took a few days off – the whole family was down for about 5 days with a fever/chest cold and that plus putting up the pears (after all, they don’t care if we’re sick and the timing is inconvenient for us, they ripen when they are ready!) and some other obligations left me feeling spread pretty thin.

Today is rainy and gray and the girls are still feeling under the weather.  I’m hoping to get the house cleaned, since it’s been terribly neglected for a week.  After that, I promised Little Hen we’d work on spinning with a drop spindle, and maybe read a little together.

I hope you have a restful and recuperative weekend, too.

Bartlett Harvest

img_6138

Saturday,  I was blessed with the opportunity to ride with another family of volunteers out to Mosier, OR (in the beautiful Columbia Gorge) to glean pears for Birch Community Services.   The weather was very rainy, windy, and chilly, so I was grateful that the children could all stay home, snuggled up reading their latest chapter book with Daddy.

img_6144

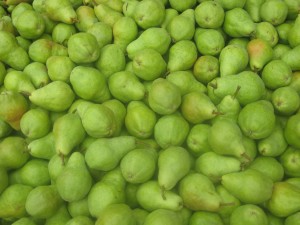
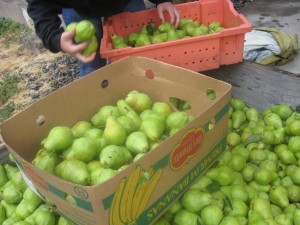
The five of us wore large canvas pear-picking bags, and picked 40-50 lbs of Bartletts off of the trees at a time and then unloaded them into large crates.  Due to the windy, rainy conditions, I didn’t get any pictures of the actual picking, but here you can see a fraction of what we picked.  The owner’s of the orchard estimated that we picked close to 2200 lbs of pears!!

img_6139

You may ask, why were thousands of pounds of beautiful pears sitting unpicked, unwanted on the trees?   Well, the owners explained to me that there isn’t any profit in Bartletts – they cost $120/crate to grow,  but can only get $180/crate on the market – so by the time they pay workers to pick them, and absorb the cost of transporting them, they actually lose money on the Barletts.

The farmer makes his living growing Bosc pears for market.  So, why grow Barletts at all, then??  Bosc pears command a much higher price than Barletts, but the trees are not self-fertile, and require another pear variety for pollination.  So, for every 4 rows of Bosc pear trees planted in the orchard, the farmer must plant a whole row of Barletts in order to reap a crop.  The Barletts are generously left available for the gleaners.

img_6148

After picking over 8000 pears to donate to BCS, we were allowed to harvest for ourselves as many pears as we could put up  – so I have over 150 lbs of pears sitting on my kitchen floor to ripen over the next week!  I’ll be dehydrating and canning pears and pear butter non-stop late in the week and over the next weekend.   Bring some jars and you’re welcome to join me and take home canned pears for your family, too!   I’d love to have your company!

For more on the culture and history of gleaning, check out my favorite (and oh-so-French!) documentary – Les Glaneurs et la Glaneuse (The Gleaners and I).

Totes

img_6085

img_6087

Now, my sewing skills are pretty basic, (nothing like the beautiful sewing at Pleasantview Schoolhouse), but this week I tried my hand at making some farmer’s market totes. (A few more tote tutorials can also be found here, but I like how the pattern I used has the lining fabric peeking up above the edge of the bag).

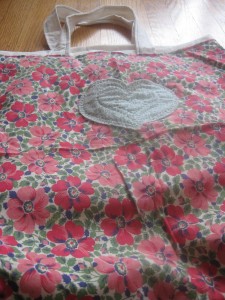
The first tote is made out of some vintage (1950’s?) fabric from the thrift store, with plain muslin lining and blue contrast stitching.  For the pocket on the front, I used a little heart I had been holding on to since I hand-quilted it at Girl Scout craft camp two decades ago.

img_6089

img_6088

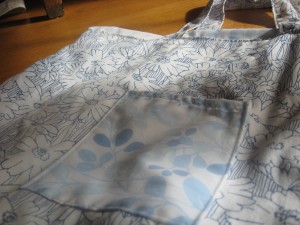
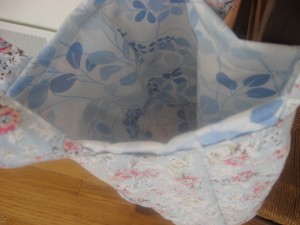
The other two totes are made from old sheets (two thrifted, and one Little Prince toddler-bed sheet with worn out elastic. ).  They are very soft, and I like the blue-on-blue in both.  The girls have already claimed the Little Prince one as a sleep-over bag for visits to Grandma’s or Auntie’s.

img_6079

I also had enough fabric leftover from a quilt I made the other day to make a little (10″ x 12″) out of the scraps.

img_6080

The outside material is from a skirt I cut up, and the inside and pocket are made out of the same sheet material that lines the other two blue totes.

img_6092

I think making totes is pretty addictive, and several folks will be receiving some for Christmas (yay for the Handmade Pledge!!).  The girls picked out fabric for their own totes at the Knittn’ Kitten, and I also have fabric for two more large farmer’s market-sized cut up and waiting to be sewn together.   Hopefully, I’ll get to sew them up when the baby is napping later today.

Wishing you a thrifty, productive week!

Pink and Blue Quilt

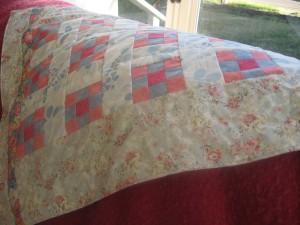
img_6066

The other night I stayed up ridiculously late finishing a little scrap quilt, and I really paid for it the next day! Of course, the children decided to wake up almost two hours earlier than normal the next morning!  I needed two cups of coffee just to be able to make toast and eggs for breakfast!

img_6038

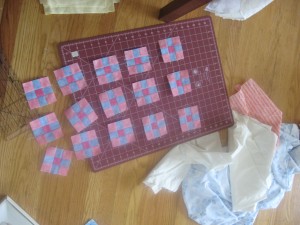
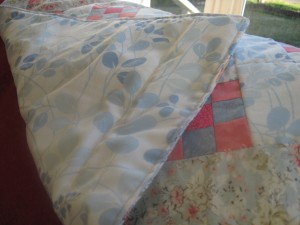
The quilt is based around a little stack of 15 pink, blue and raspberry colored blocks that came to us in a large bag of fabric scraps.  At first, I put the blocks in the bottom of my fabric drawer, because my initial reaction was that they were super ugly (circa 1992?).

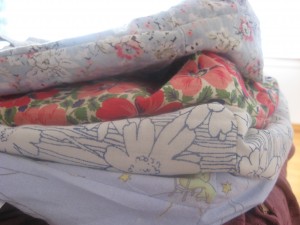
I went through my fabric stash, and found a strip of equally ugly early 90’s fabric, a vintage sheet with a large rip in it, and an old summer skirt of mine, (back when I used to wear skirts above the knee!) that all sort-of coordinated.  Soon, a little quilt began to take shape.

img_6069

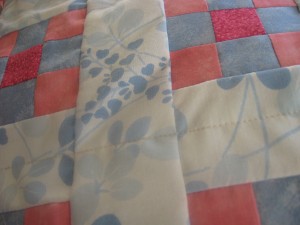
The sheet was cut into strips for the middle of the quilt (to join the blocks).

img_6068

The skirt became the sashing around the outside of the quilt, with that strip of extremely-floral fabric tucked in, too.

img_6067

The batting is two layers of a pale-blue flannel sheet that had become quite worn and was in my rag bag.  And more of the torn vintage sheet fabric was used for the back.

Overall, I’m pretty pleased with it, even if it’s not my kind of color-scheme.  It was a frugal use of some blocks that might otherwise have sat in my fabric stash for years, and I was able to repurpose all sorts of fabric odds and ends.  Of course, my super girly-girls love the pink on baby-blue look, so even if it isn’t my cup of tea, it made some folks happy.  🙂

Have you been able to utilize or repurpose a craft supply that someone else has cast off?  I’d love to see what you and your kids have created!

Peaches, Preserved

img_5634

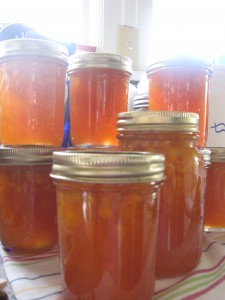
Peach-Brandy Jam = 18 -  1/2 pints

img_5635

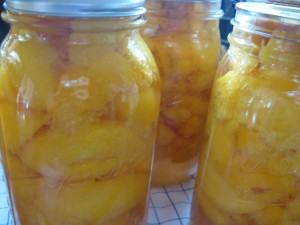
Peaches in Light Syrup = 12 Quarts

img_60131

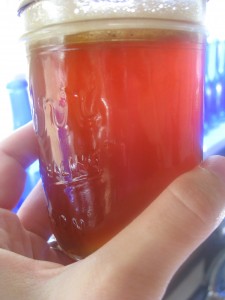
Peach Honey (a delicious, thrifty, vegan honey substitute) = 6 1/2 pints

img_6021

Peach Honey Butter on Applesauce cake (with peach jam between the layers.) – 1 stick unsalted butter, 6 tbsp peach honey (or regular honey) , beaten together in the Kitchenaid Mixer with a whisk attachment until combined and fluffy.

The best thing about home-preserved peaches, in my opinion, is opening a jar in the middle of winter and tasting a sunny summer day.

These ladies are taking preserving the harvest to a whole new level – Dana, Beth, Rural Mamma, and Amanda.

Marionberry Liqueur

img_6004

We like to make an assortment of flavored liqueurs to enjoy on cold winter evenings (and to give as gifts).  The list includes apricot or peach brandy, lemoncello, elderflower cordial, raspberry cordial (alcoholic, and non-), and cherry brandy (which makes a very special soaked-fruitcake at Christmas).

I started making apricot vodka about 15 years ago (back in high school!) for my grandfather, but my current method was inspired by an article I saw 4 or 5 years ago in Backwoods Home Magazine (our library used to carry it – it’s a very…interesting magazine full of back-to-the-land and survivalist- type articles).

img_6002

This year, I added Marionberry Liqueur to the list, since the farmer’s market had some really beautiful looking marionberries.  The process would work for most any fruit – I make cherry and peach brandy in a similar manner.

Here’s my recipe  – which takes 5 weeks, but involves little effort-

Larksong’s Marionberry Liqueur

5 quart mason jars, lids and rims, washed with very hot soapy water, and sterilized (in dishwasher or boiled for 15 min.)

2 cups well-crushed berries (3-4 cups whole, measurement doesn’t have to be exact – if using stone fruit, wash and pit, but do not skin)

1 bottle inexpensive brandy or vodka (I personally like brandy for cherries, peaches, marionberries, and vodka for raspberries, citrus, apricots, pears)

white or brown sugar (I prefer brown sugar for peach brandy)

Directions –

img_6008

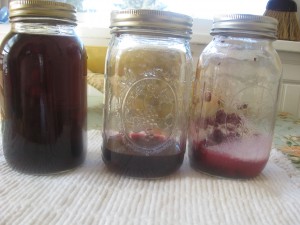
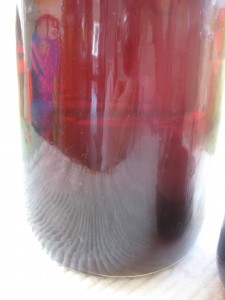
Week 1 – To one mason jar, add crushed fruit and 3 cups of alcohol.  Put lid and screw band on and invert several times.  Then, leave in a dark place (like a kitchen cupboard).  After a week, the alcohol will take on the beautiful color and much of the flavor of the fruit.

Week 2- Decant the alcohol carefully into the 2nd jar, close it, label this jar #1 and  set aside.   Sprinkle the berries that remain in the first jar with about 1/2 cup sugar.  Put the lid and screw band on, and invert several times.  Put both containers back in the dark for 1 week.  (The sugar will draw excess alcohol out of the fruit, along with LOTS of fruit flavor.)

img_6009

Week 3 – Decant the alcohol from the berries again (you will have between 1/2 and 3/4 cup – see middle jar above), this time, label the jar #2, and set aside.  Once again, sprinkle the berries that remain with sugar (just enough to coat the fruit this time).  Put the jars up for another week.

Week 4 – Repeat the process of week 3.

Week 5 – Carefully decant the last bit of liquid (don’t pitch the fruit! – the remaining fruit is wonderful over ice cream, or can be used in a loaf of quick bread.  If you used peach slices or apricot halves, they can be packed in jars with half a vanilla bean or a cinnamon stick, covered with simple syrup, and kept in the fridge until later – serve with a slice of poundcake).

Now, take a little spoonful of each container and taste them.  Notice that Jar #1 is all alcohol, not very sweet, and as you progress through the jars, they will be more sugary, less alcoholic.  How sweet do you want the liqueur to be?  This is purely up to you – I always add all of jars 1 and 2 together, I add some of jar 3 and 4 little by little until I get the desired sweetness.  Any leftover alcoholic-fruit-syrup is enjoyed over ice cream (sometimes there’s as much as 1/2 cup left, and it’s very sugary).

Strain the liqueur through several layers of cheesecloth or a very clean flour-sack towel, put into small bottles, cork, label, and store in a dark place (so as not to fade the rich color).  Enjoy as a digestif or a bit drizzled into hot tea.  Use within 6 months.

Have you blogged about a favorite traditional homemade preserved food?  If so, please share the link with me, and I’ll add it to this post – I’d love to learn what other folks enjoy making.  Thanks!

Books to buy, books to borrow

img_5917

img_5915

img_5912

We made another trip to our favorite local bookstore, Powell’s.   It’s on the way home from church, and so very hard to pass it by without stopping in.  Every visit I am tempted to spend a ridiculous amount of money on crafting, cooking, and kids’ books.  And I could hide out in the Orange Room for hours and hours if my children didn’t keep dragging me back to the kid corner…

In the end, I exercised some self-control, and left with only this hilarious kid’s book, which will be a gift for Firecracker’s birthday in October.  (But, I also left with a long mental list of things to order from the library – you know, those books you’d like to read once, but are not ready to commit to purchasing.)

img_5920

img_5921

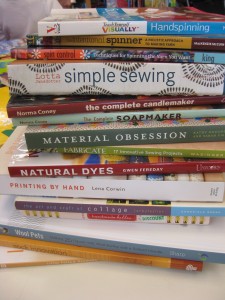
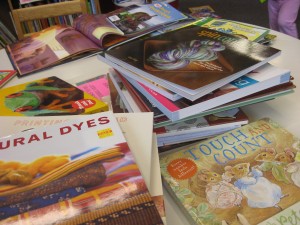
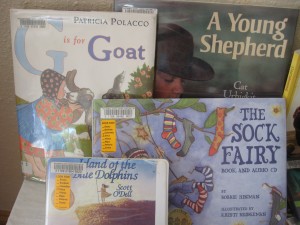
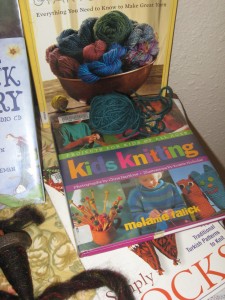
Here are some of the books we’ve been reading this week for homeschool, as well.  Little Hen, who loves to finger knit, is learning how to knit on two needles and spin on a drop spindle, so we’ve ordered a big stack of knitting and spinning books (although the librarian was skeptical when I tried to check out knitting books on my home-educator library card.  I guess they didn’t look like “homeschooling books” to her).   The book on Turkish sock knitting led to an internet search of Turkish culture, and we ordered several children’s books and cultural books on Turkey that will hopefully come soon.  (Isn’t that one of the wonderful things about homeschooling?  How you’re free to chase your interests wherever the trail leads?)

We must have had fiber-art on the brain, because many of our other choices had to do with socks, knitting, sheep, fiber.  Only our new book CD – Island of the Blue Dolphins – seems out of place, although we’ve been listening to it during our quiet-time in the afternoons, while the girls finger-knit or sew with me during the baby’s nap. (Speaking of great kid’s fiber art, Quince and Quire has a neat kid’s wet-felting post)

Some other mamas with stacks of books  – 5 Orange Potatoes, Charming the Birds from the Trees, Red Dirt Mother, and Starry Sky Ranch.  There are always great reads on the bookshelves of Mom in Madison, and  SouleMama,  .  And don’t forget to check out the very talented Mamaroots, and her lovingly hand-crafted wooden playsets with literary themes.